This project started a few weeks back when I was out looking for a new bed frame. The frame I currently have was purchased from – you guessed it – IKEA maybe 10 years ago now. It’s never really been a good bed, but it’s done its job. It’s not the best quality, creeks and groans, feels flimsy, and ya, is an IKEA bed. So, off to the furniture store I went. I took a lunch hour and went over to my local Ashley store. I saw all kinds of bed frames, some cheap and some expensive. The quality I was looking for was of course the most expensive. It had to be solid wood (no MDF or particle board), had to bolt together (no hooks, dowels, or whatever IKEA does), and it had to look modern. Ashley had one model that met my criteria. Here it is:
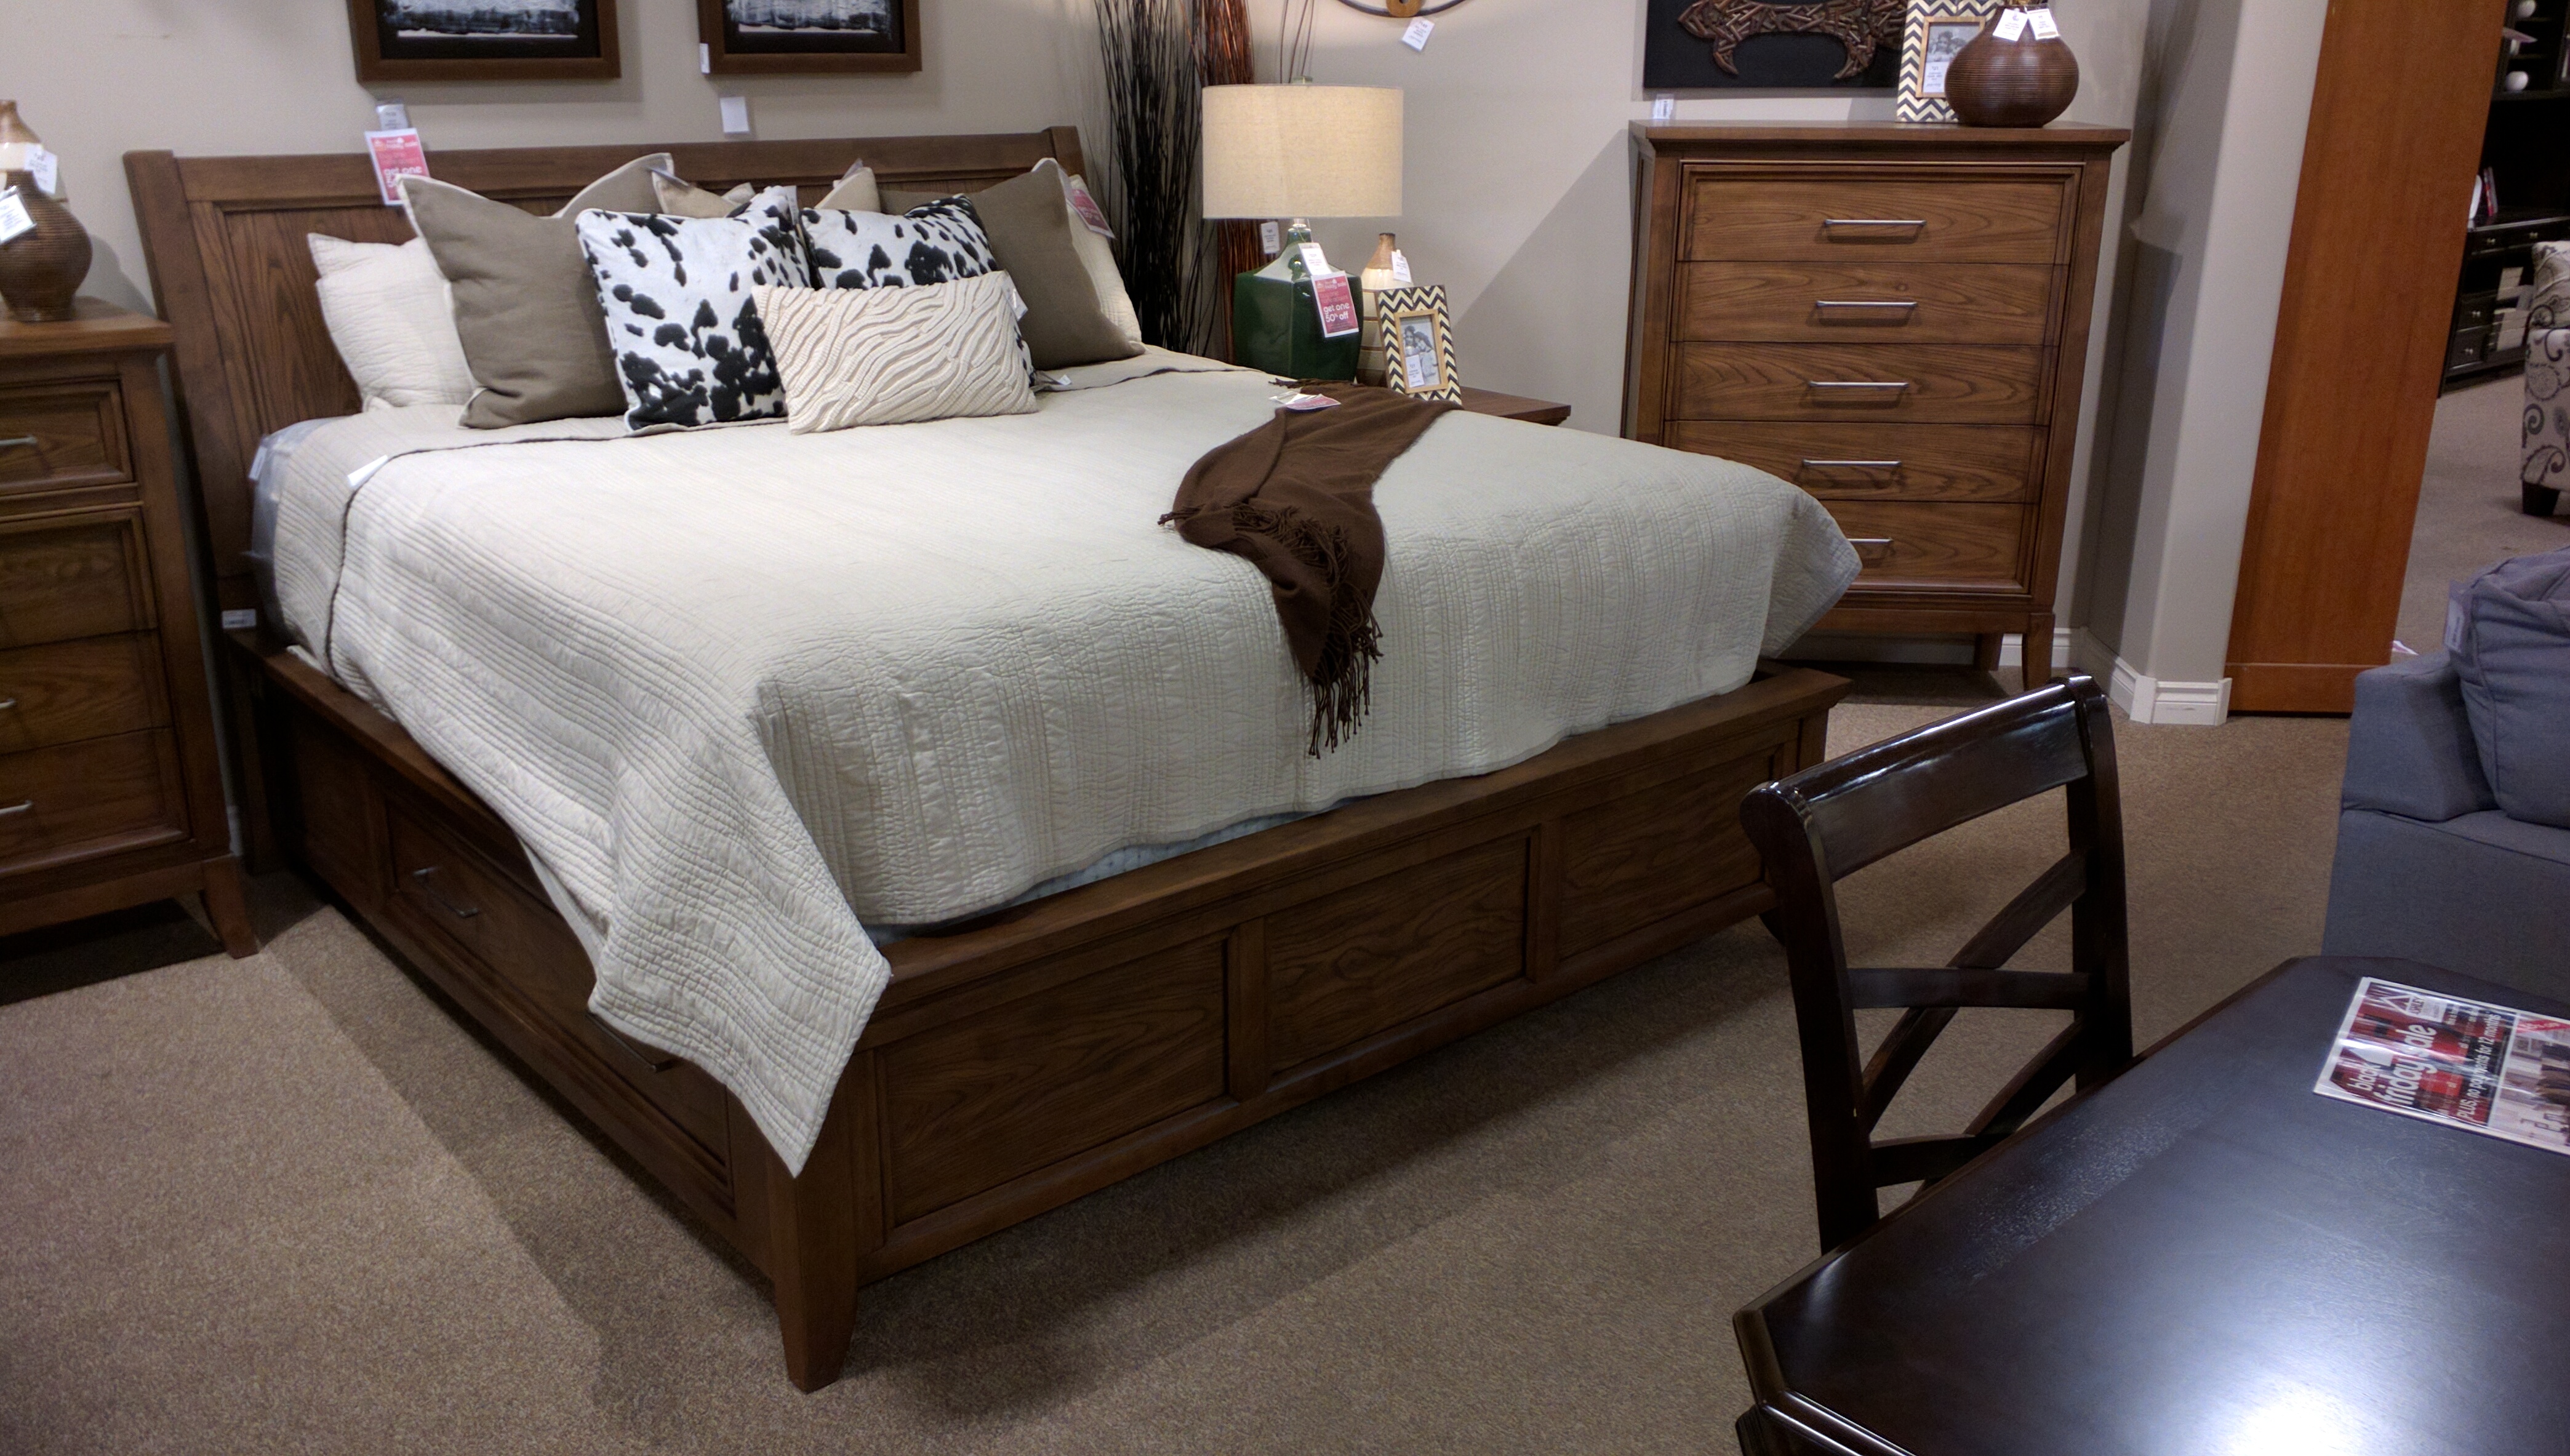
Nice right? Guess how much… $1,800. Crazy!
Needless to say I did not purchase this model. Instead I went back to work and (worked hard obviously) thought about other options. One option I was interested in exploring was making my own bed. How hard could it be right? After a fair bit of Googling I landed on this “how to guide” on LifeBuzz.
http://www.lifebuzz.com/floating-bed
I liked it because it had a how-to-guide, it was modern, and looked fairly straight forward to put together. The guy even had a list of parts. So, theoretically all I had to do was get the lumber store to cut everything to my specs and then I screw it together. The guide called for California Red Wood for the visible parts and then a cheaper Pine for the inners. I was settled. This is what I wanted to make, so off to the lumber store I went. This turned out to be a bad idea. More on that later.
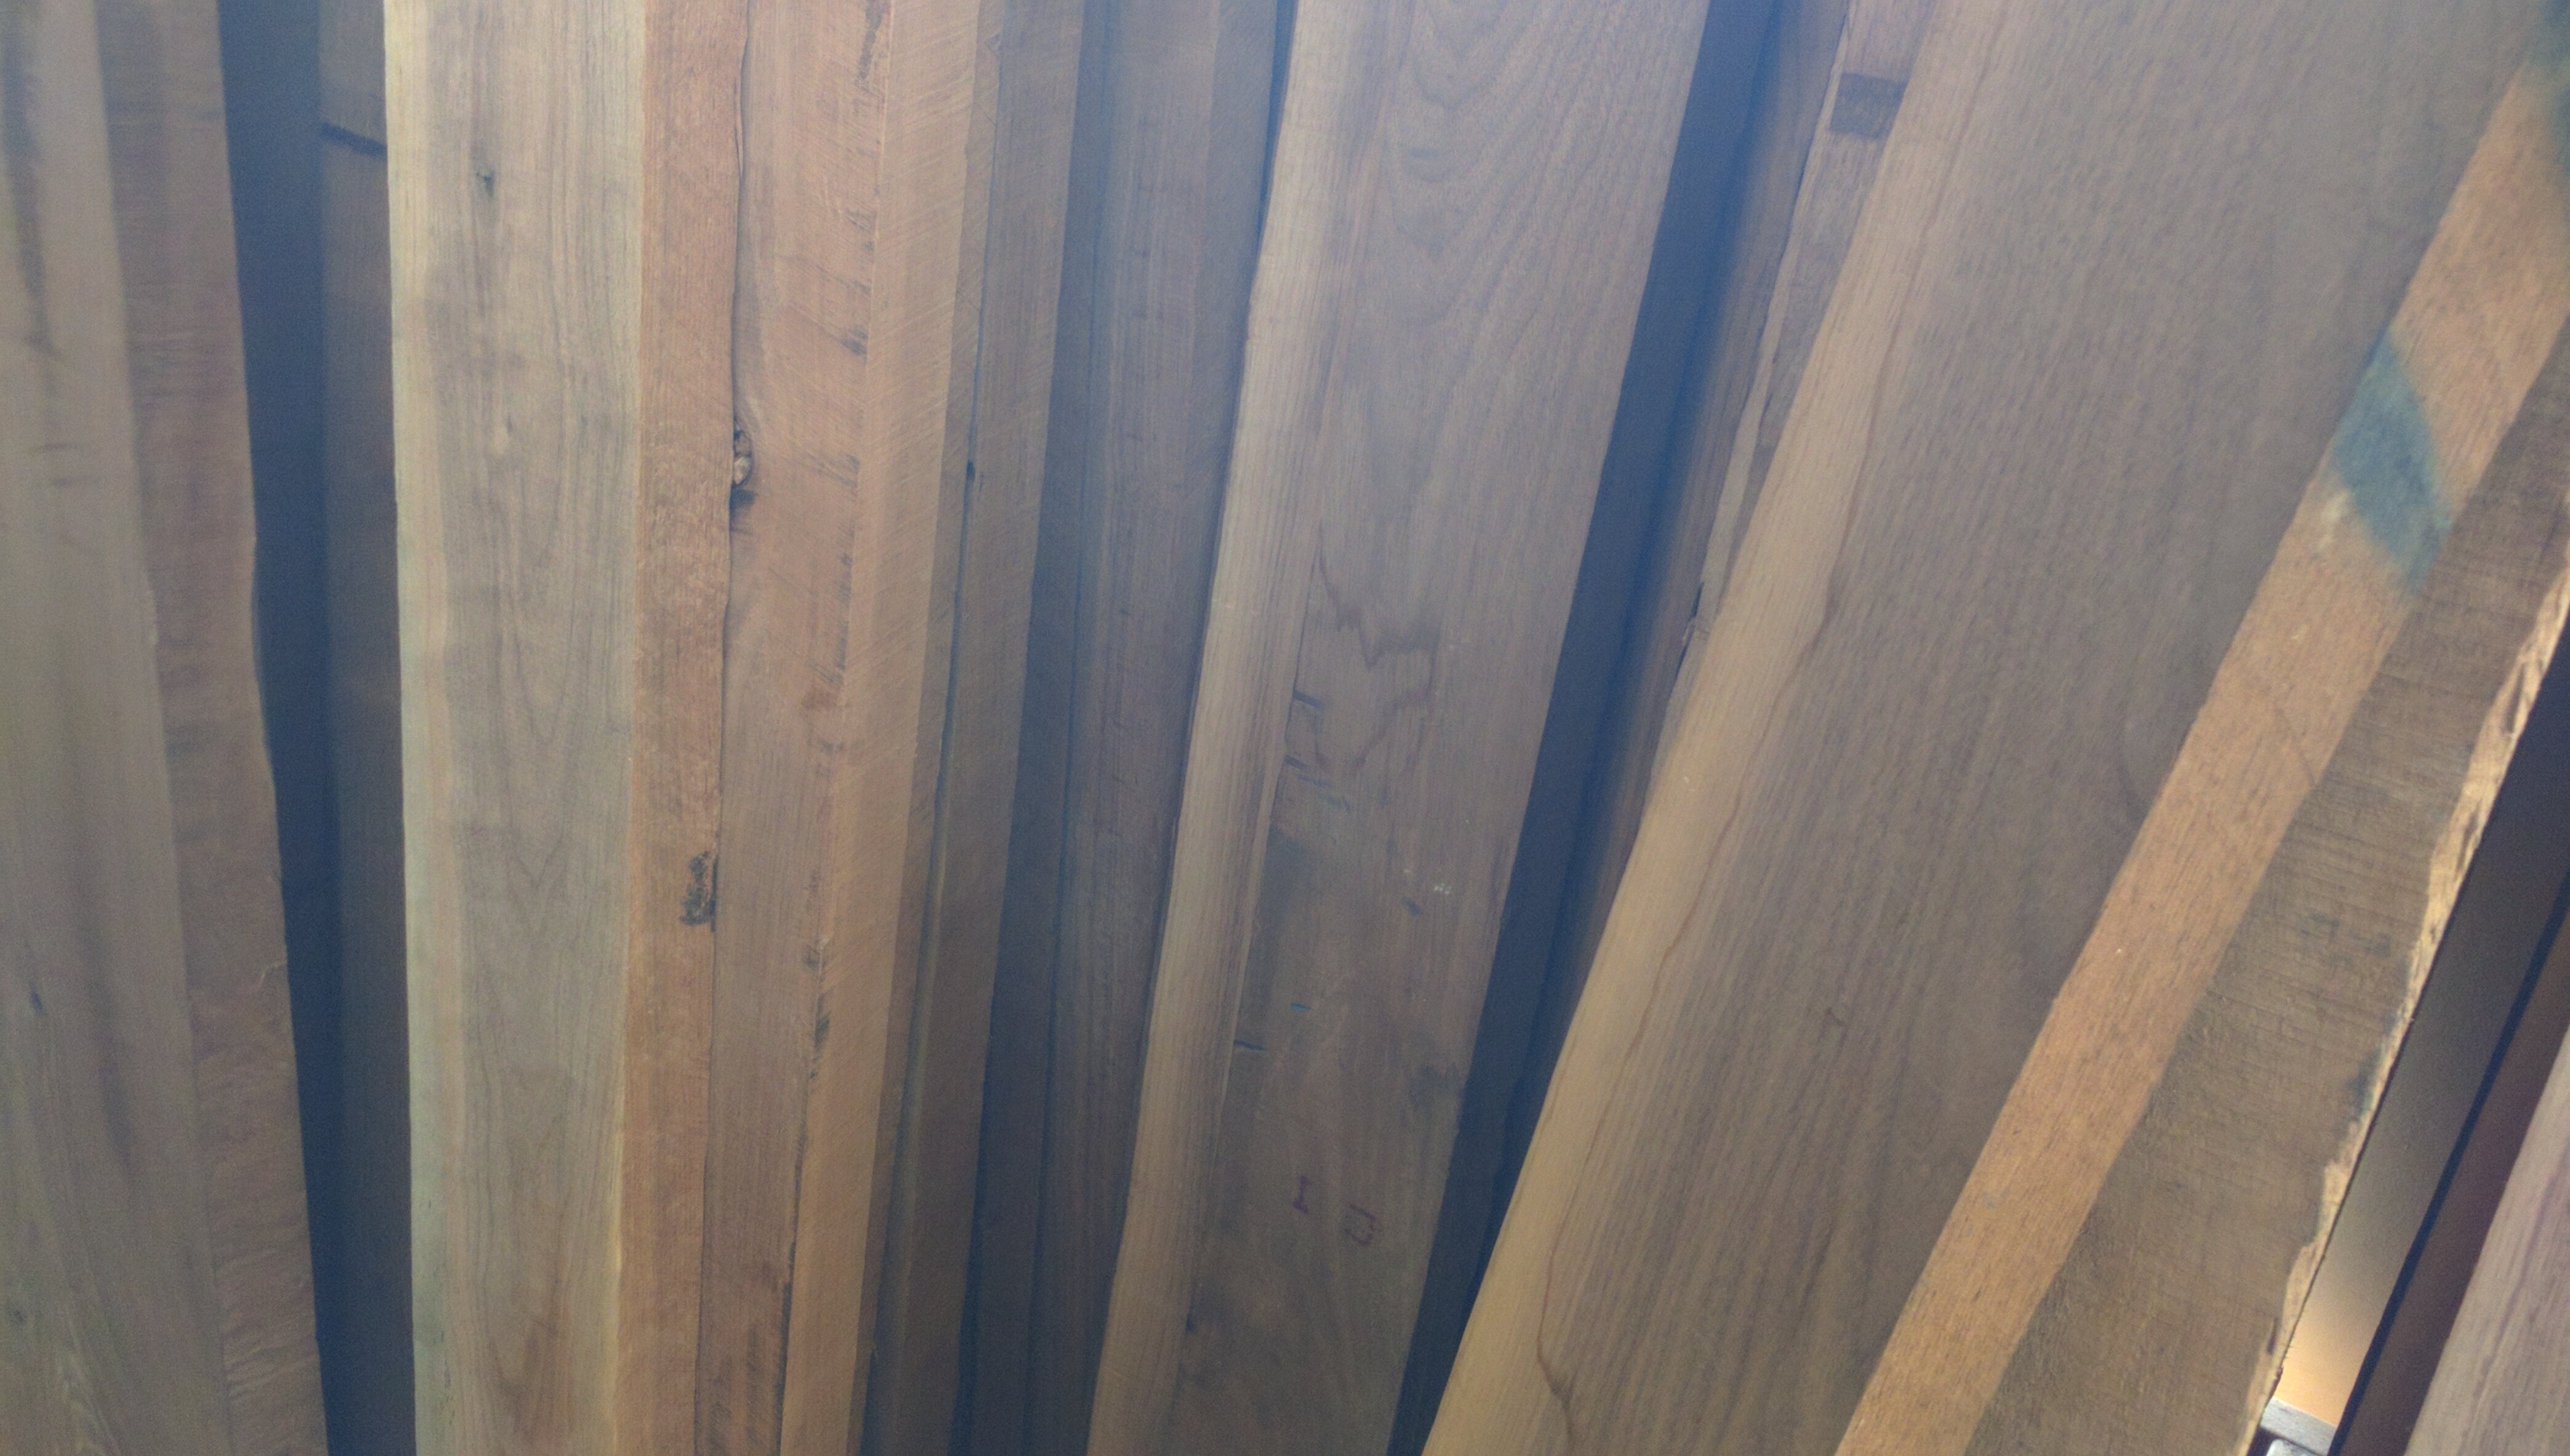
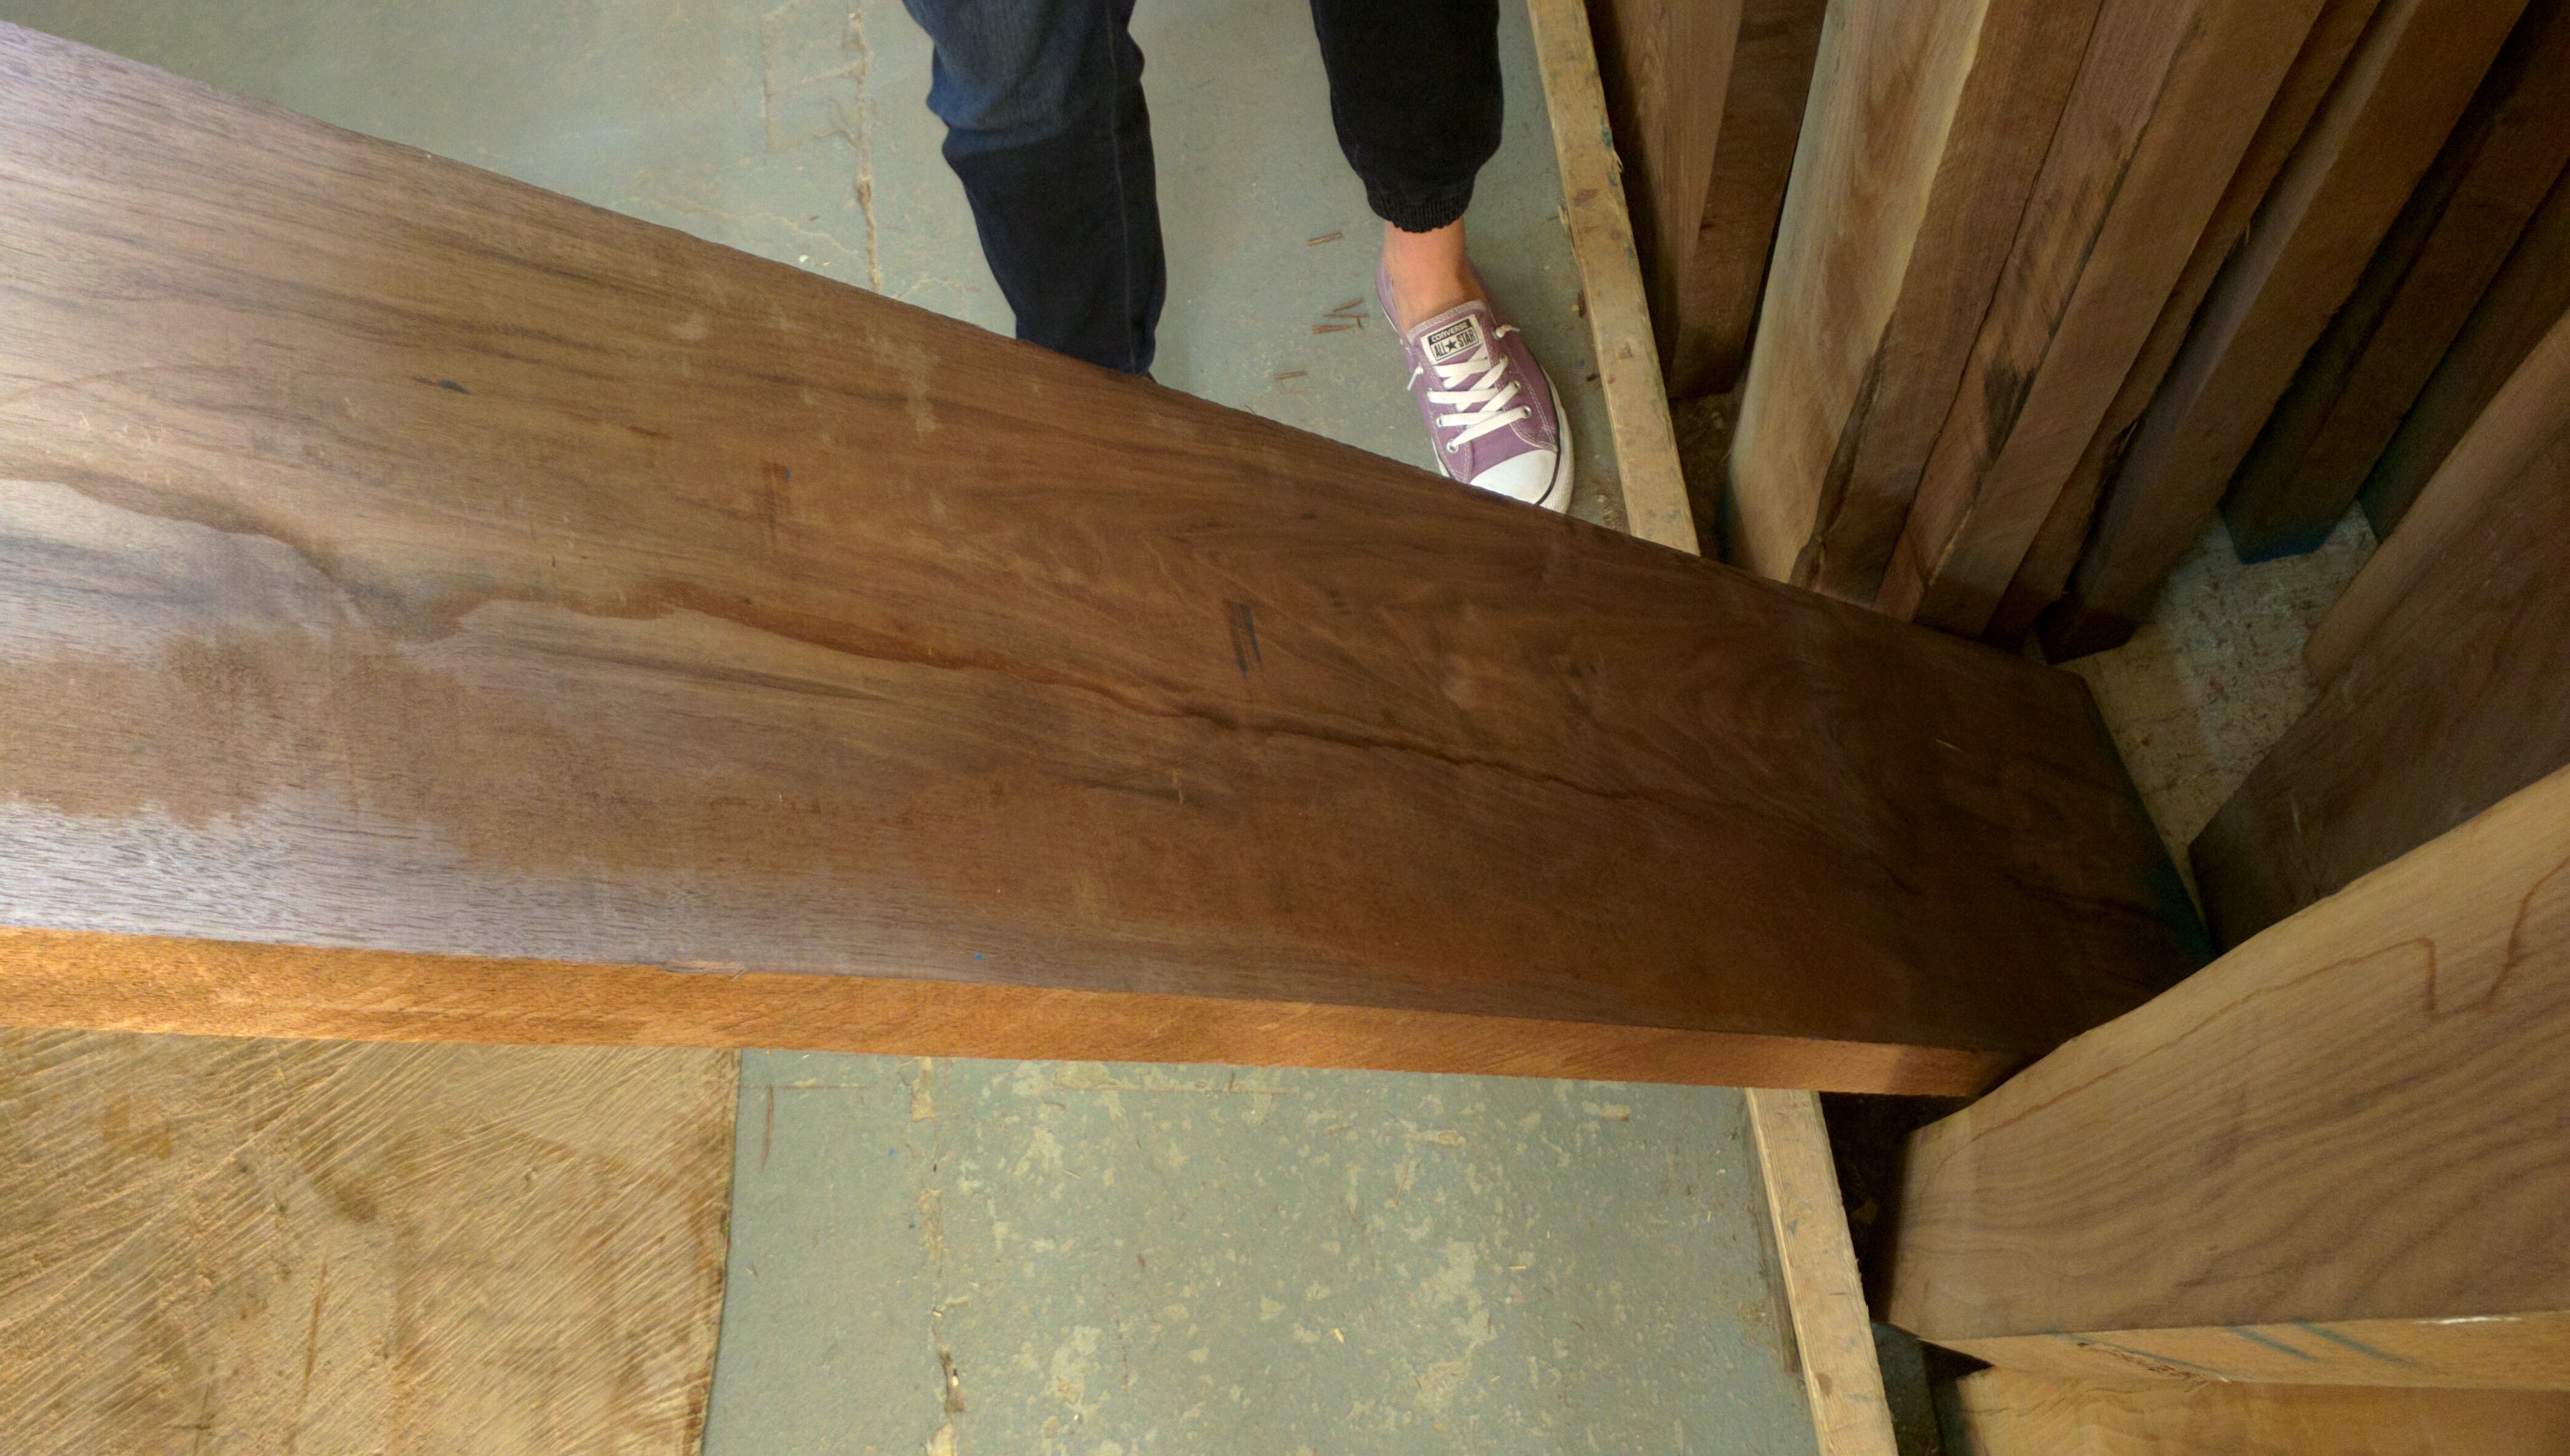
The lumber store turned out to be an exotic wood hobby shop filled with woods from all over the world. North America, South America, Asia, Africa, you name it, they had a wood from there. And nothing was cheap. Remember that California Red Wood? Apparently you can buy it from Home Depot (if you’re in California) for a reasonable price, but not at this place. I ended up liking a Black Walnut harvested in North Carolina. Blown away by the volume of wood in the sore, I went home and thought about things. I was now enlightened about the world of exotic wood working.
The following day I called the store and placed my order. I was still planning on making the floating bed design from earlier, and like the guy did I would use an exotic wood for the visible parts. But because of the cost of this Walnut I planned only to make the frame for now, and worry about the headboard later. My initial order would consist of just 4 pieces.
2 x 2″ thick – 6″ wide – 80″ long
2 x 2″ thick – 6″ wide – 64″ long
This design is for a queen bed frame by the way, meaning I need the inner dimensions to be 80×60″. The guy I was dealing with was happy to help cut everything to length for me and was even able to S4S the pieces, meaning Straight on 4 Sides. This ensures there is no bowing and the cuts are perfect 90 degree angles.
The day finally came, and to my disappointment the pieces were cut to the following:
2 x 2″ thick – 6″ wide – 84″ long
2 x 2″ thick – 6″ wide – 60″ long
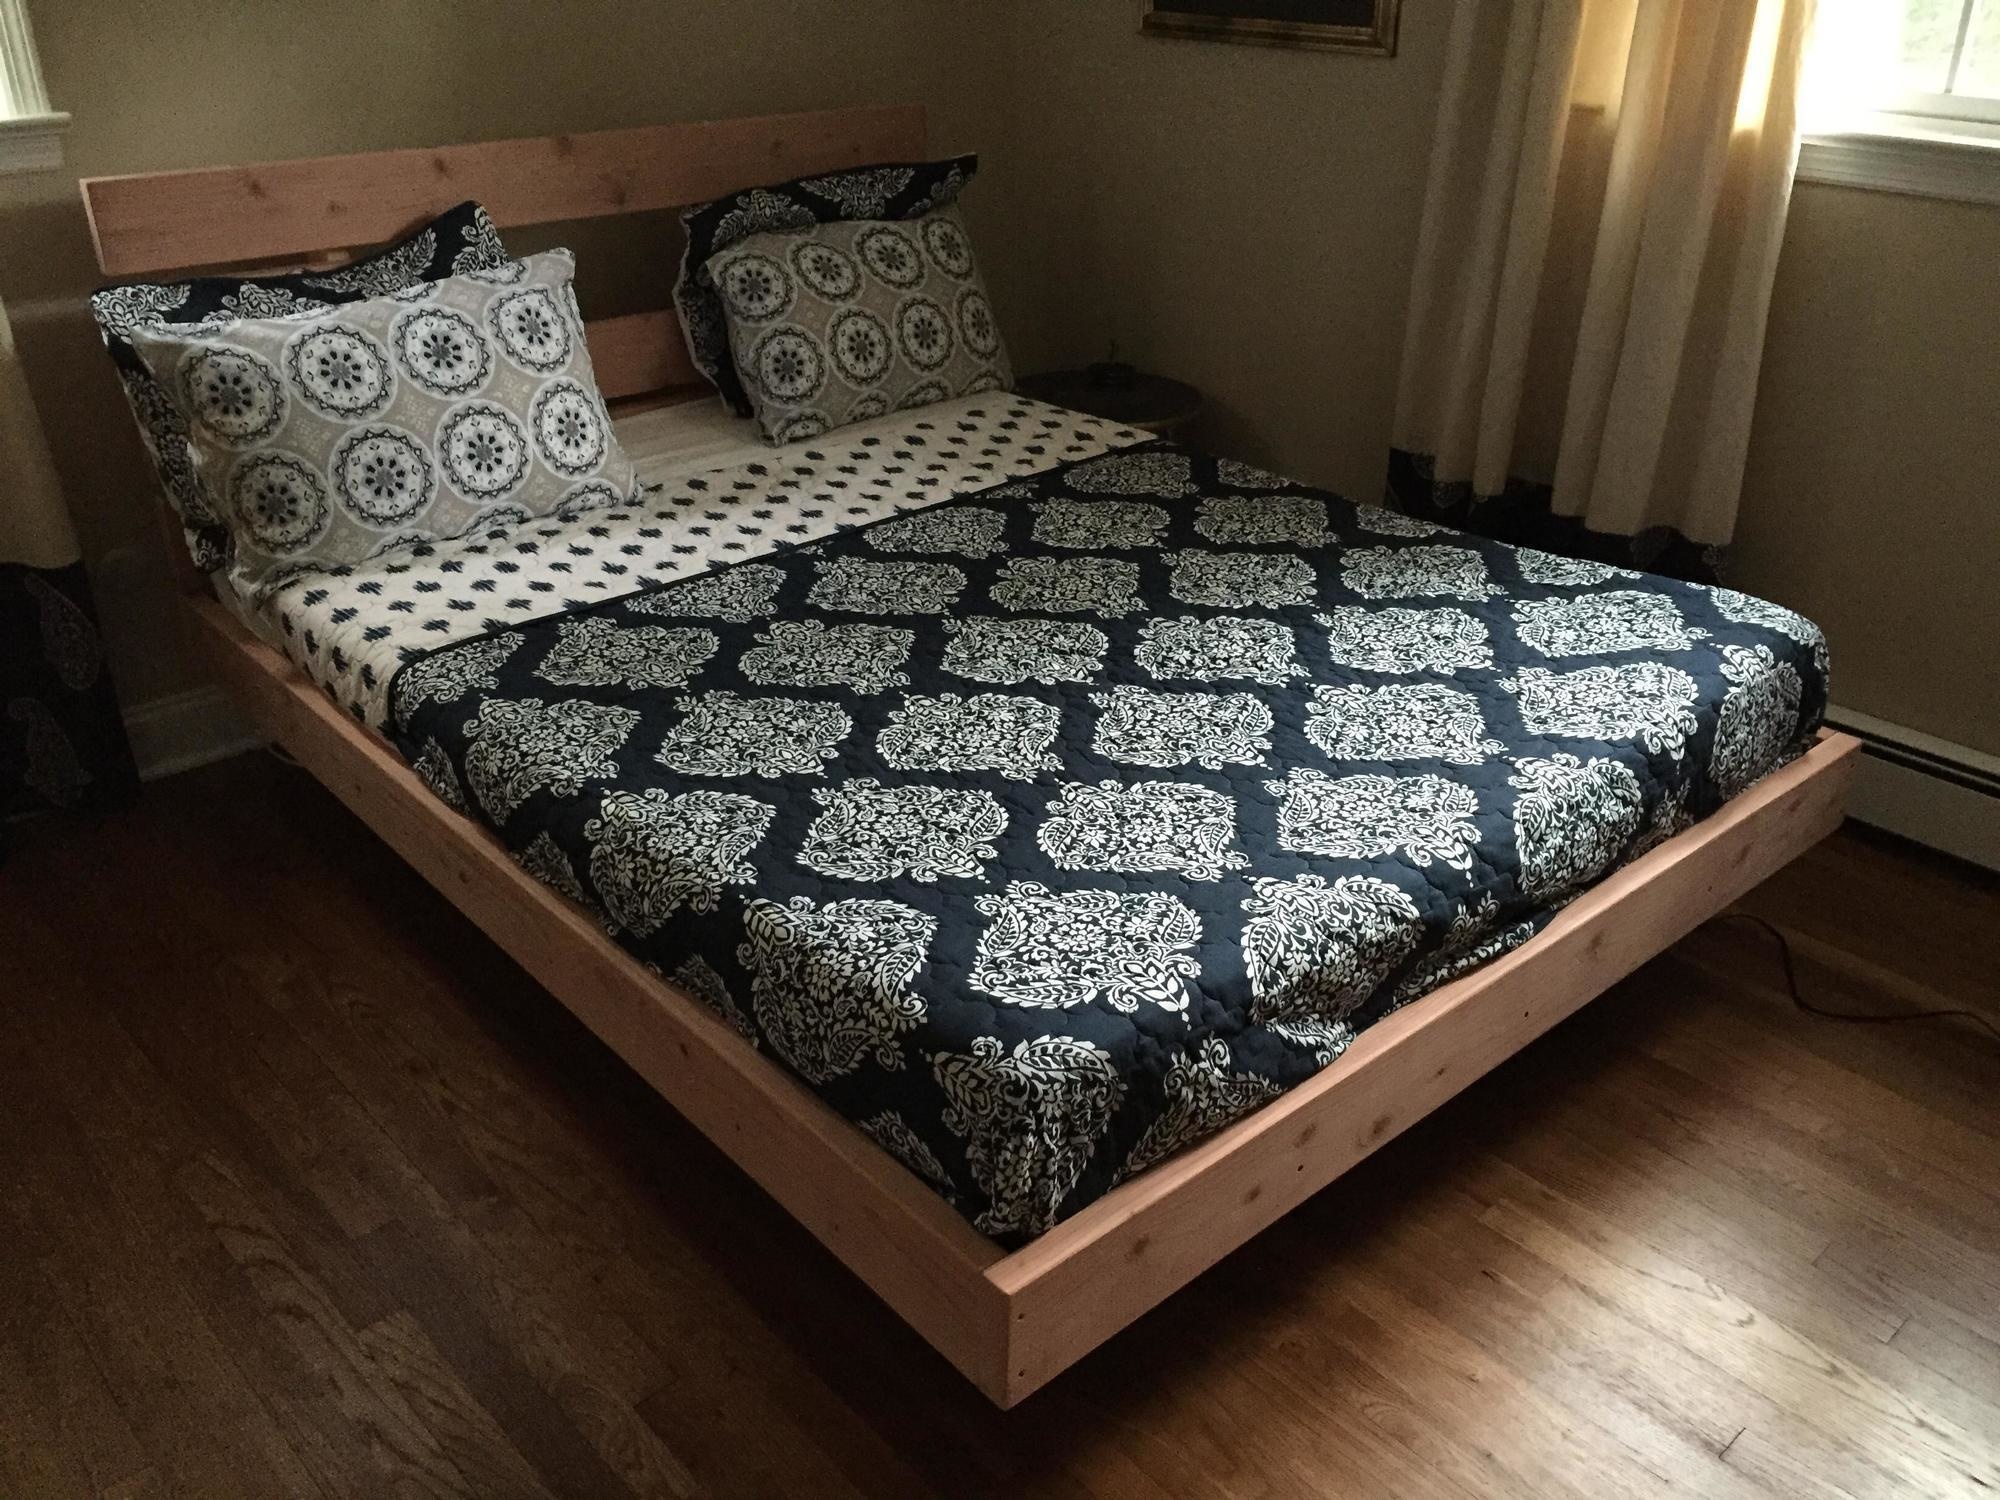
Not what I had in mind 🙁 Back to the drawing board I went. This turned out to be a bad idea because I spend a good while redesigning the bed frame in my head. Although the idea of a floating bed looked nice I had two issues with it. 1. I didn’t want to ruin my nice new beautiful Walnut by screwing into it. 2. The design was for a one time use, meaning it wasn’t designed to be taken apart and moved. My solution involved purchasing more – expensive – Walnut and moving away from a floating design.
I would order 2 more pieces so that I ended up with the following:
2 x 2″ thick – 6″ wide – 84″ long
2 x 2″ thick – 6″ wide – 60″ long
2 x 2″ thick – 8″ wide – 64″ long
The two shorter pieces would stack on top of each other, and the side rails would rest on the 64″ pieces. This would keep the design modern, provide great support for the side rails, and could be made modular. So back to the phones to order new pieces. I also ordered two pieces to be used as the bed slat rails. They were:
2 x 1″ thick – 3″ wide – 79″ long
They will be glued and screwed to the bed rails and be used to support the bed slats. I still opted to use a cheaper Pine for the bed slats, but wanted to use Walnut for the slat rails to avoid any issued with expansion and contraction of the glued joint. Walnut being a hardwood and Pine being a softwood, they will have different expansion ratios.
Next, I got the new pieces home and proceed to test fit everything. And yes, I am going to be building this thing in my office 🙂 Need a constant temperature and humidity level. It’s all about temperature and humidity.
It looked OK, but upon closer inspection the new cuts weren’t exactly to size. I used a 90 degree bracket on all 4 corners to align everything and then marked off the pieces that needed to be trimmed.
Once the trimming was made it was time to attach the slat rails to the bed rails. I opted to glue, dowel, and screw them together. This piece would be more or less supporting all the weight of the mattress and people, and had to be strong.
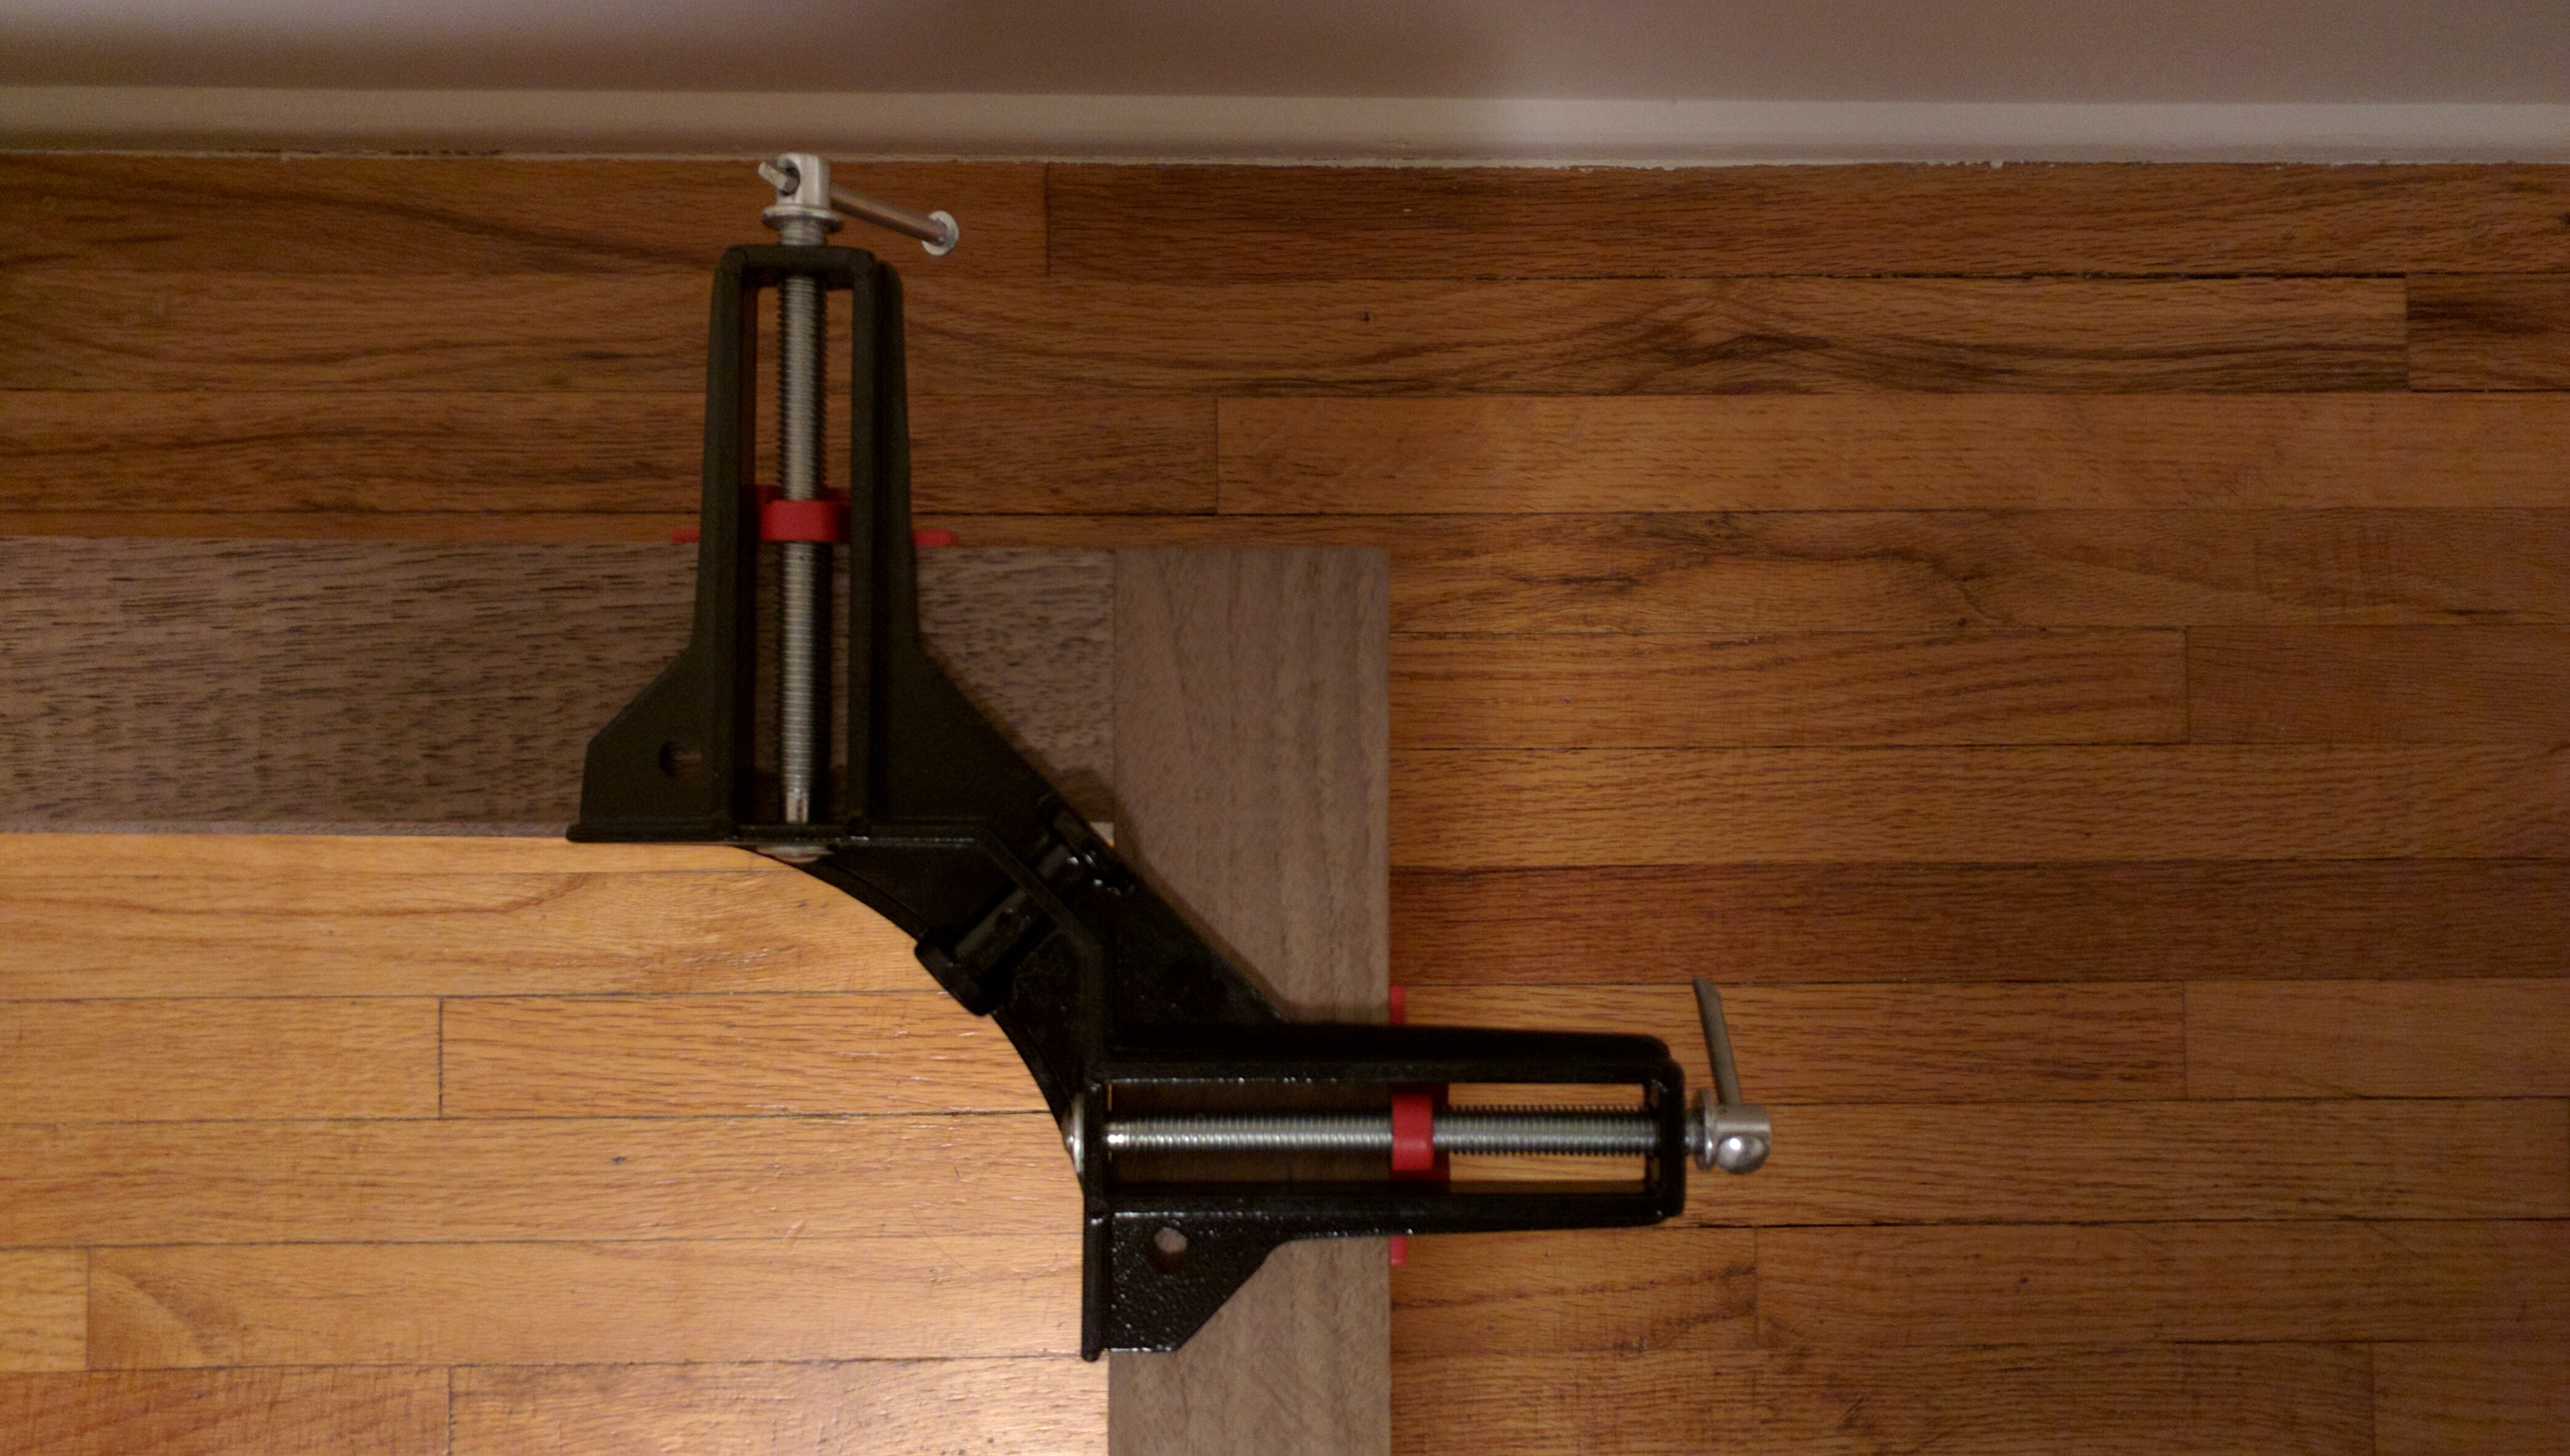
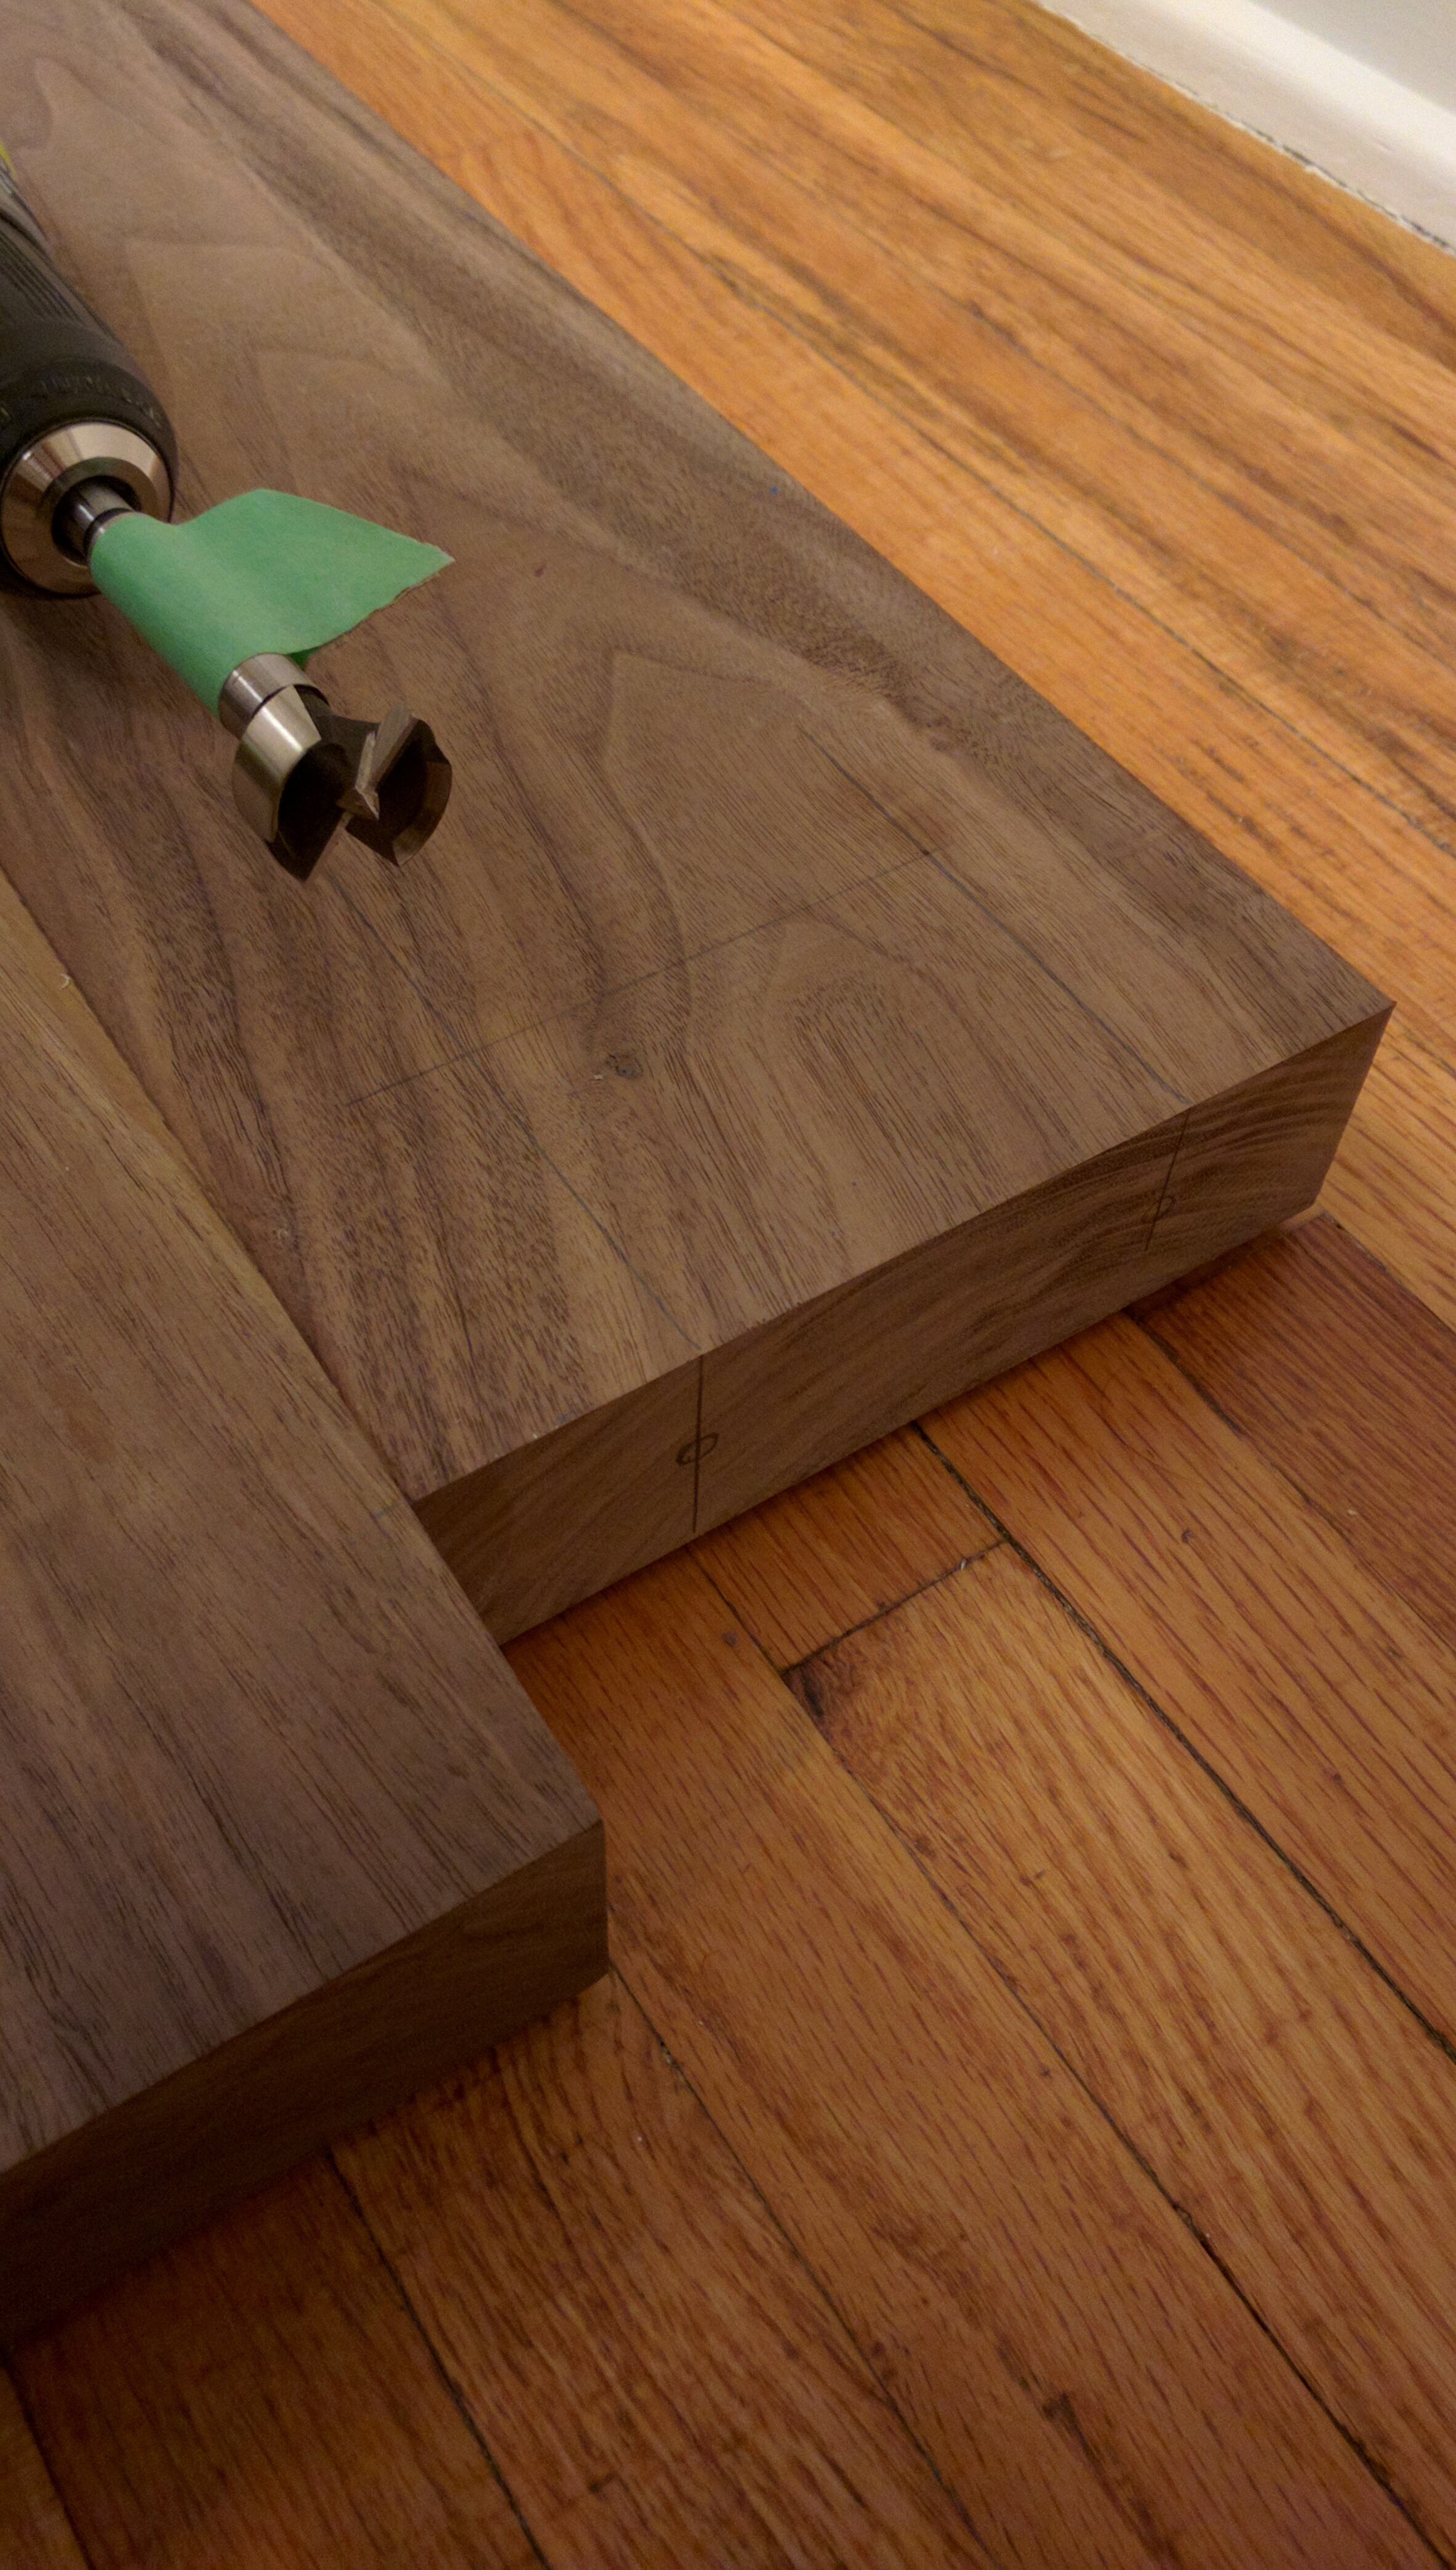
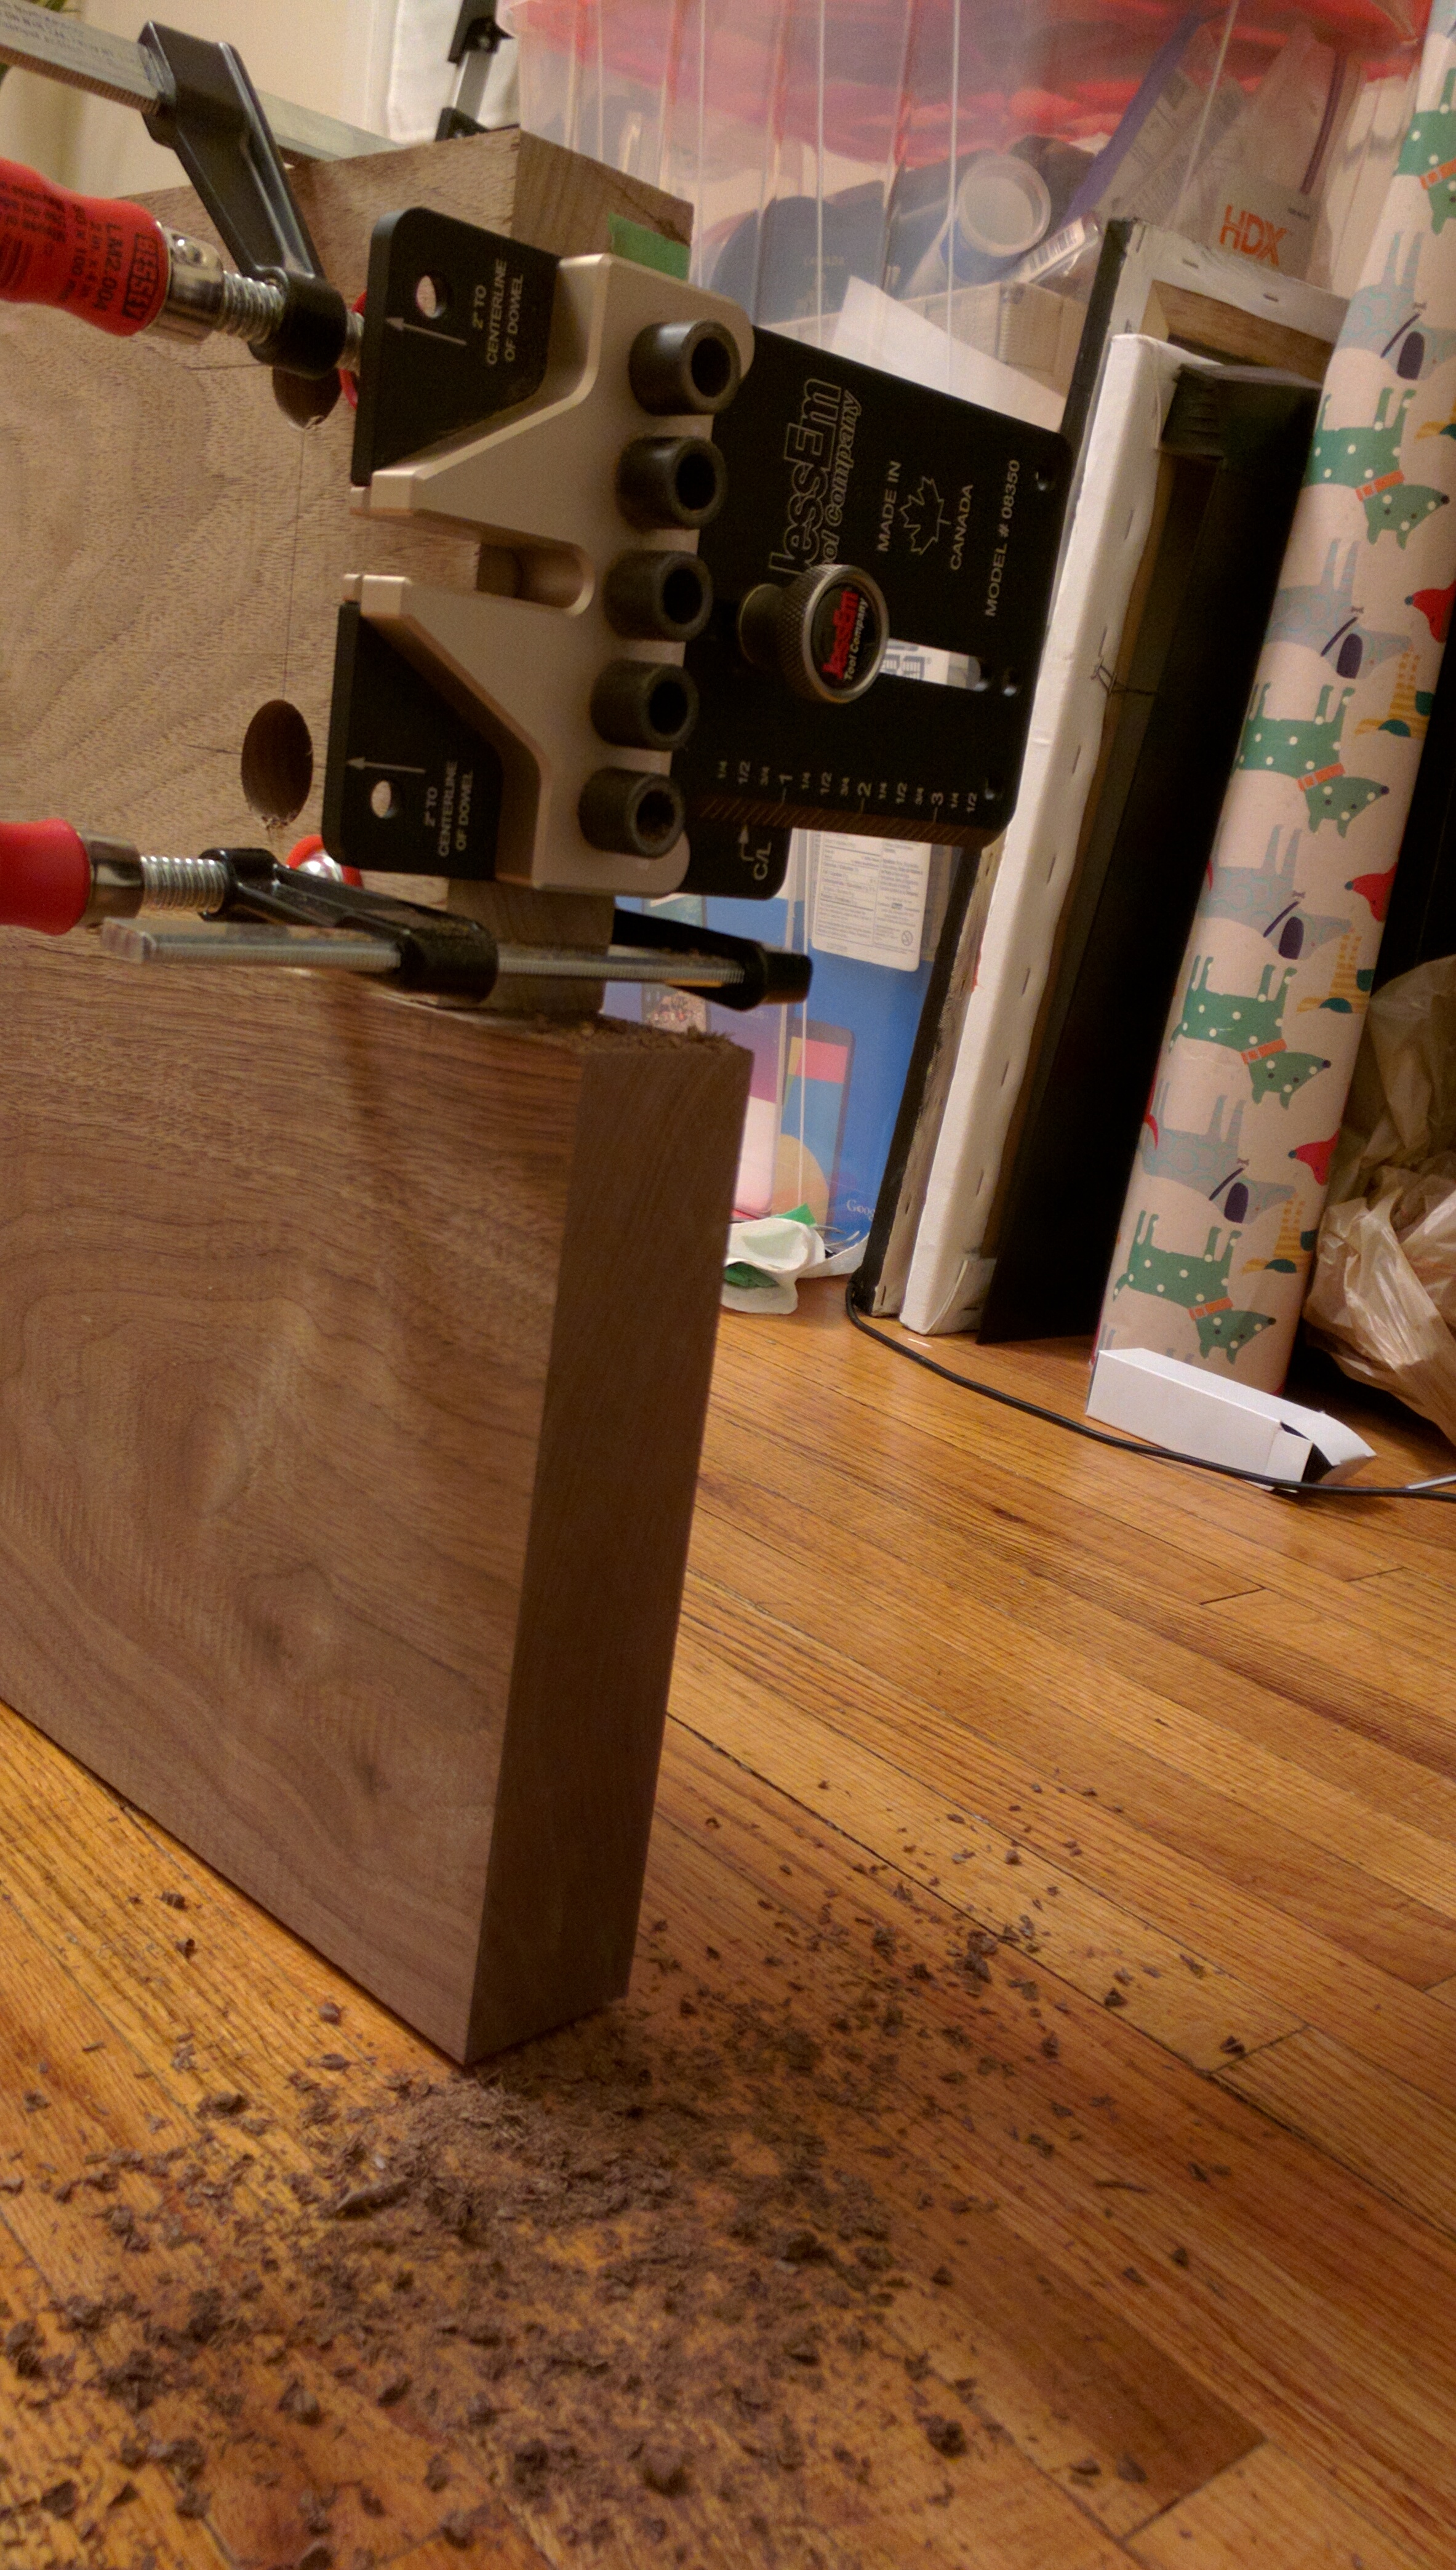
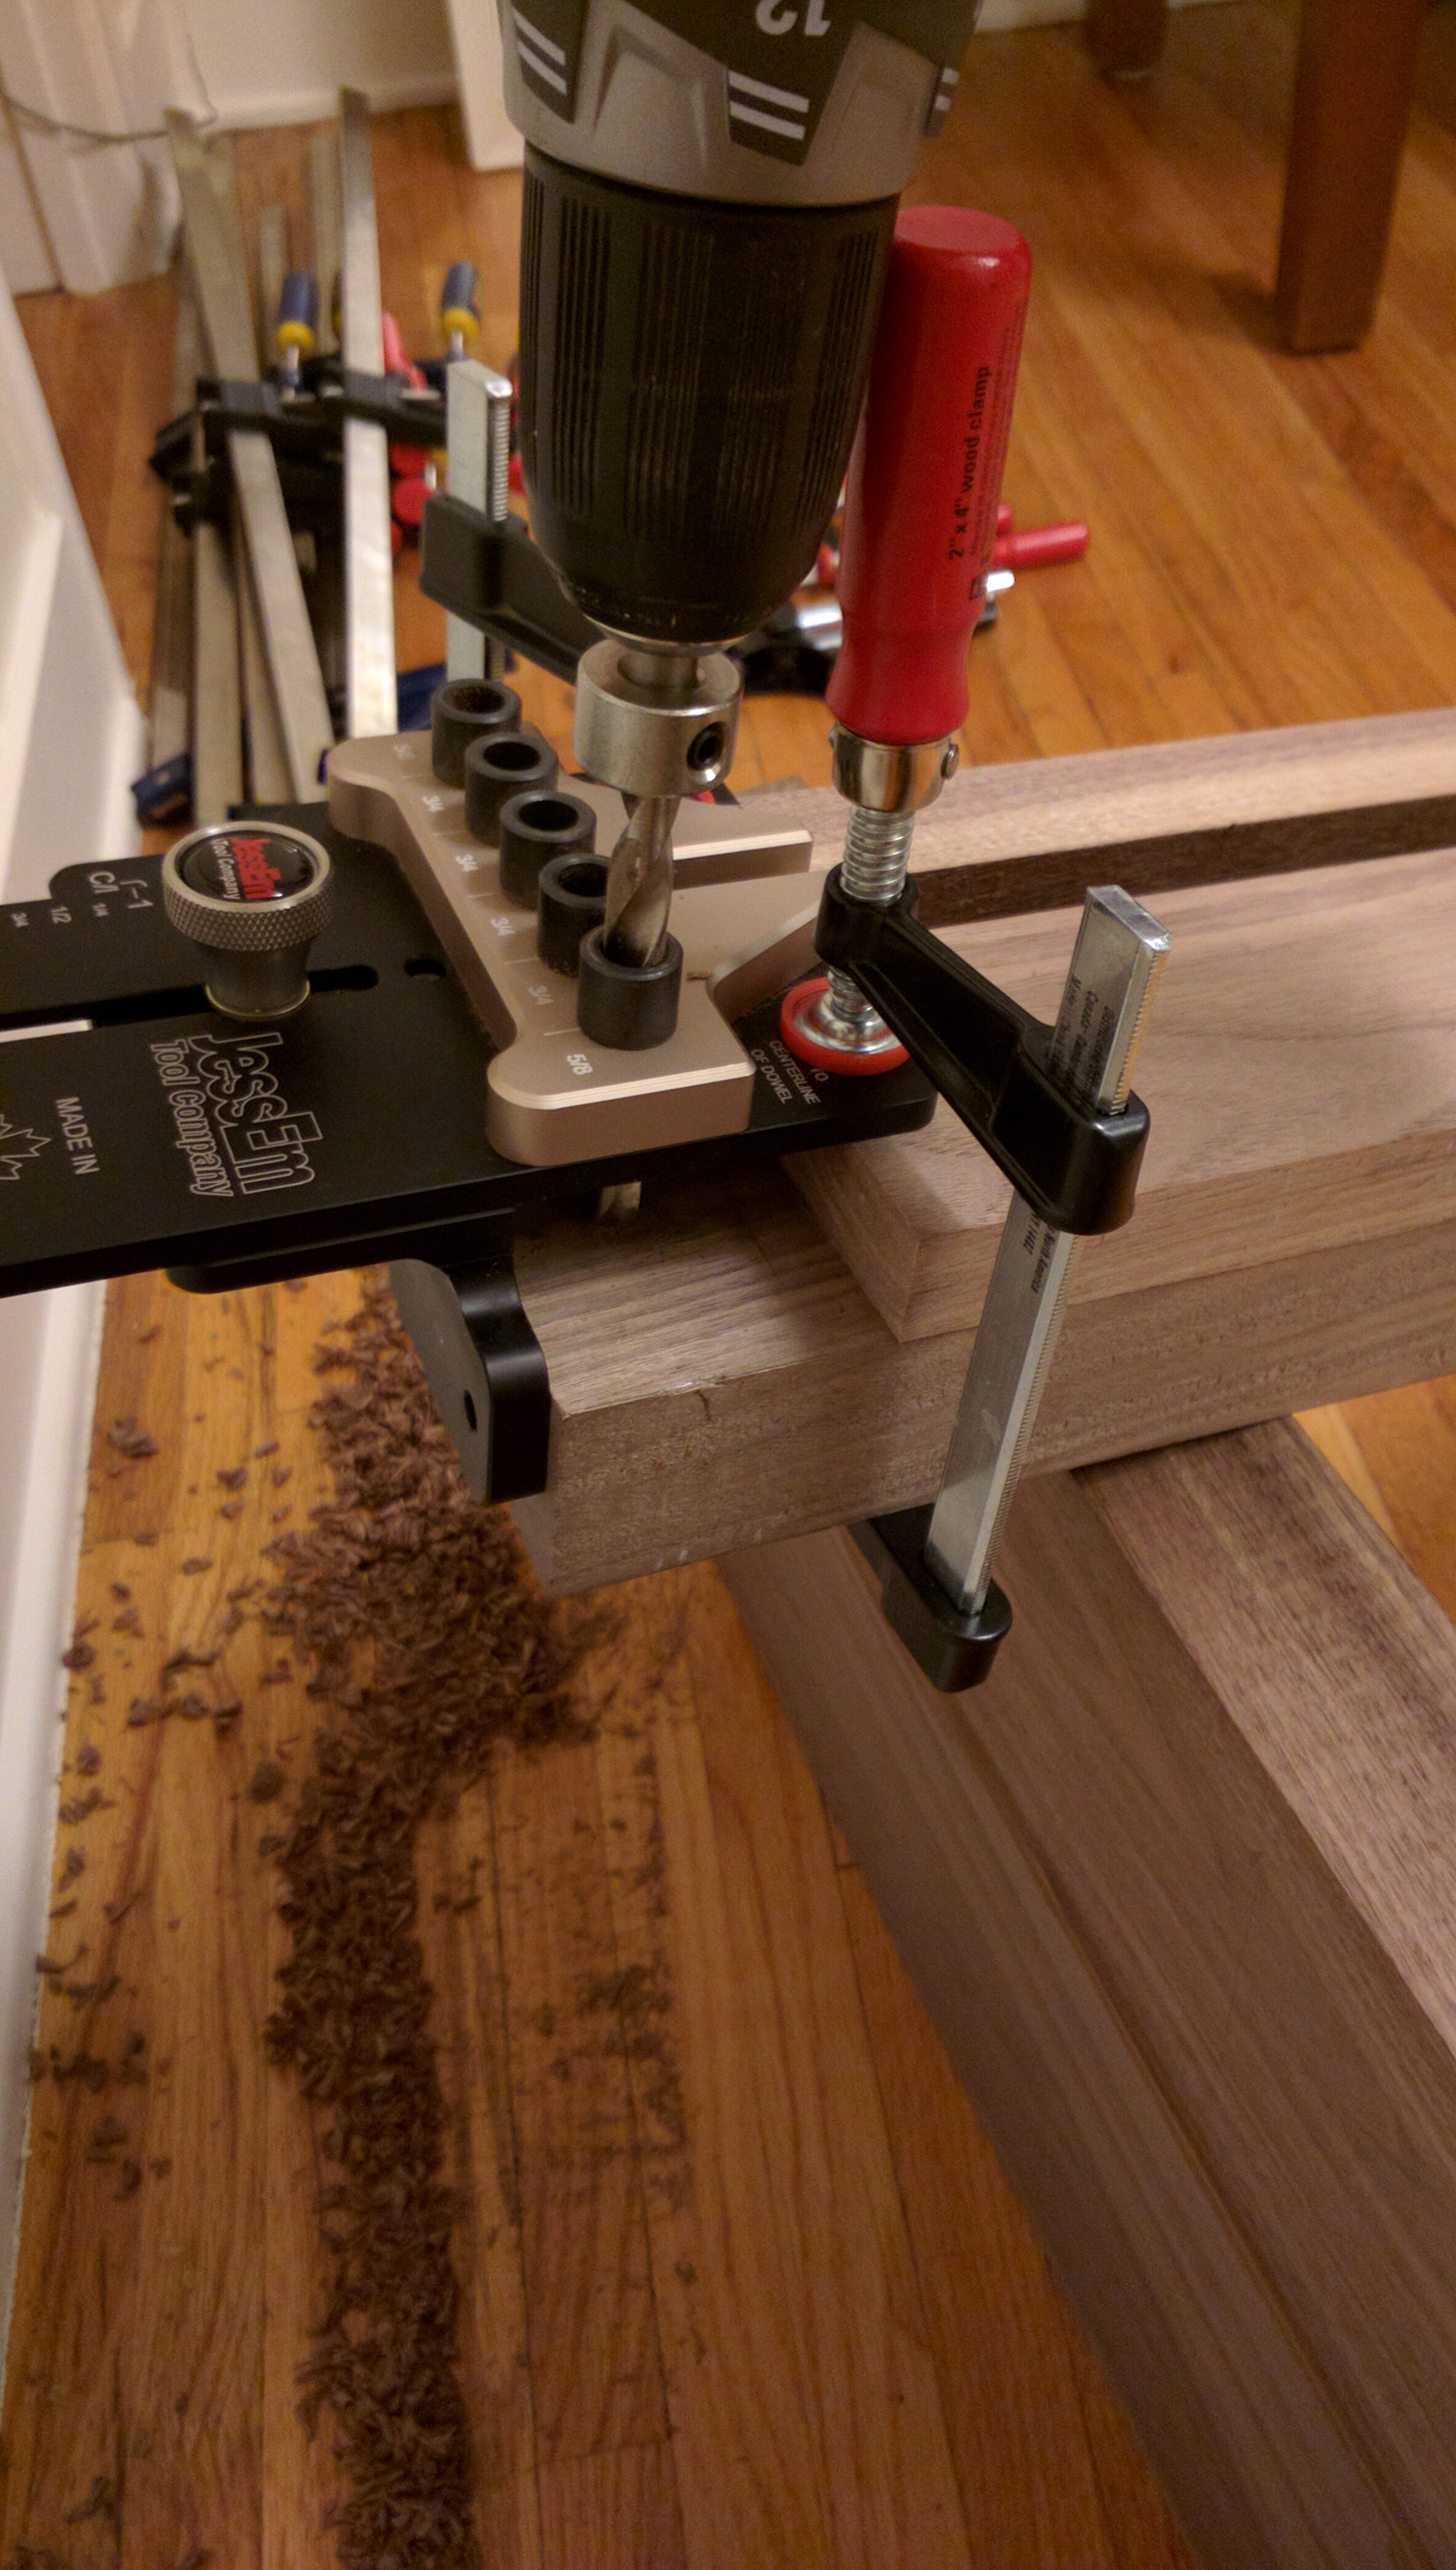
Next I used a square to mark the slat rail and bed rail. This is where the dowel would be placed. I wanted dowels to help align the two pieces when they were glued.
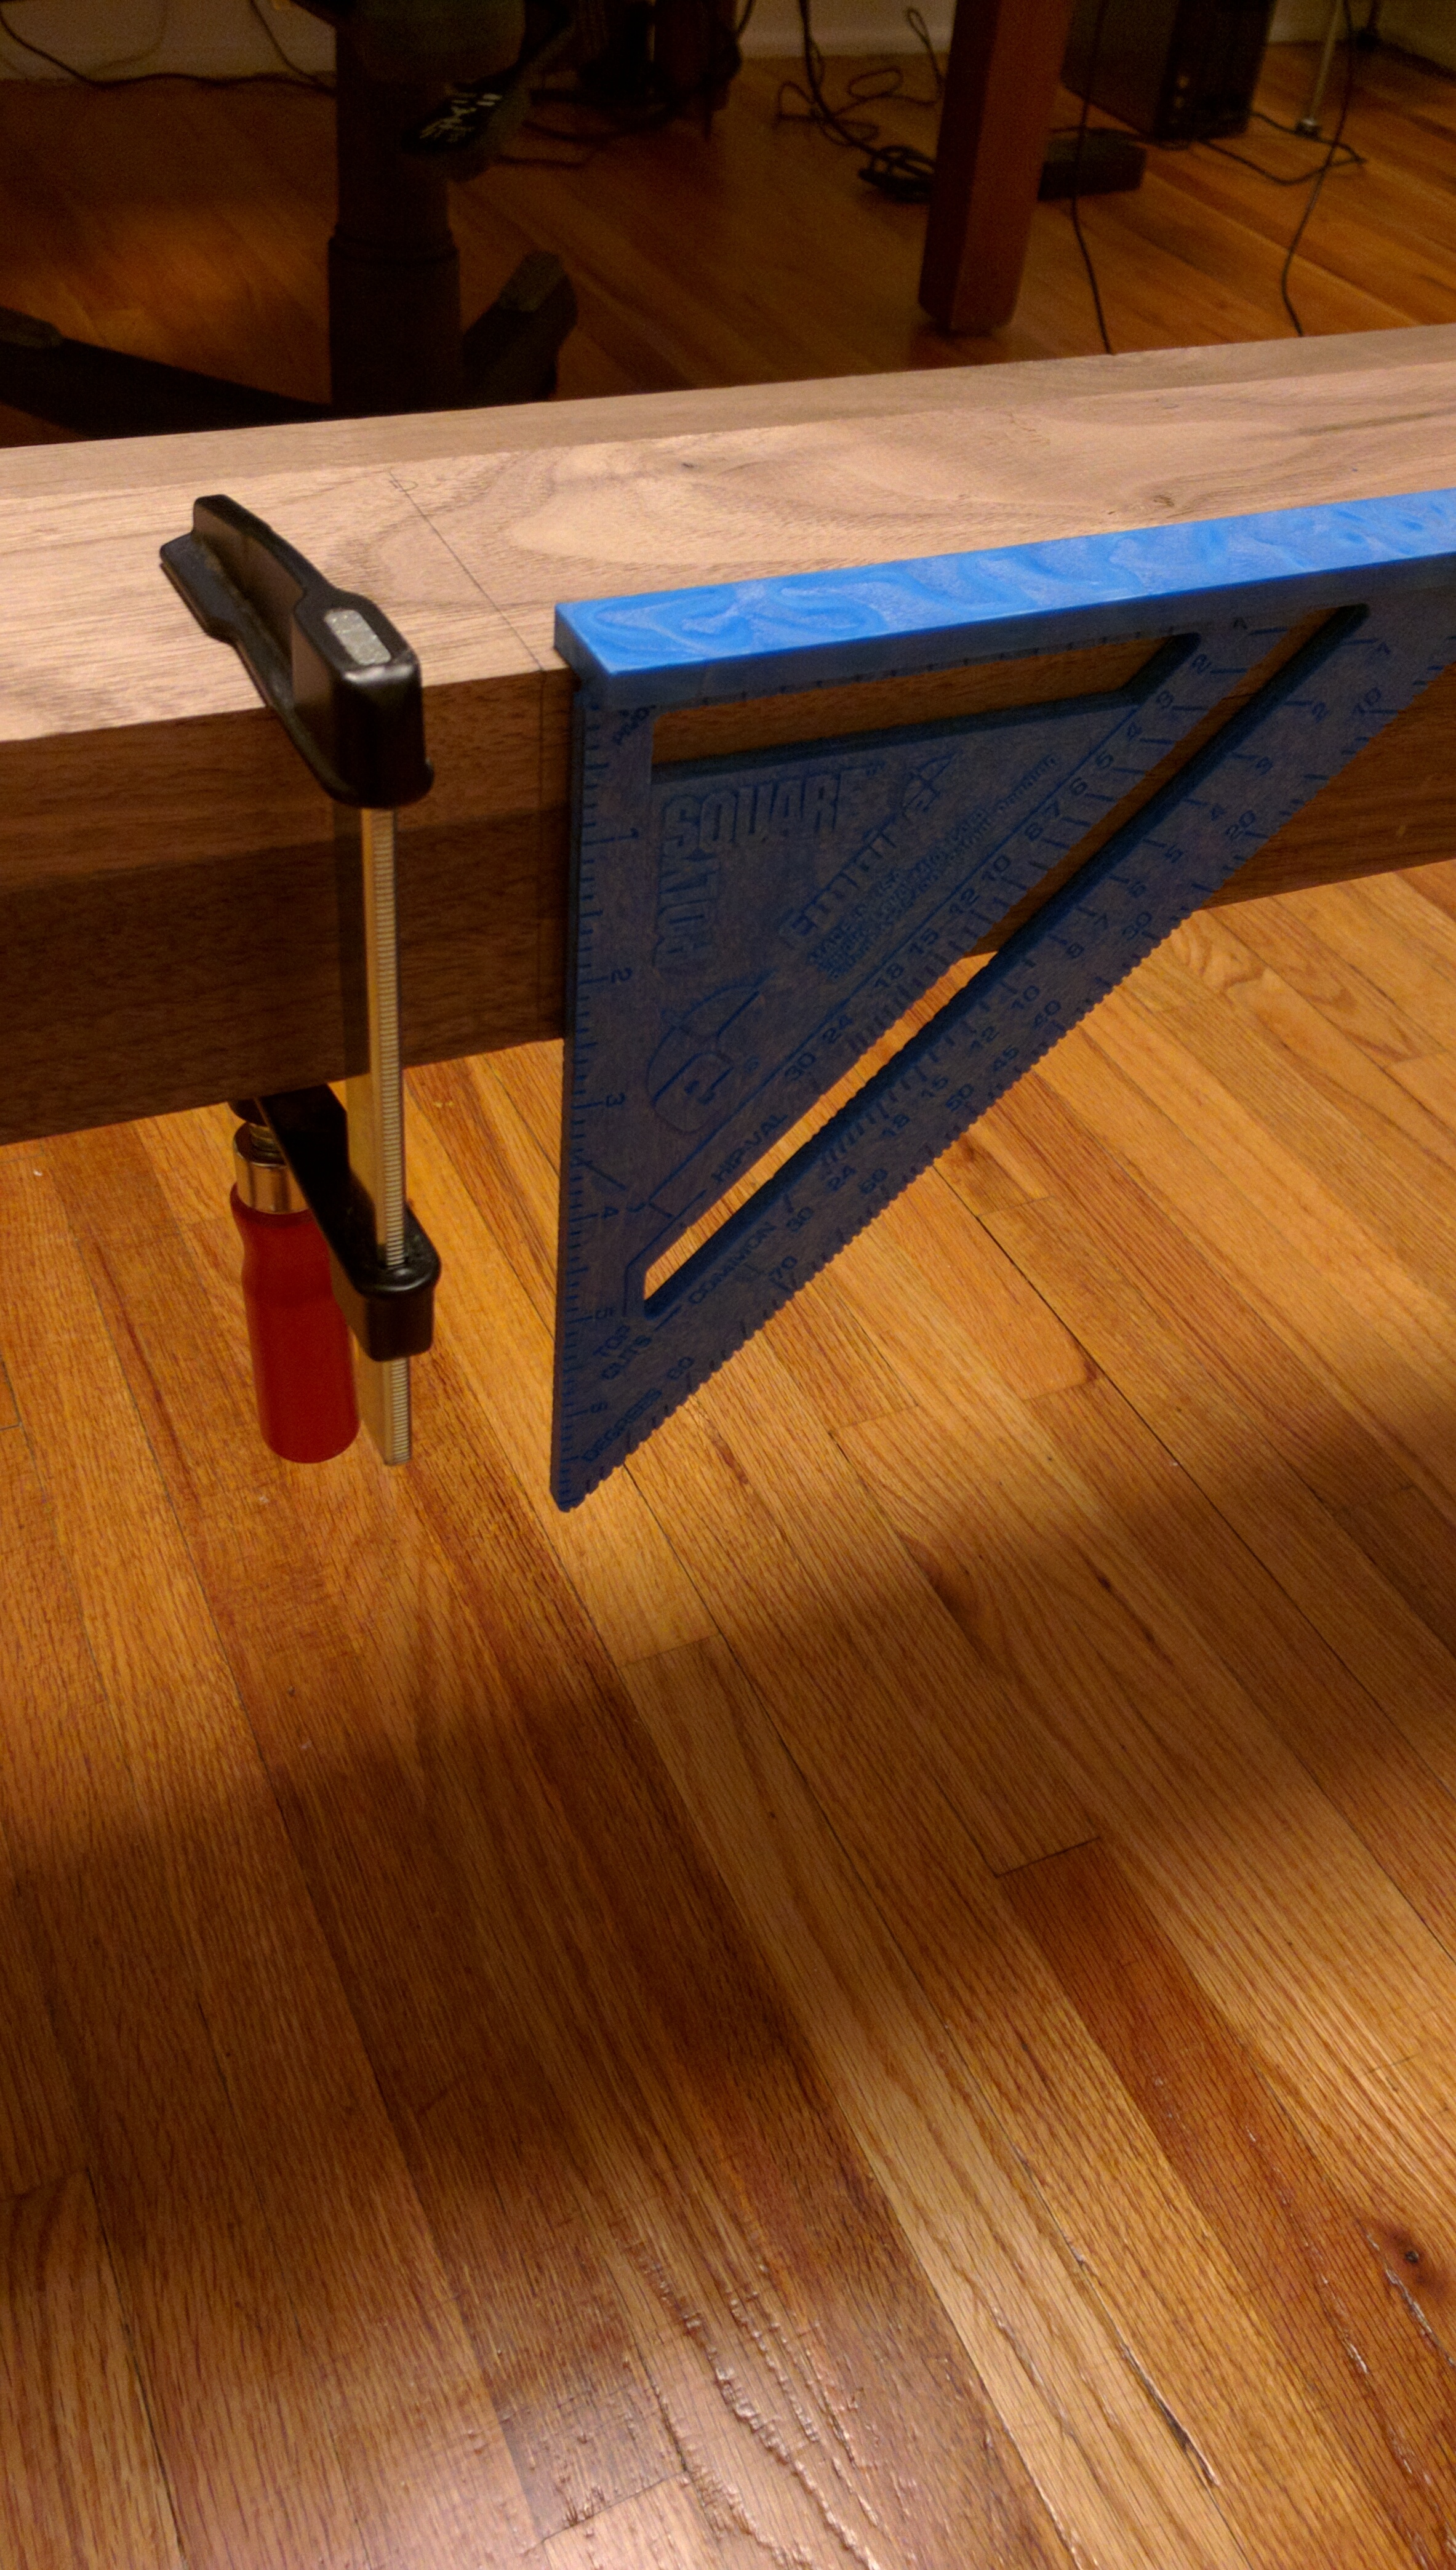
Here’s the fancy dowel jig. It’s really easy. Align the jig to the marks and drill. I opted for 1″ dowels, and thus needed a 1/2″ hole in both the slat rail and bed rail.
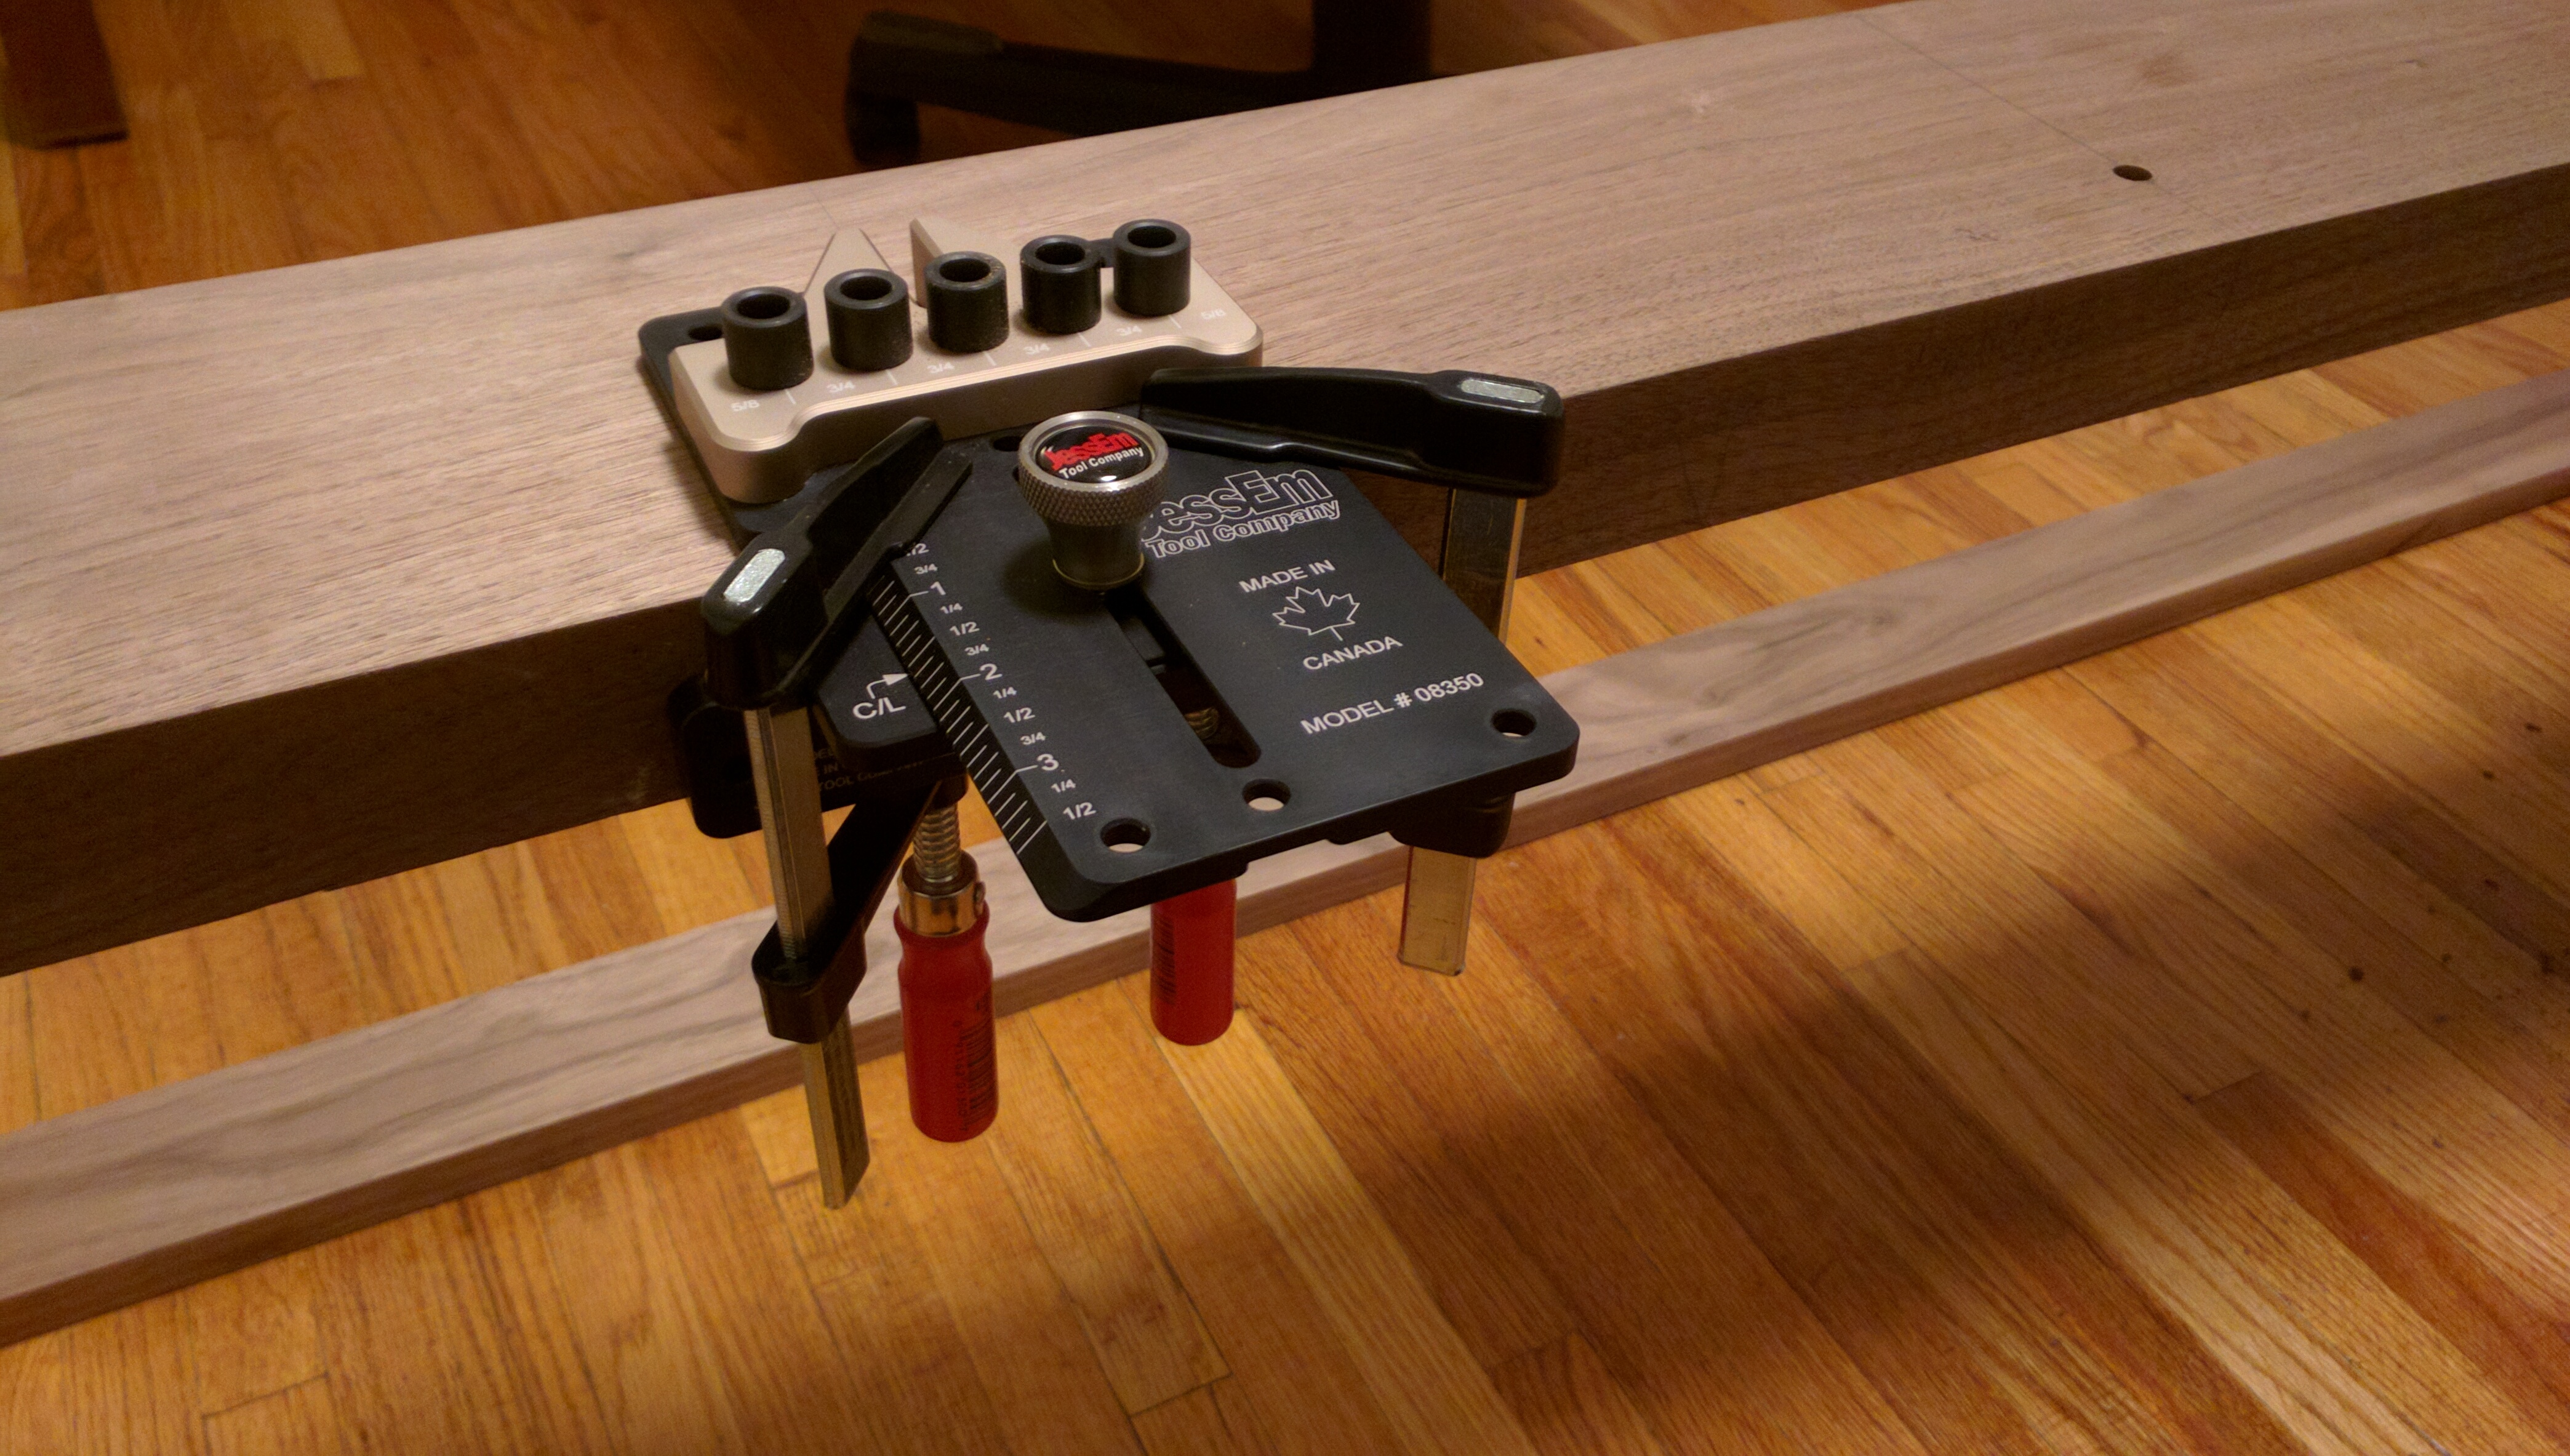
Here’s the two after doweling.
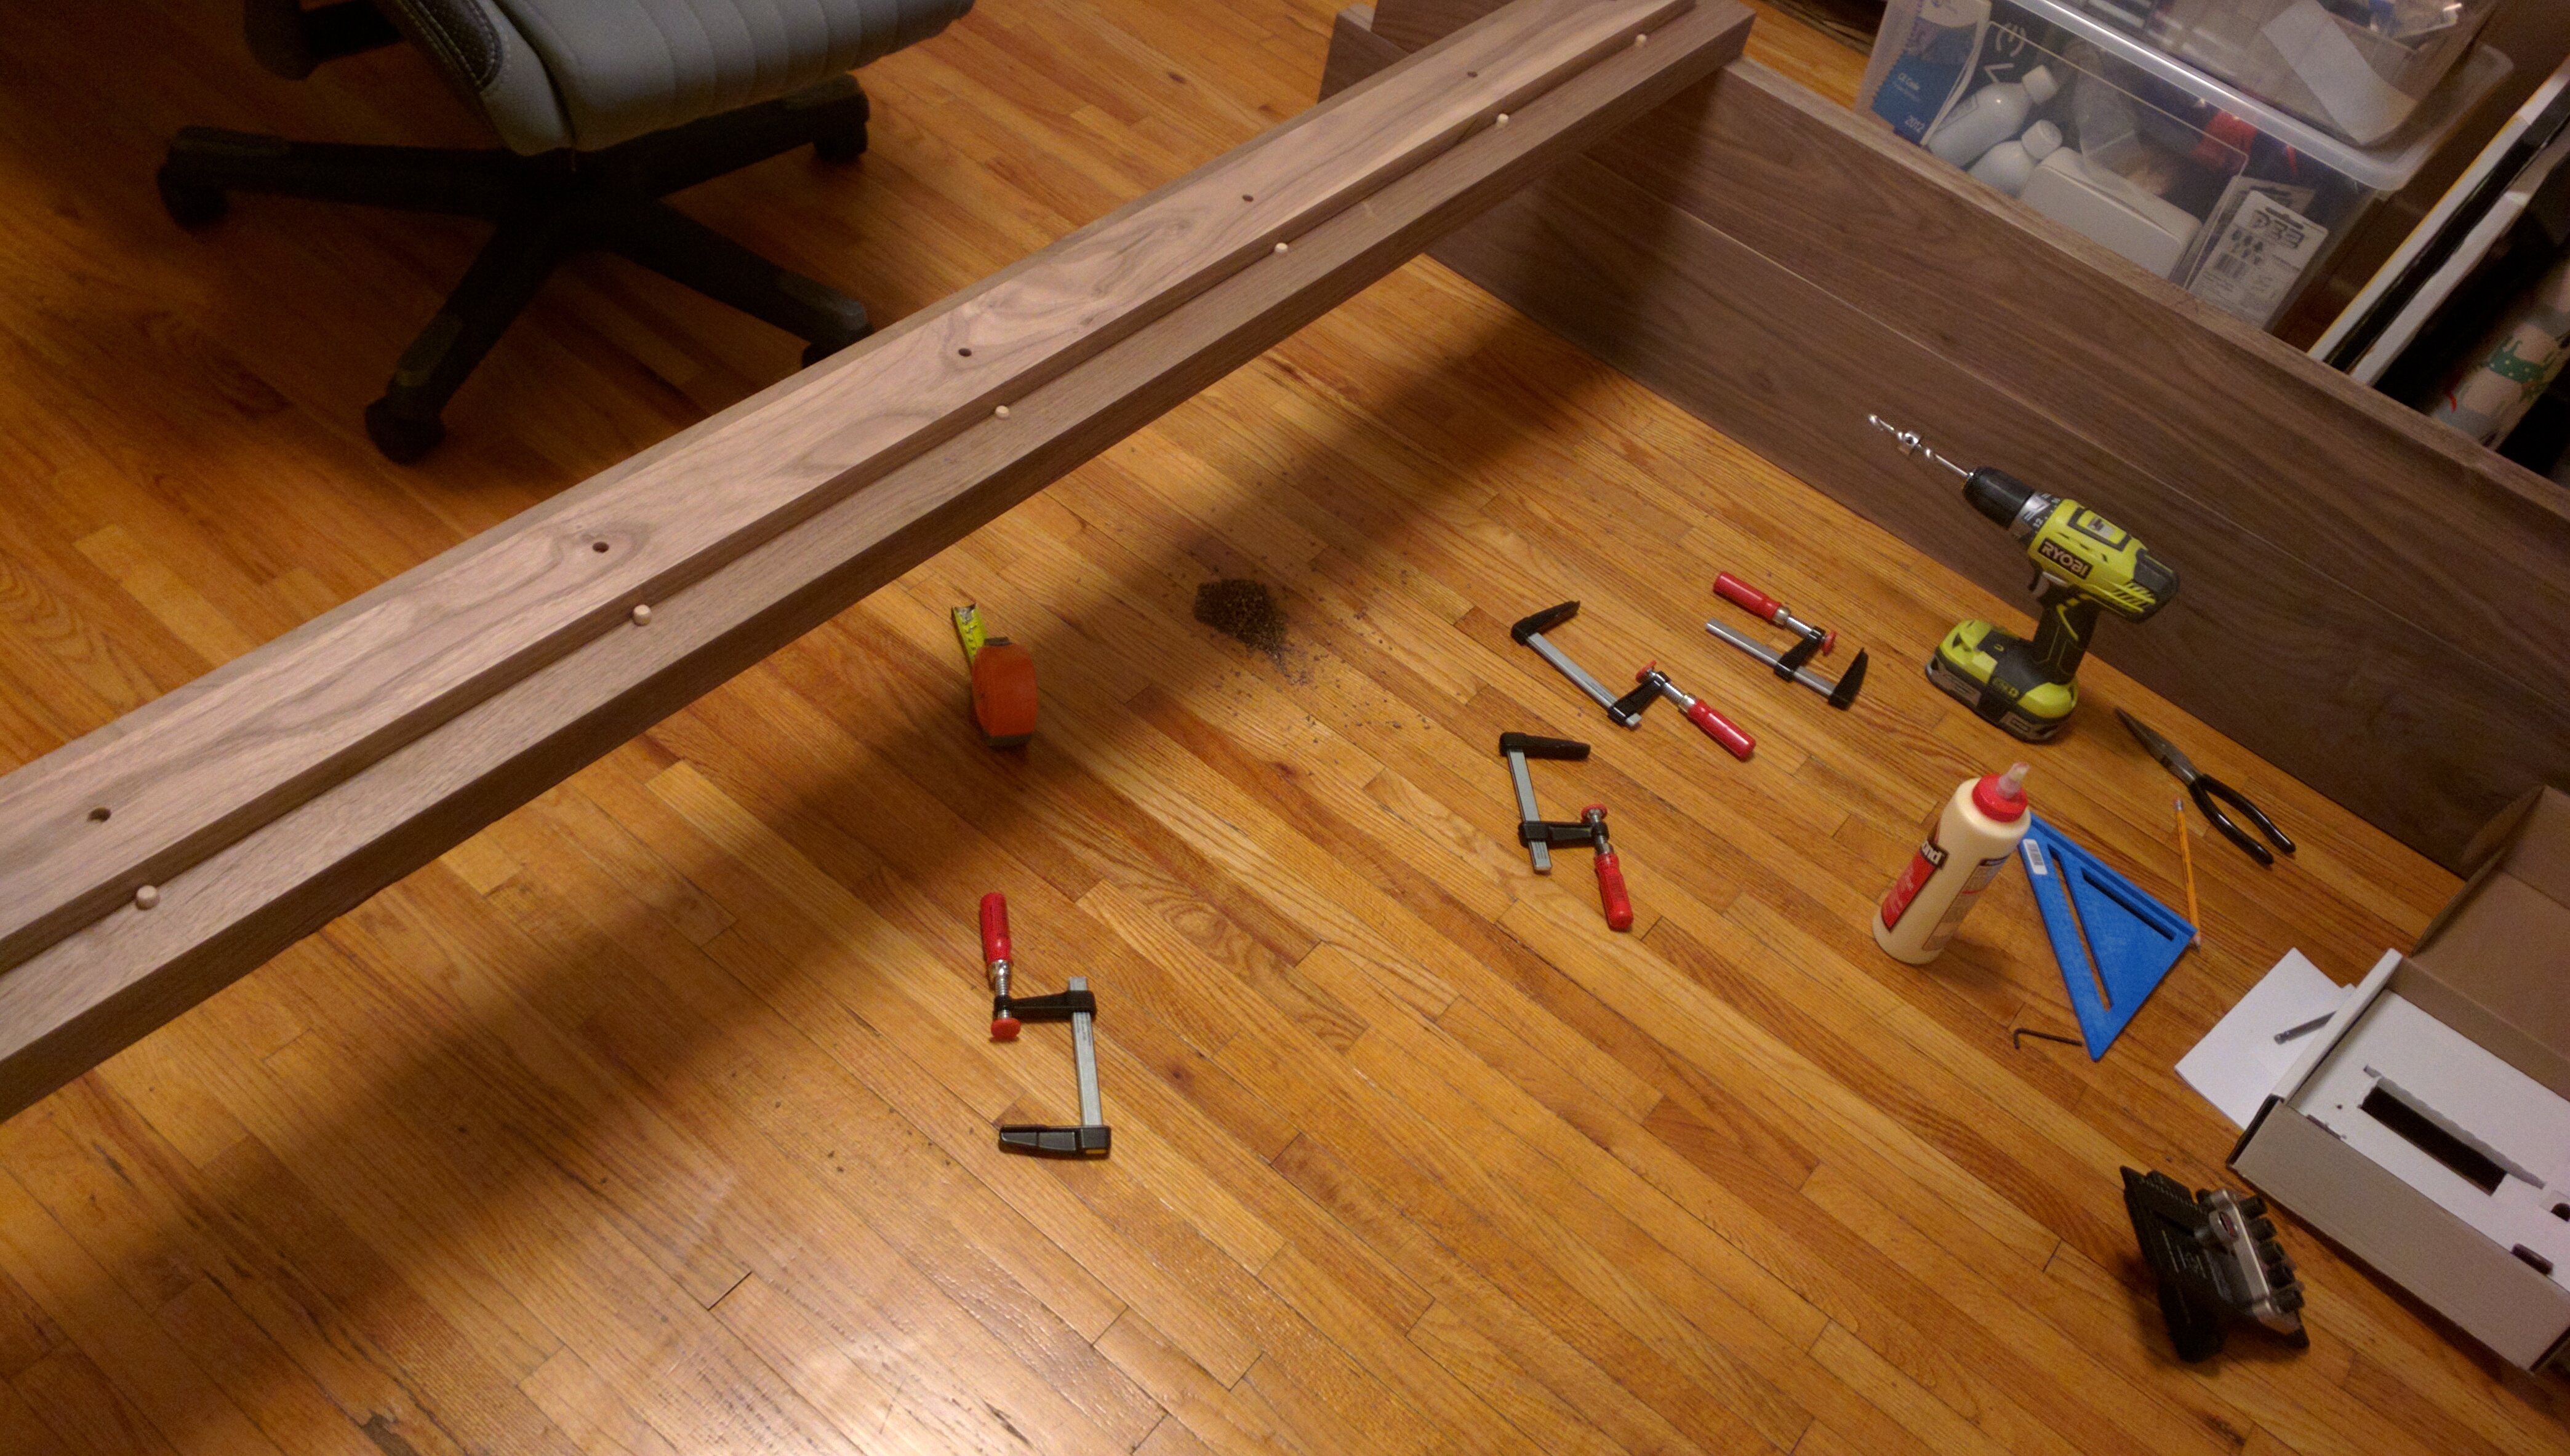
Next use every clamp you can get your hands on and proceed to glue the crap out of the this joint. I didn’t glue the dowels, they were just for alignment.
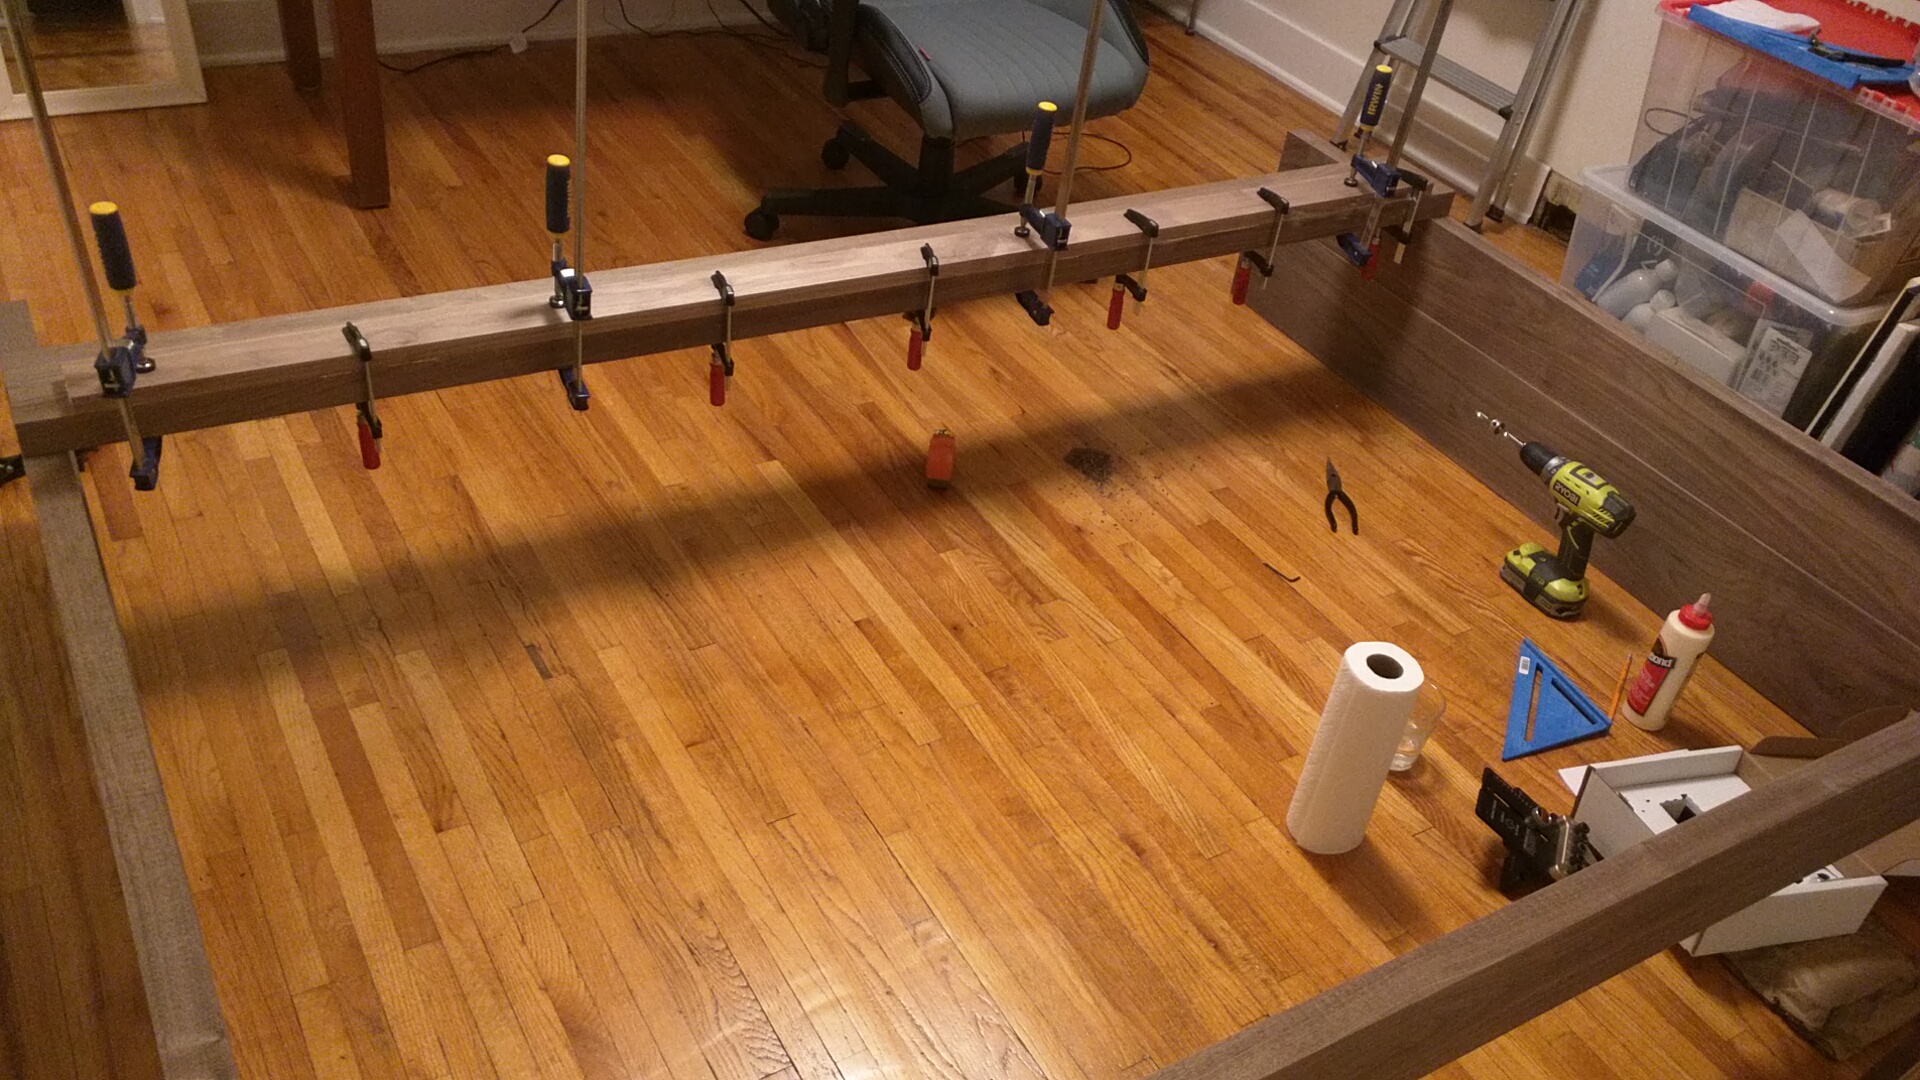
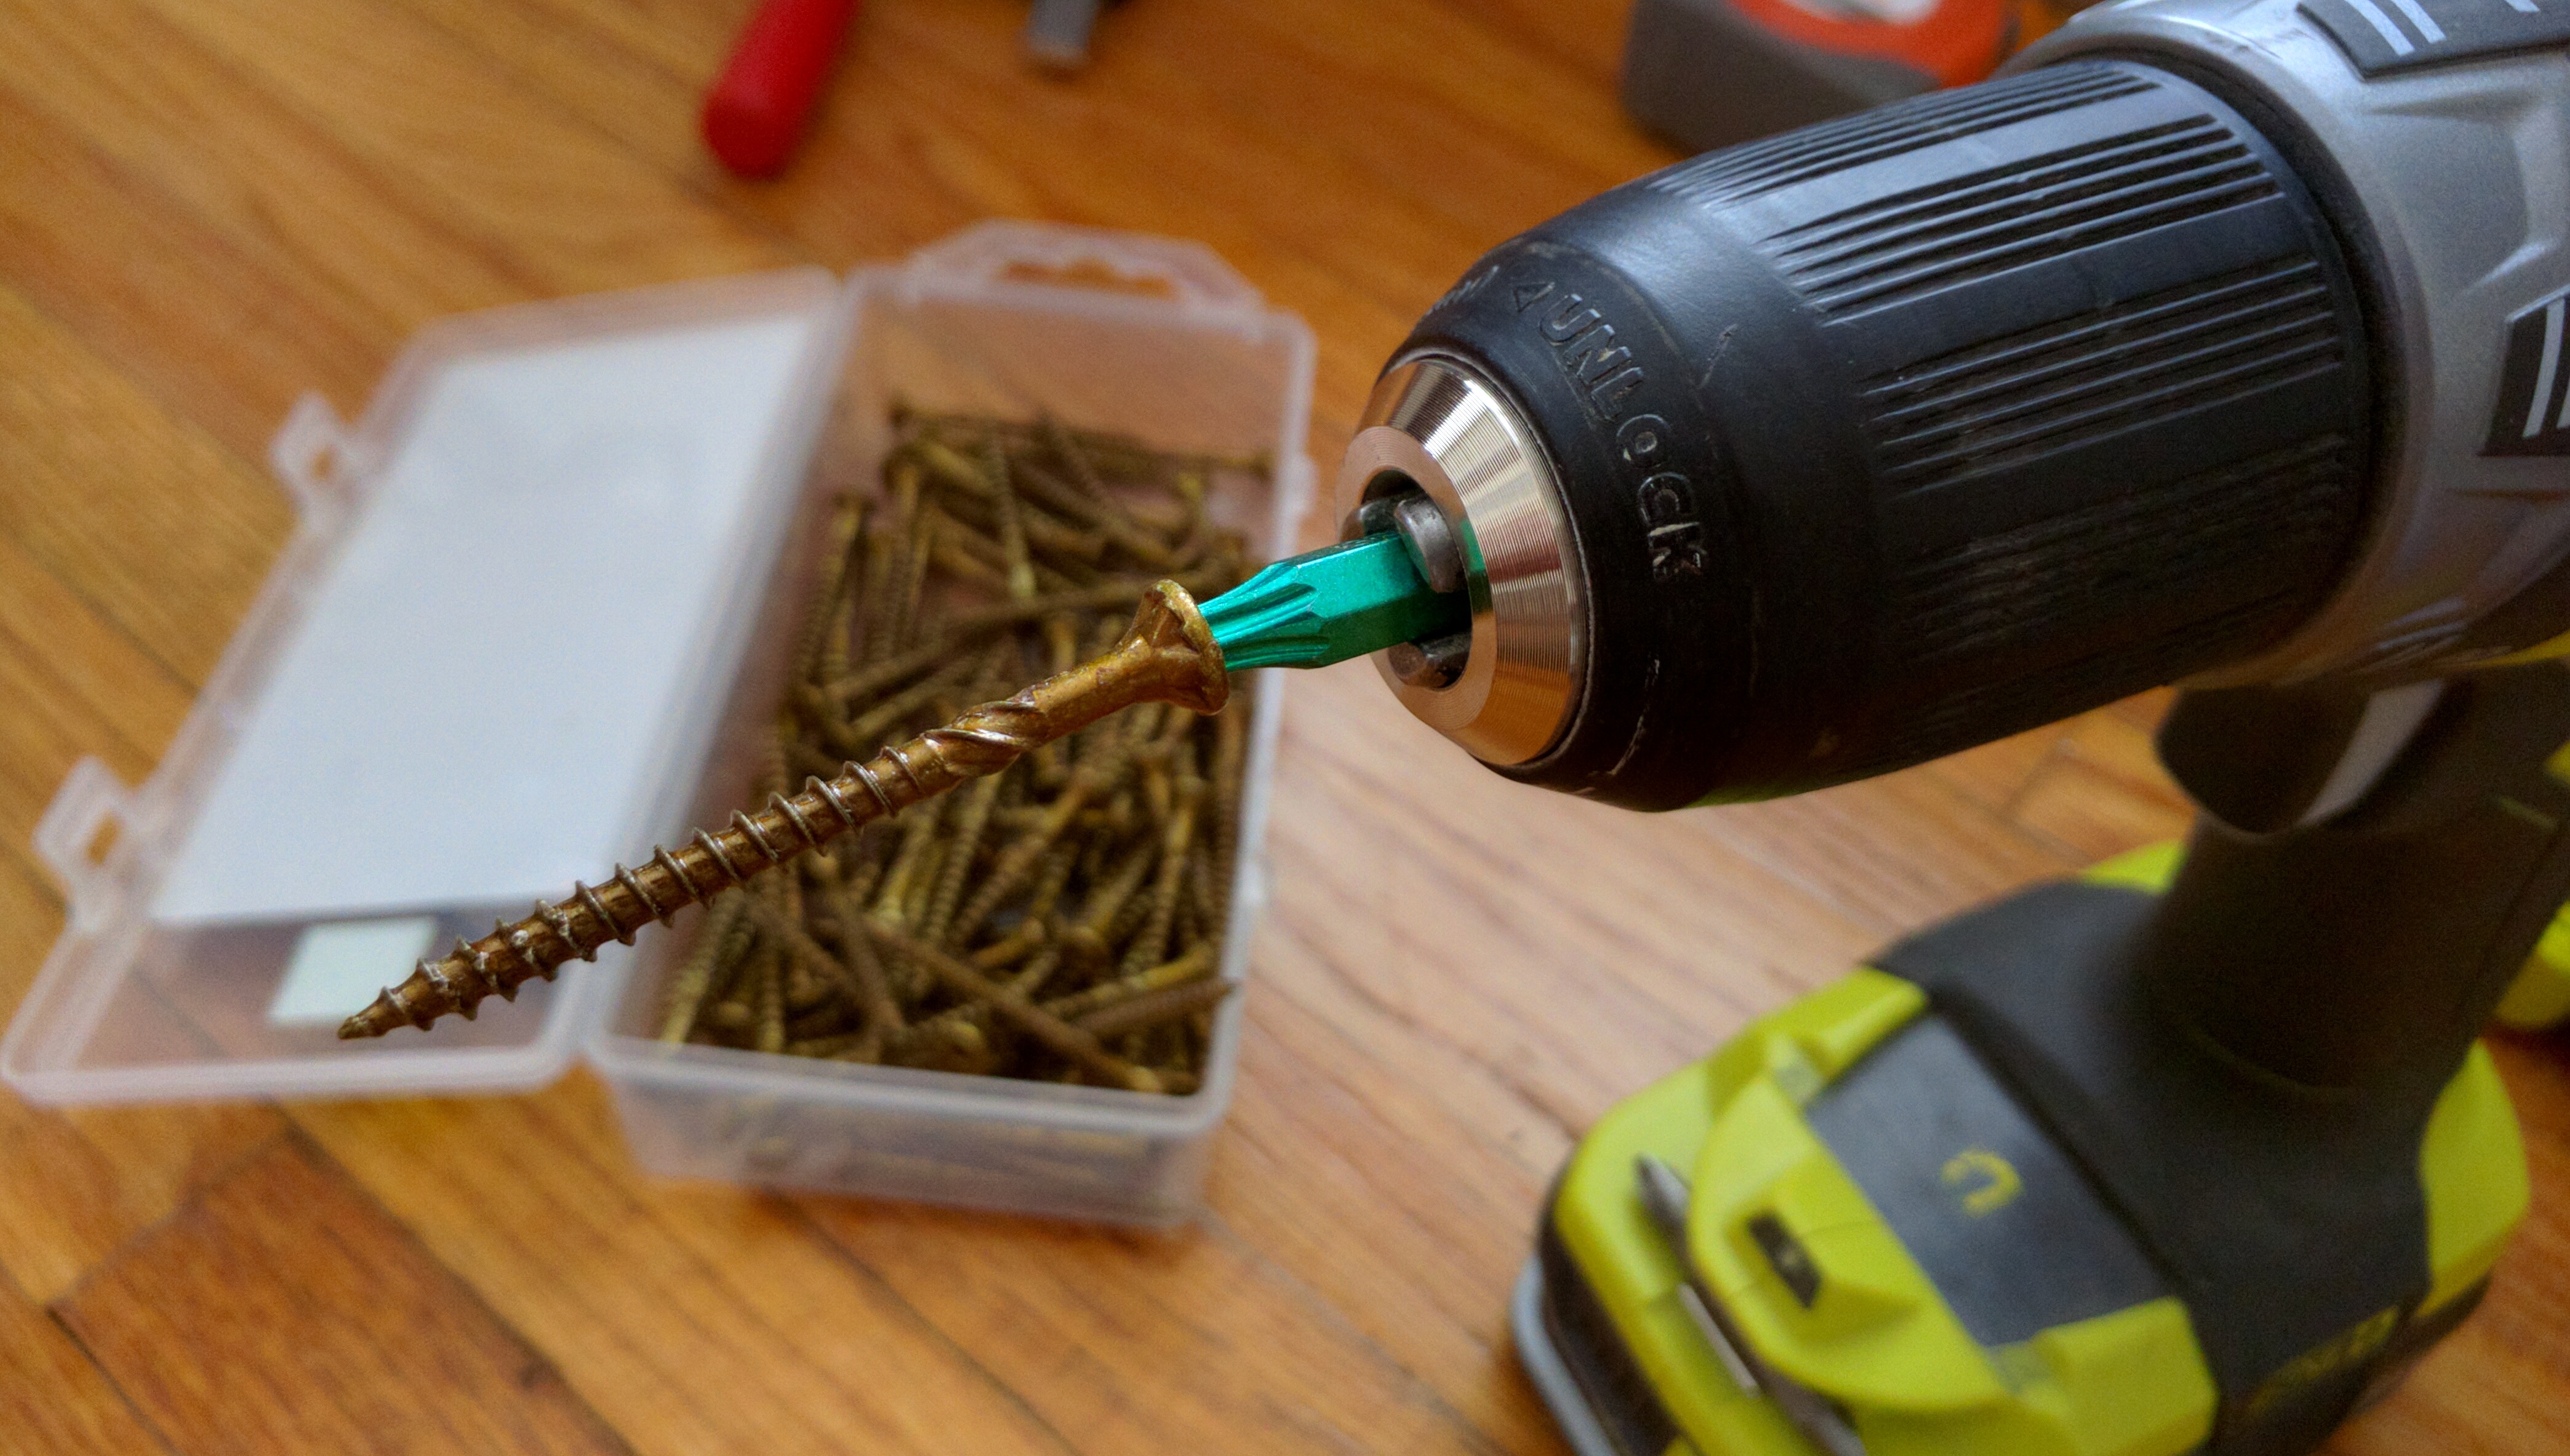
After 24 hours in the clamp it was time to screw the joint. I used a fancy German screw manufactured by GRK. They use a star head to minimize slipping, and a unique thread pattern to help avoid splitting the wood.
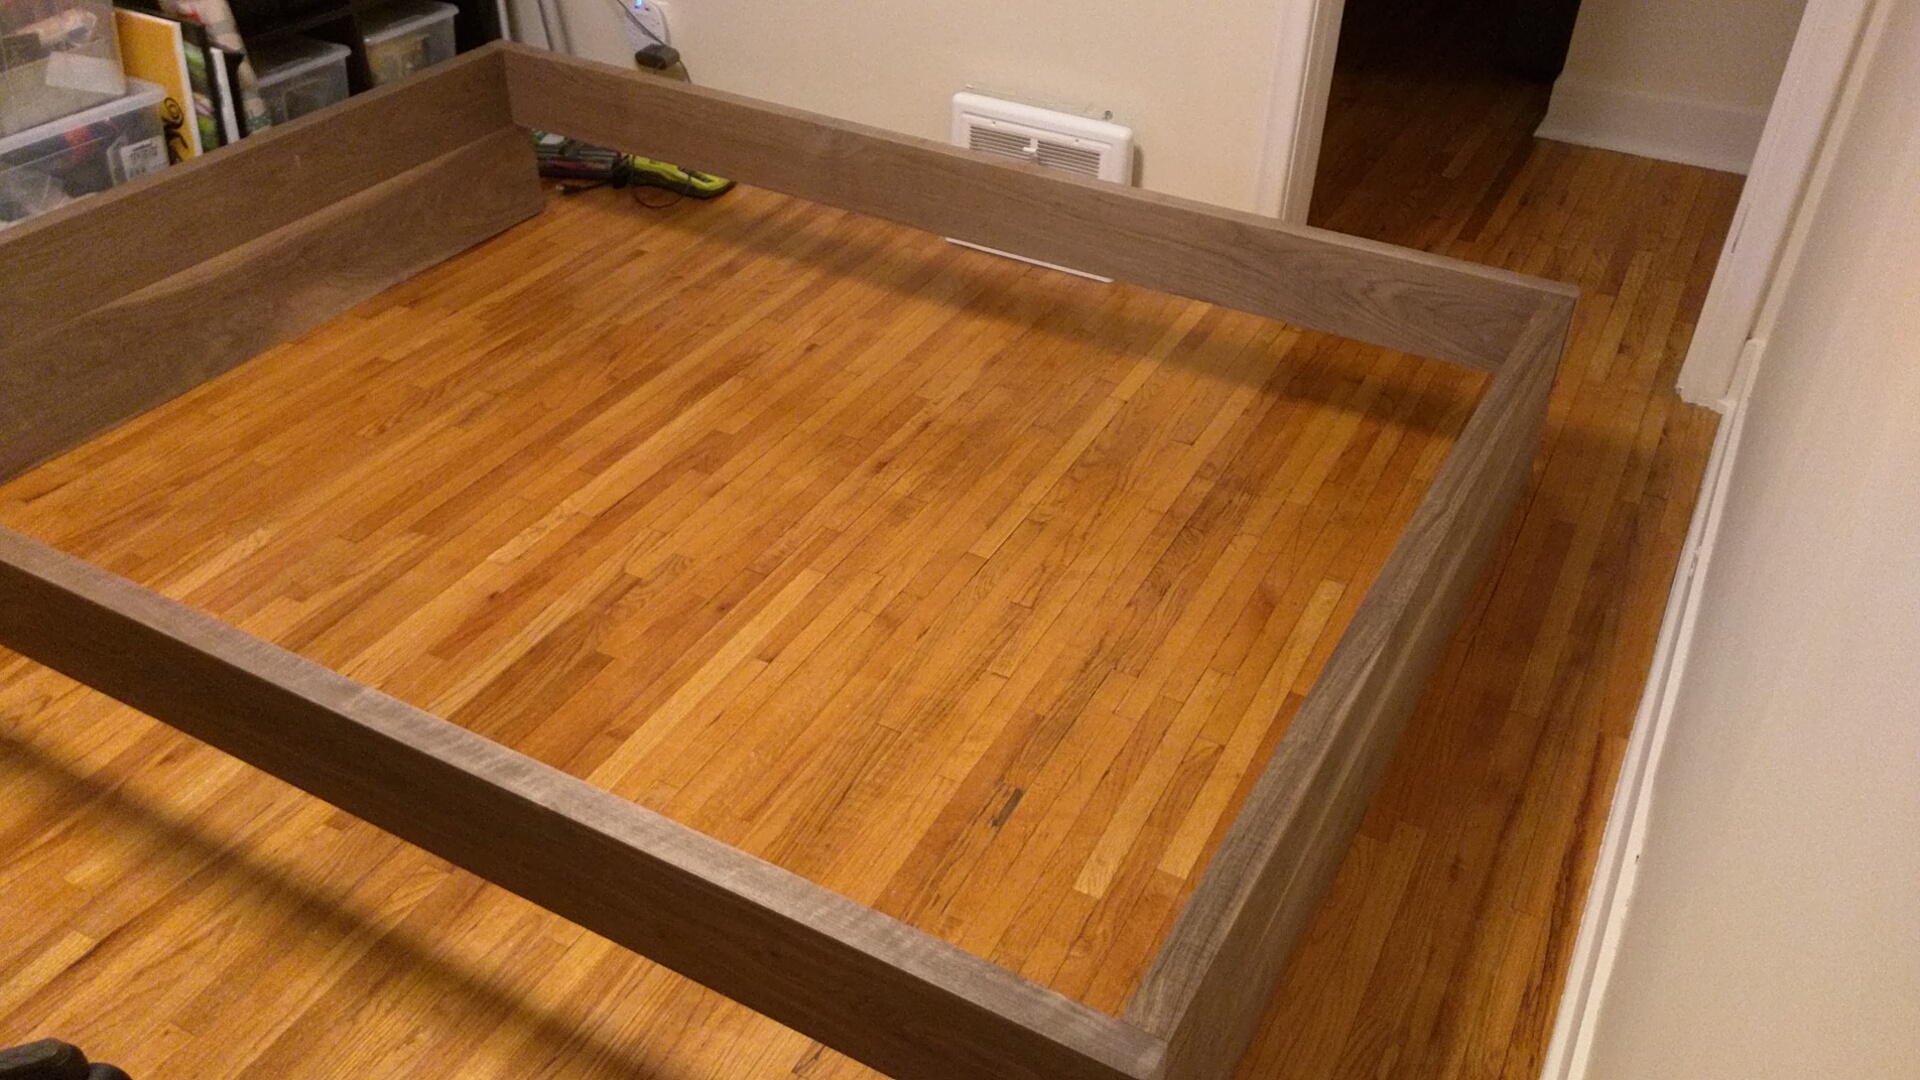
Once screwed I test fit the rail. Luckily it fit!
I then repeated the same sequence for the other bed rail.
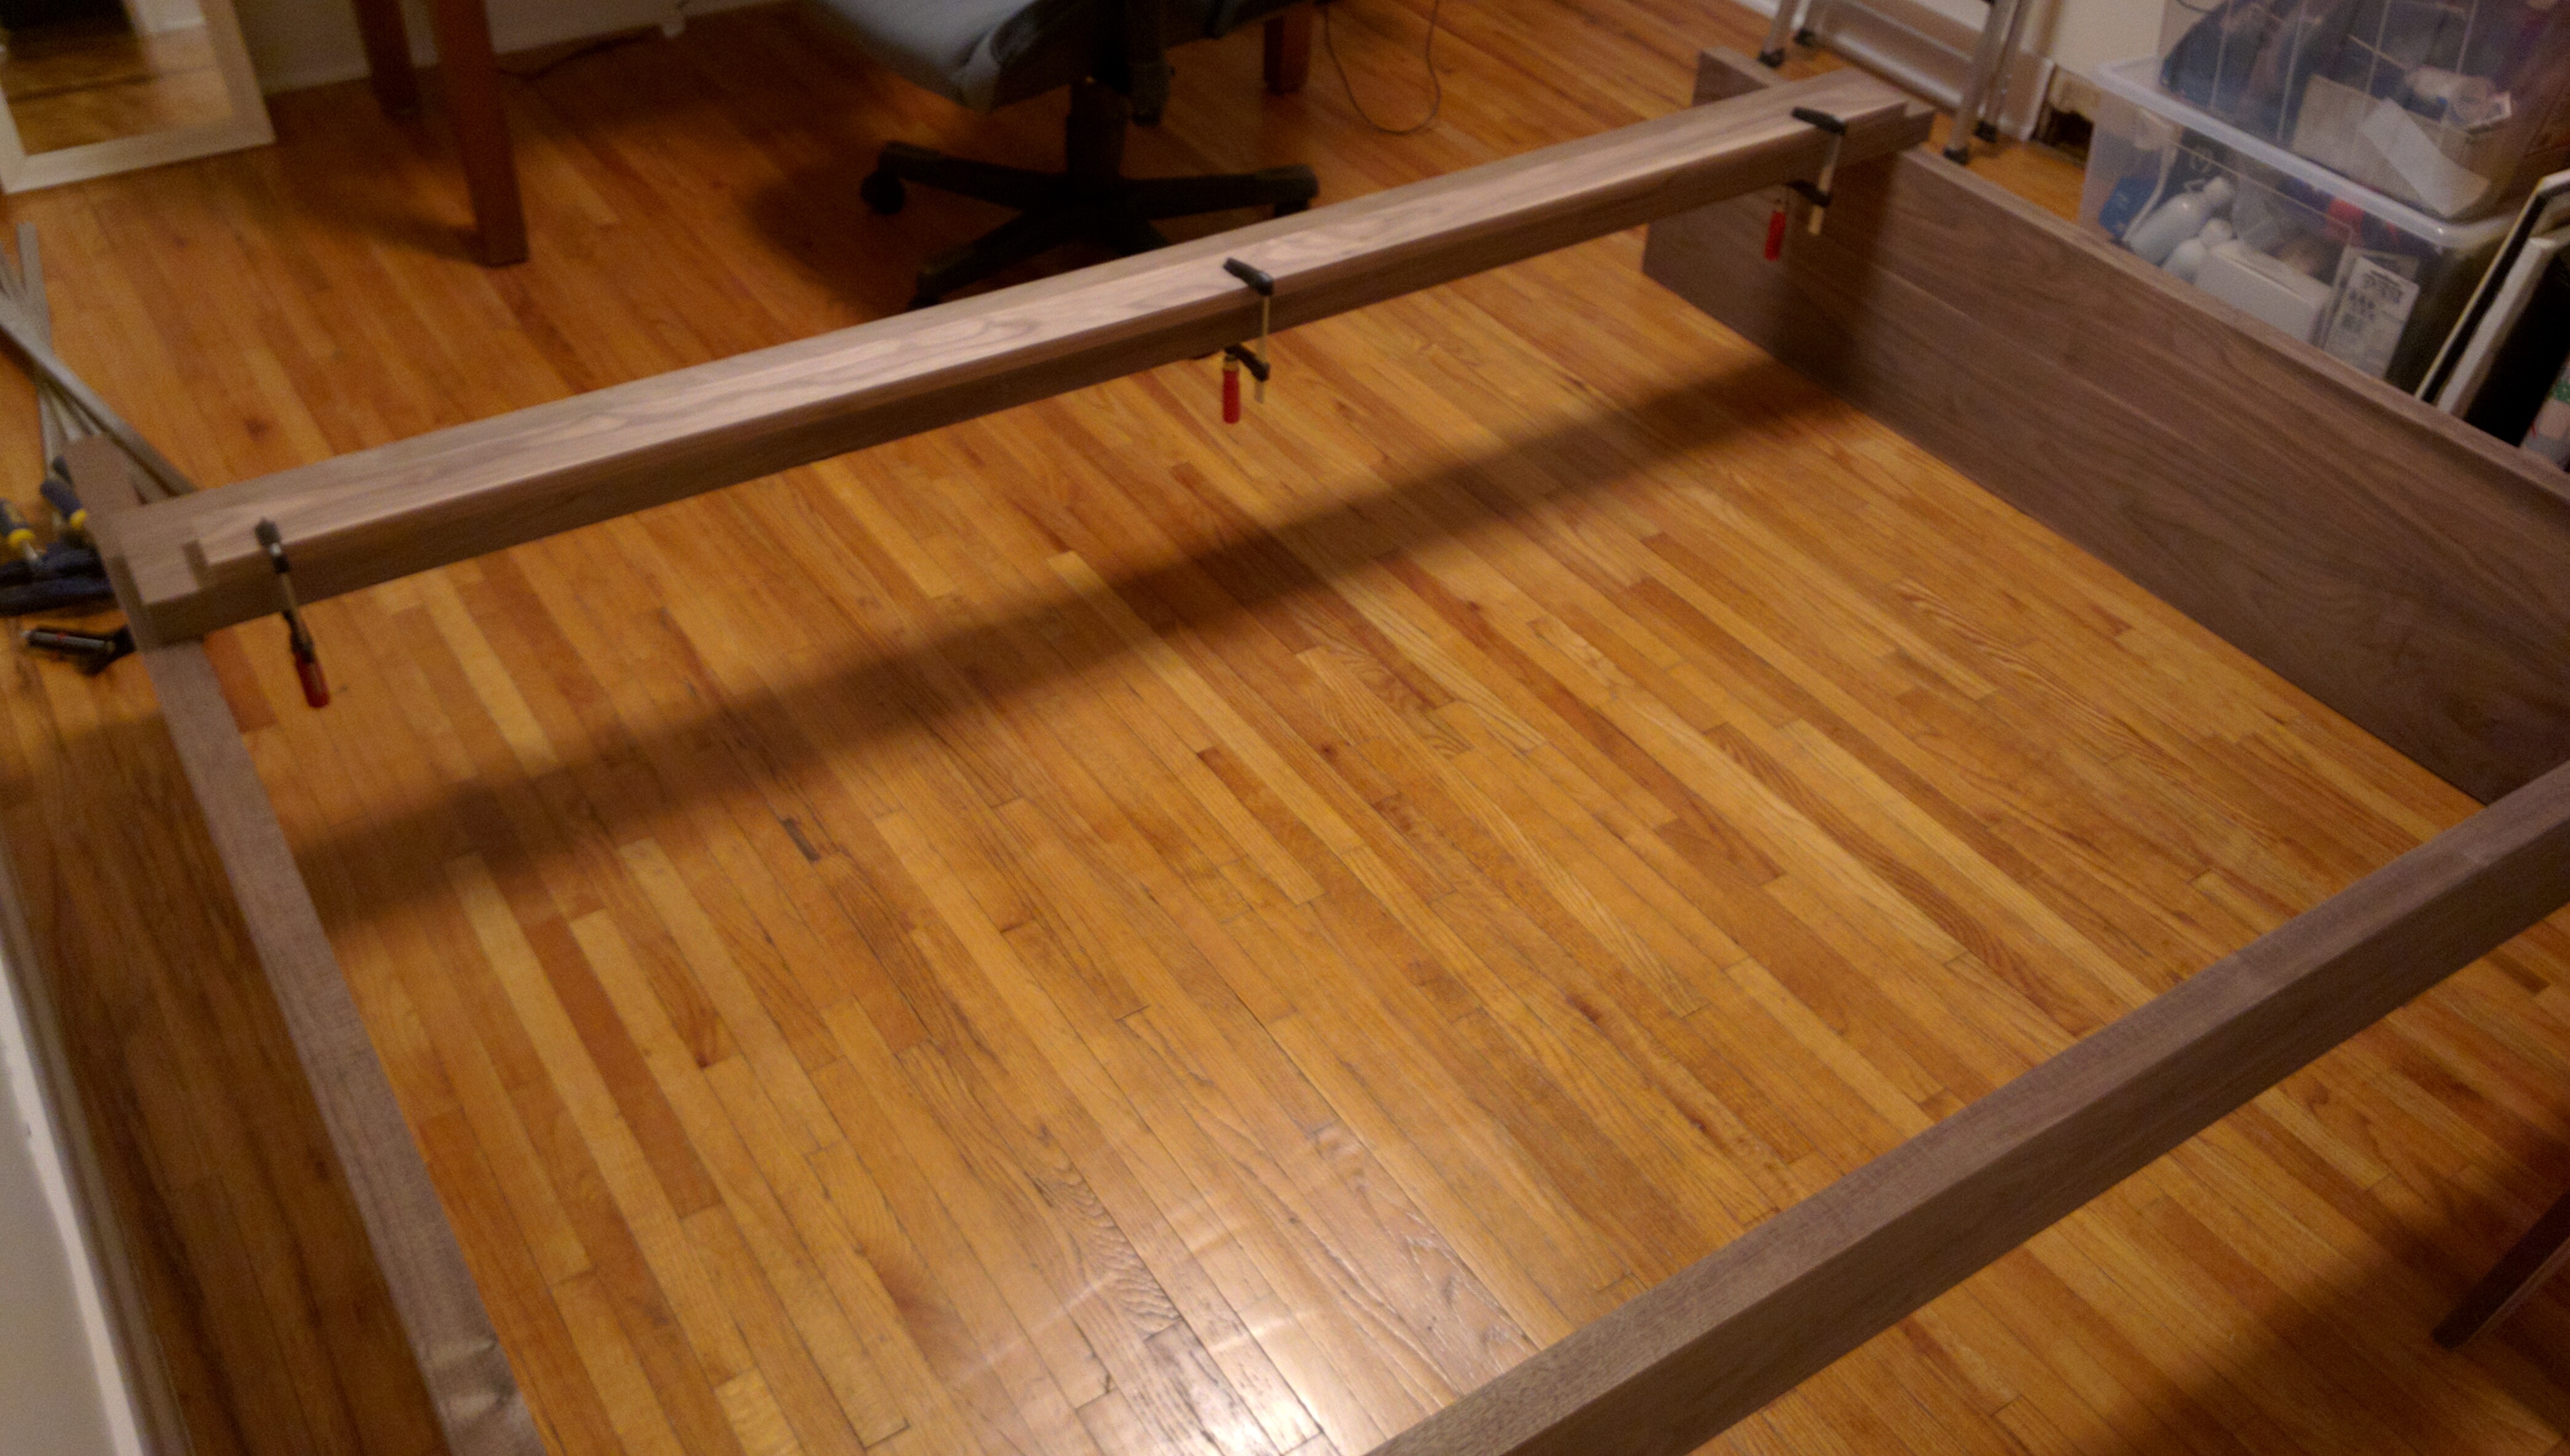
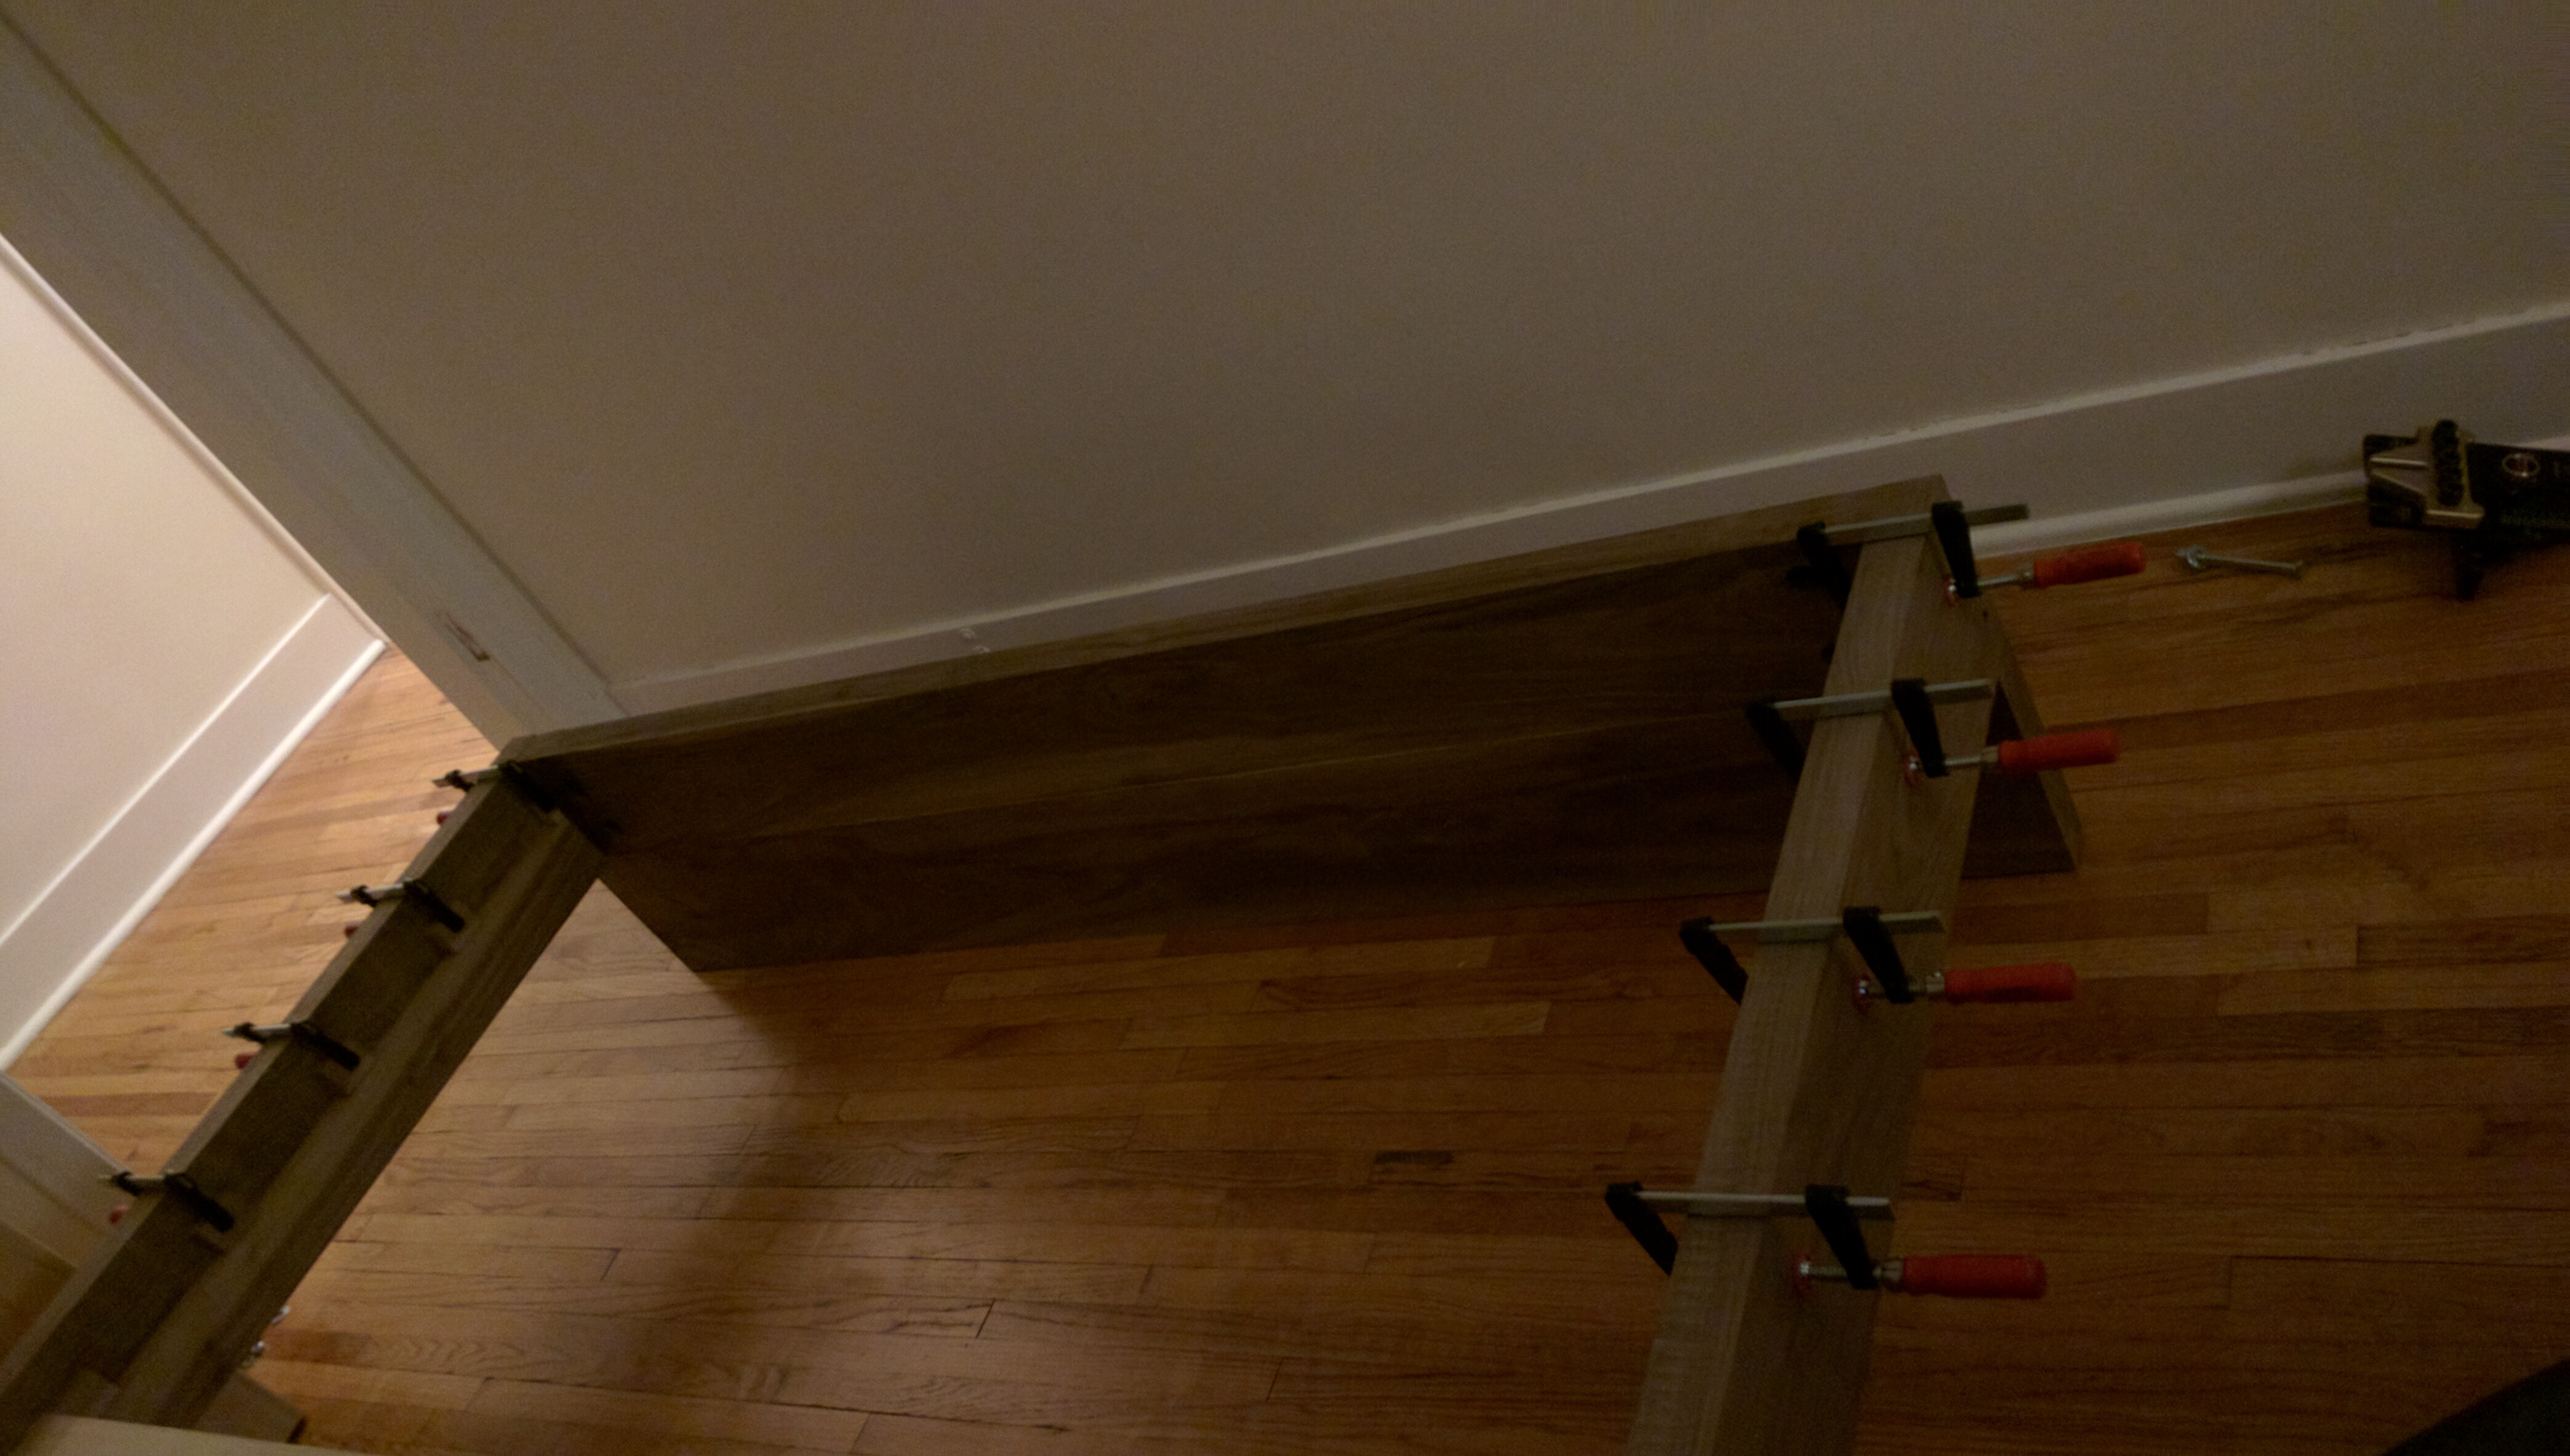
Next step was to glue the head and foot boards. Again I opted to use 1″ dowels for alignment and would rely on glue to hold the pieces together. Glue is really strong from what I understand. Often stronger than the wood itself. Here are the head and foot boards in clamps. The clamps are on both sides only to balance the piece. They are so heavy that when they are all on the same side the piece would tip over.
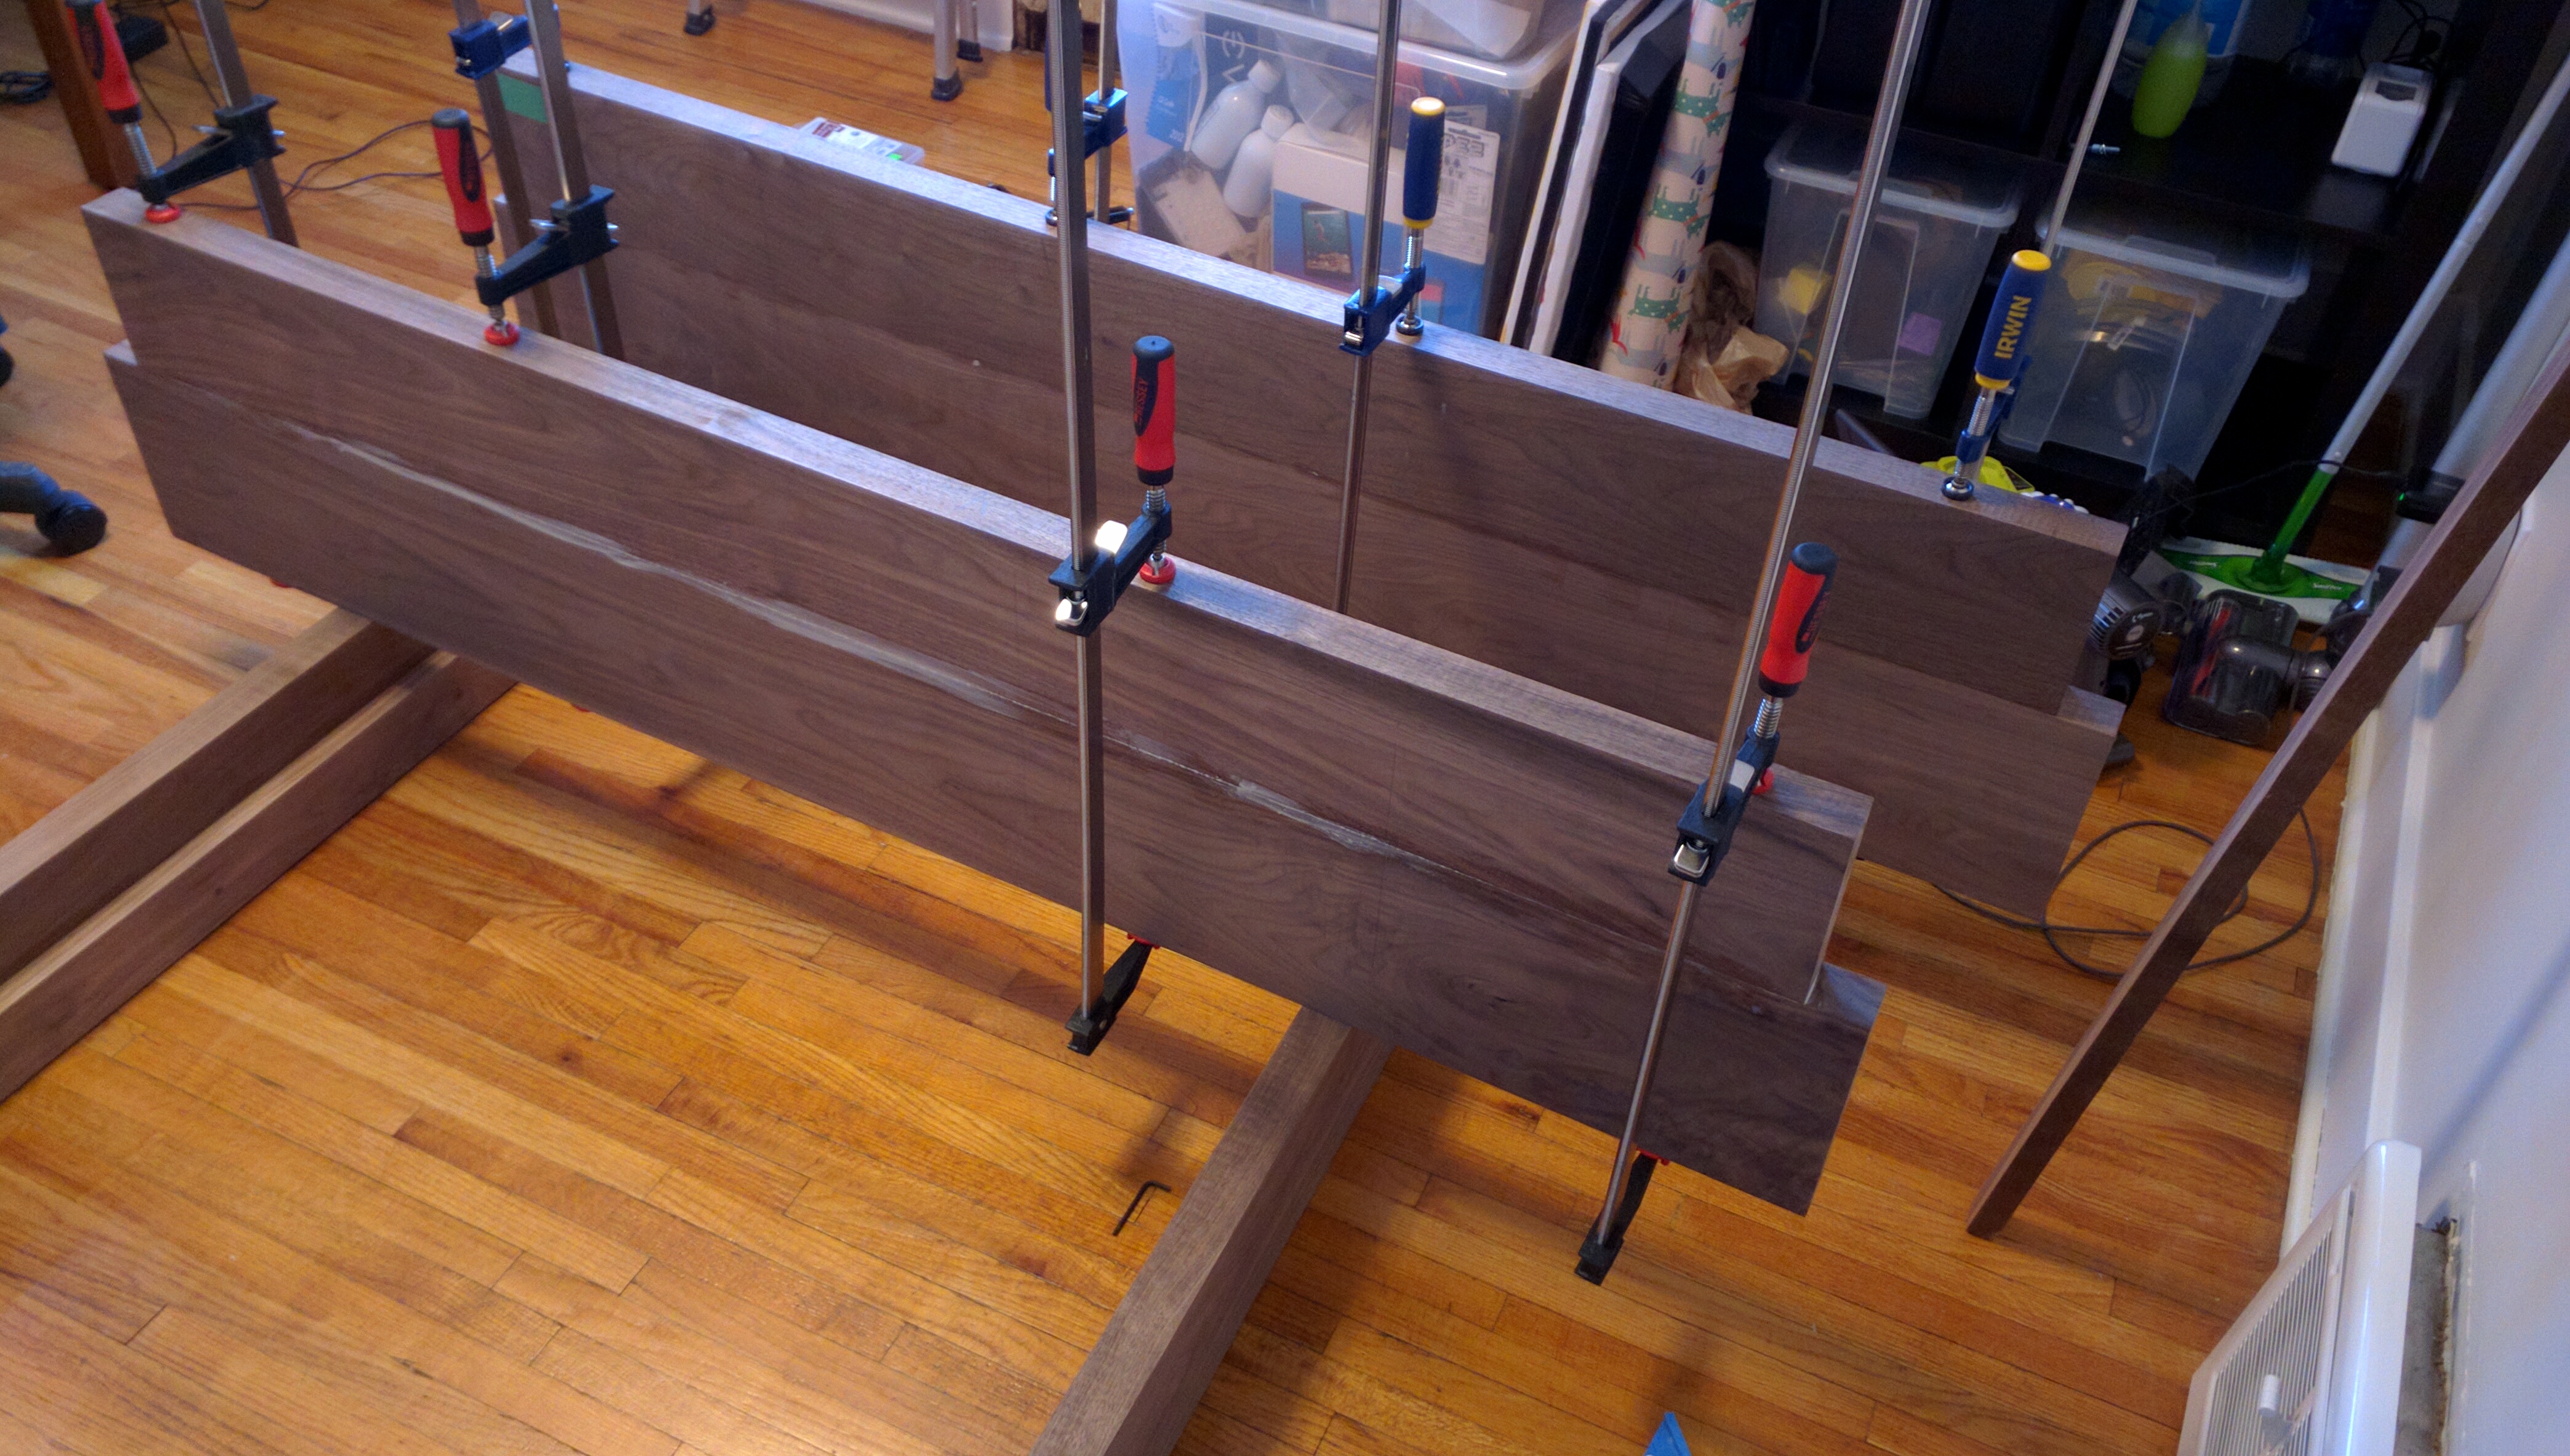
After another lengthily 24 hour period I test fit everything to make sure nothing went wrong.
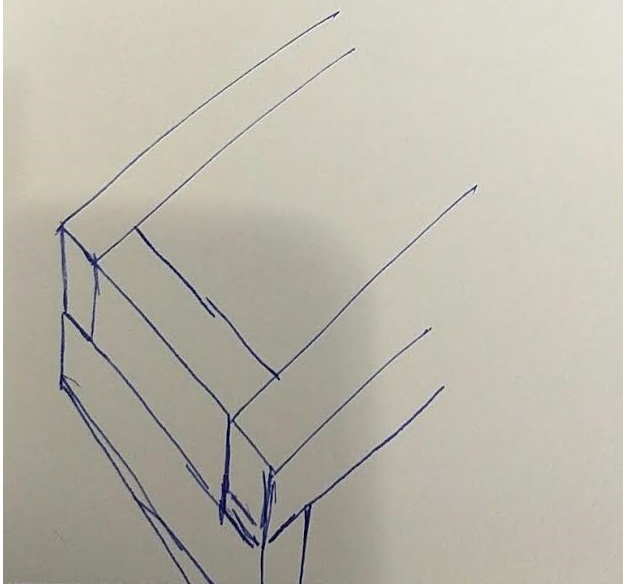
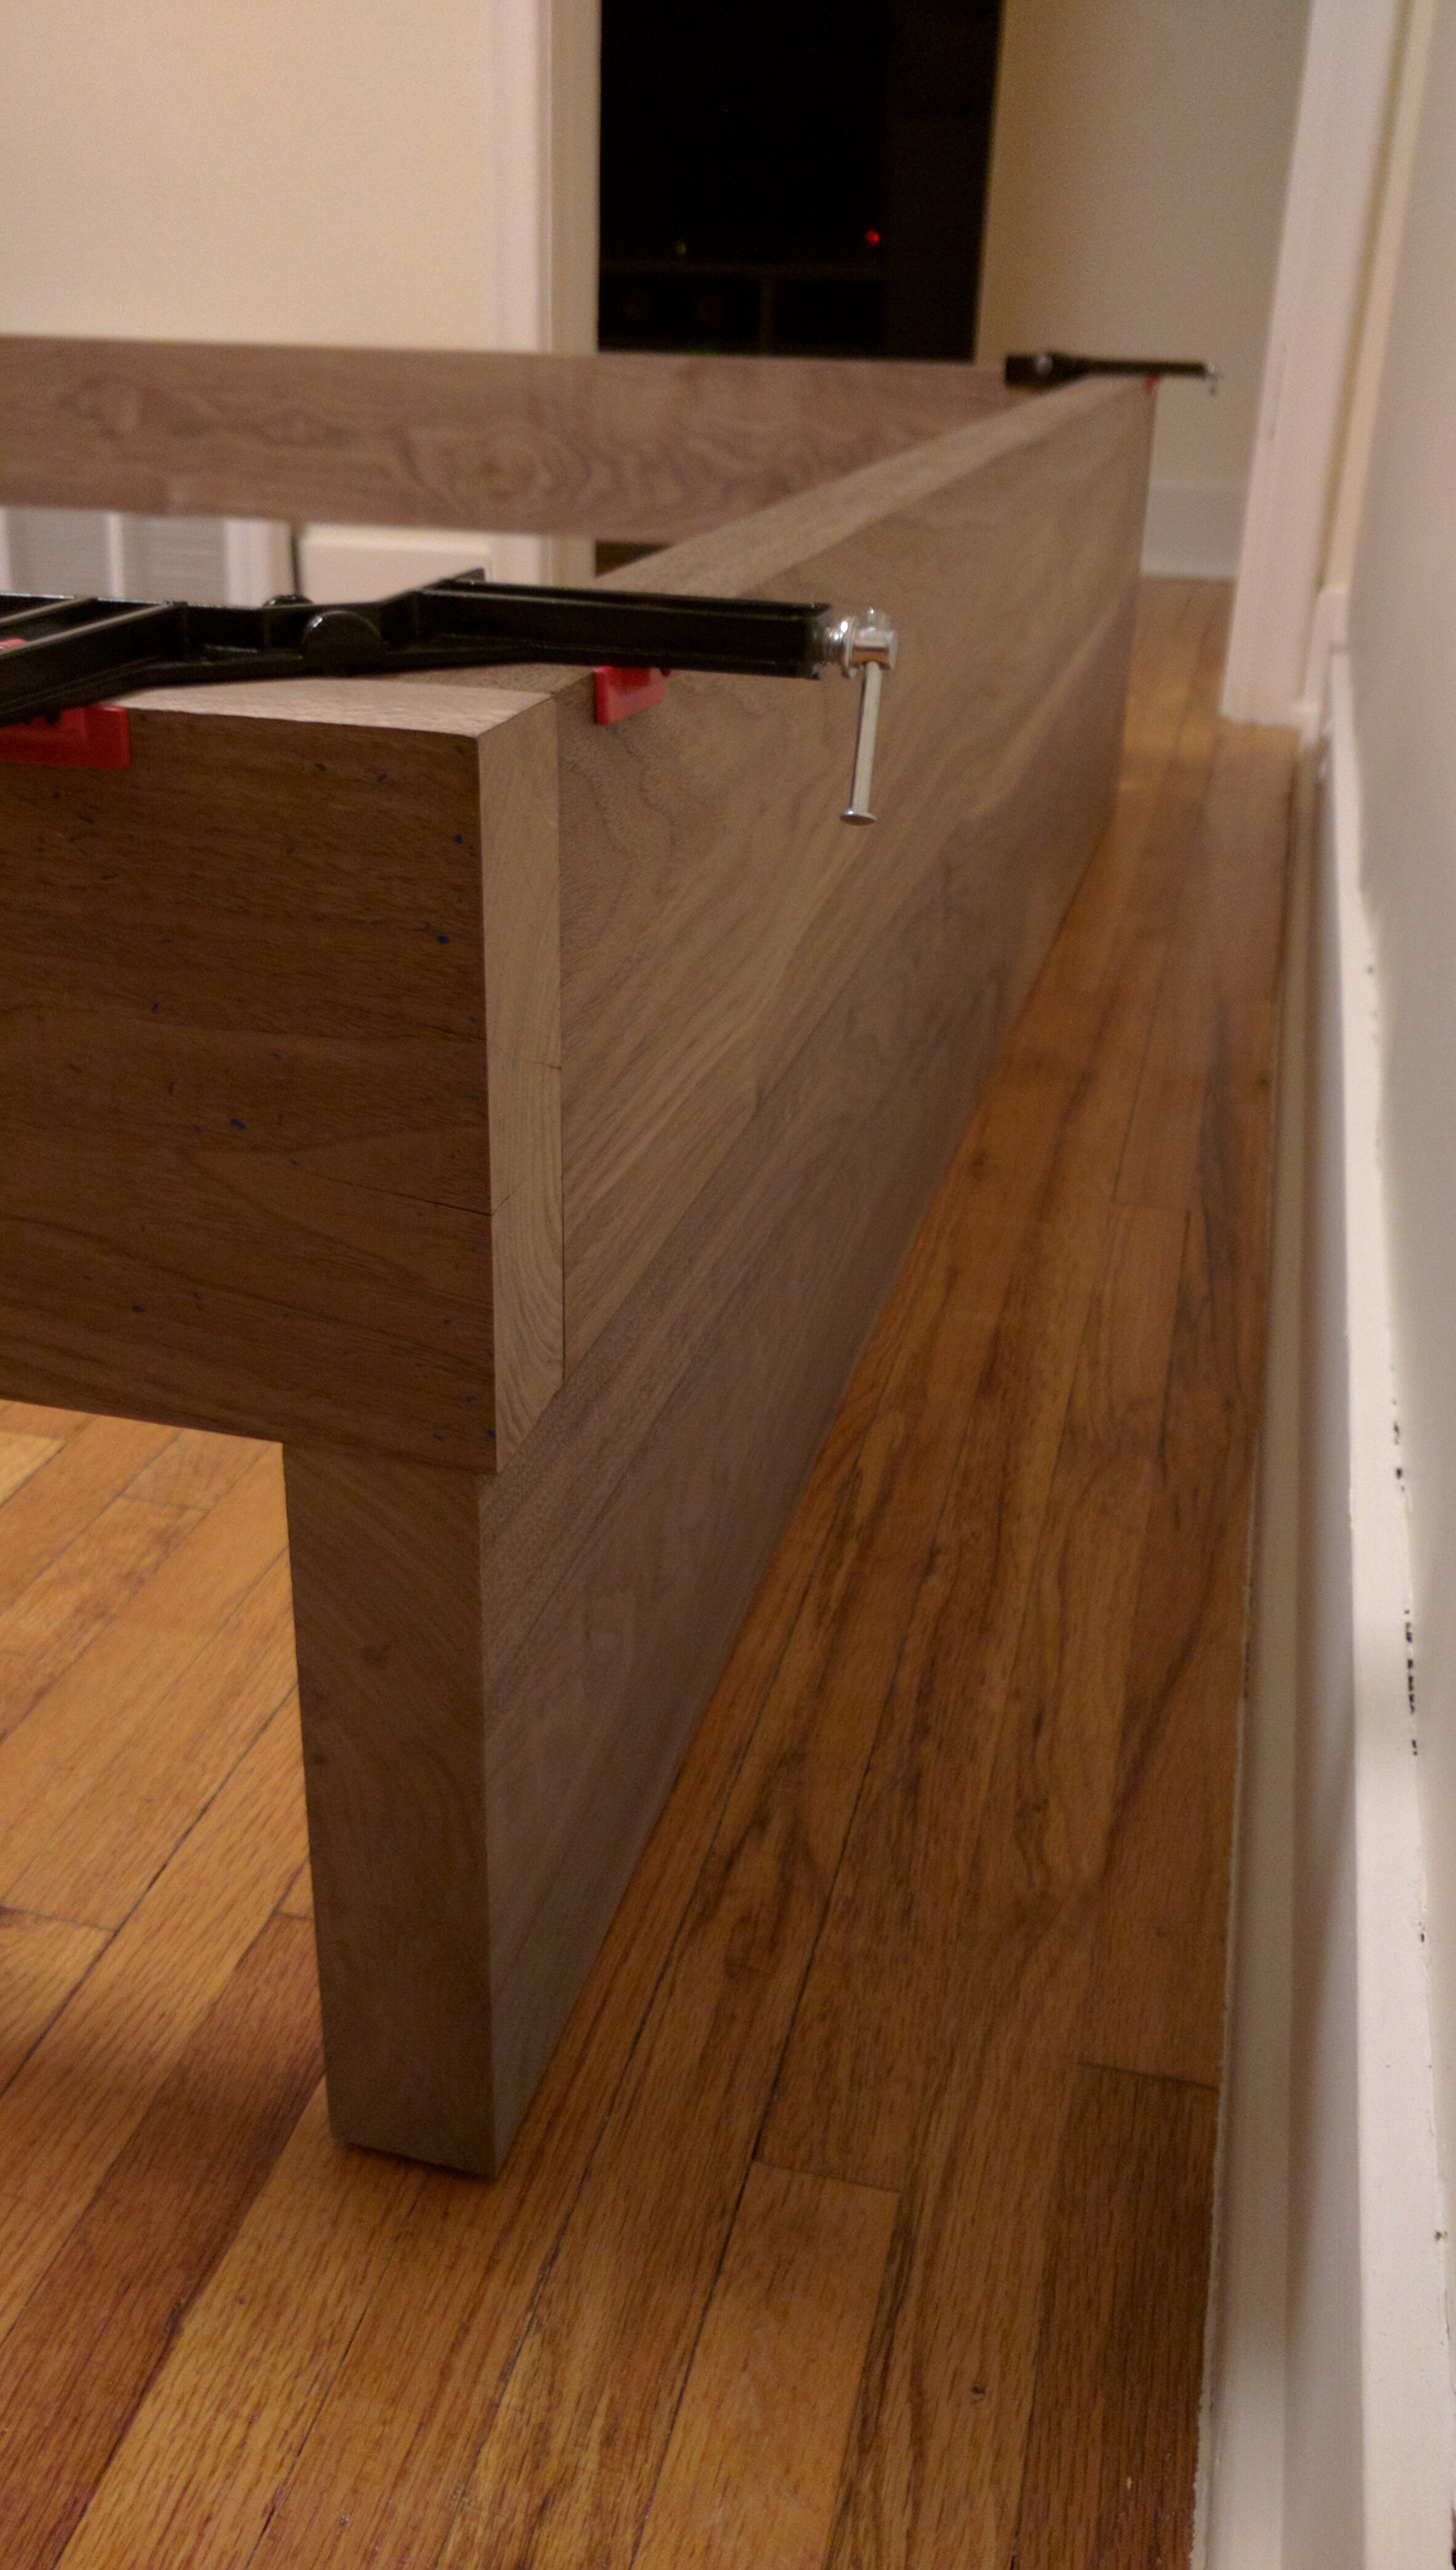
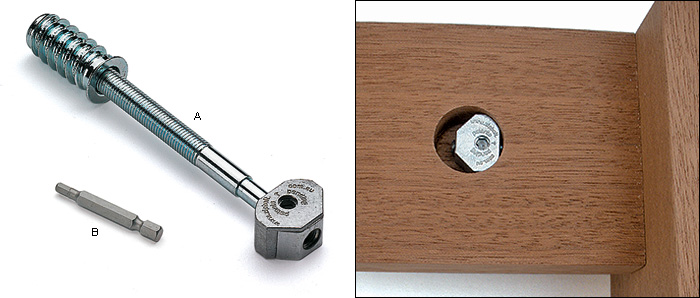
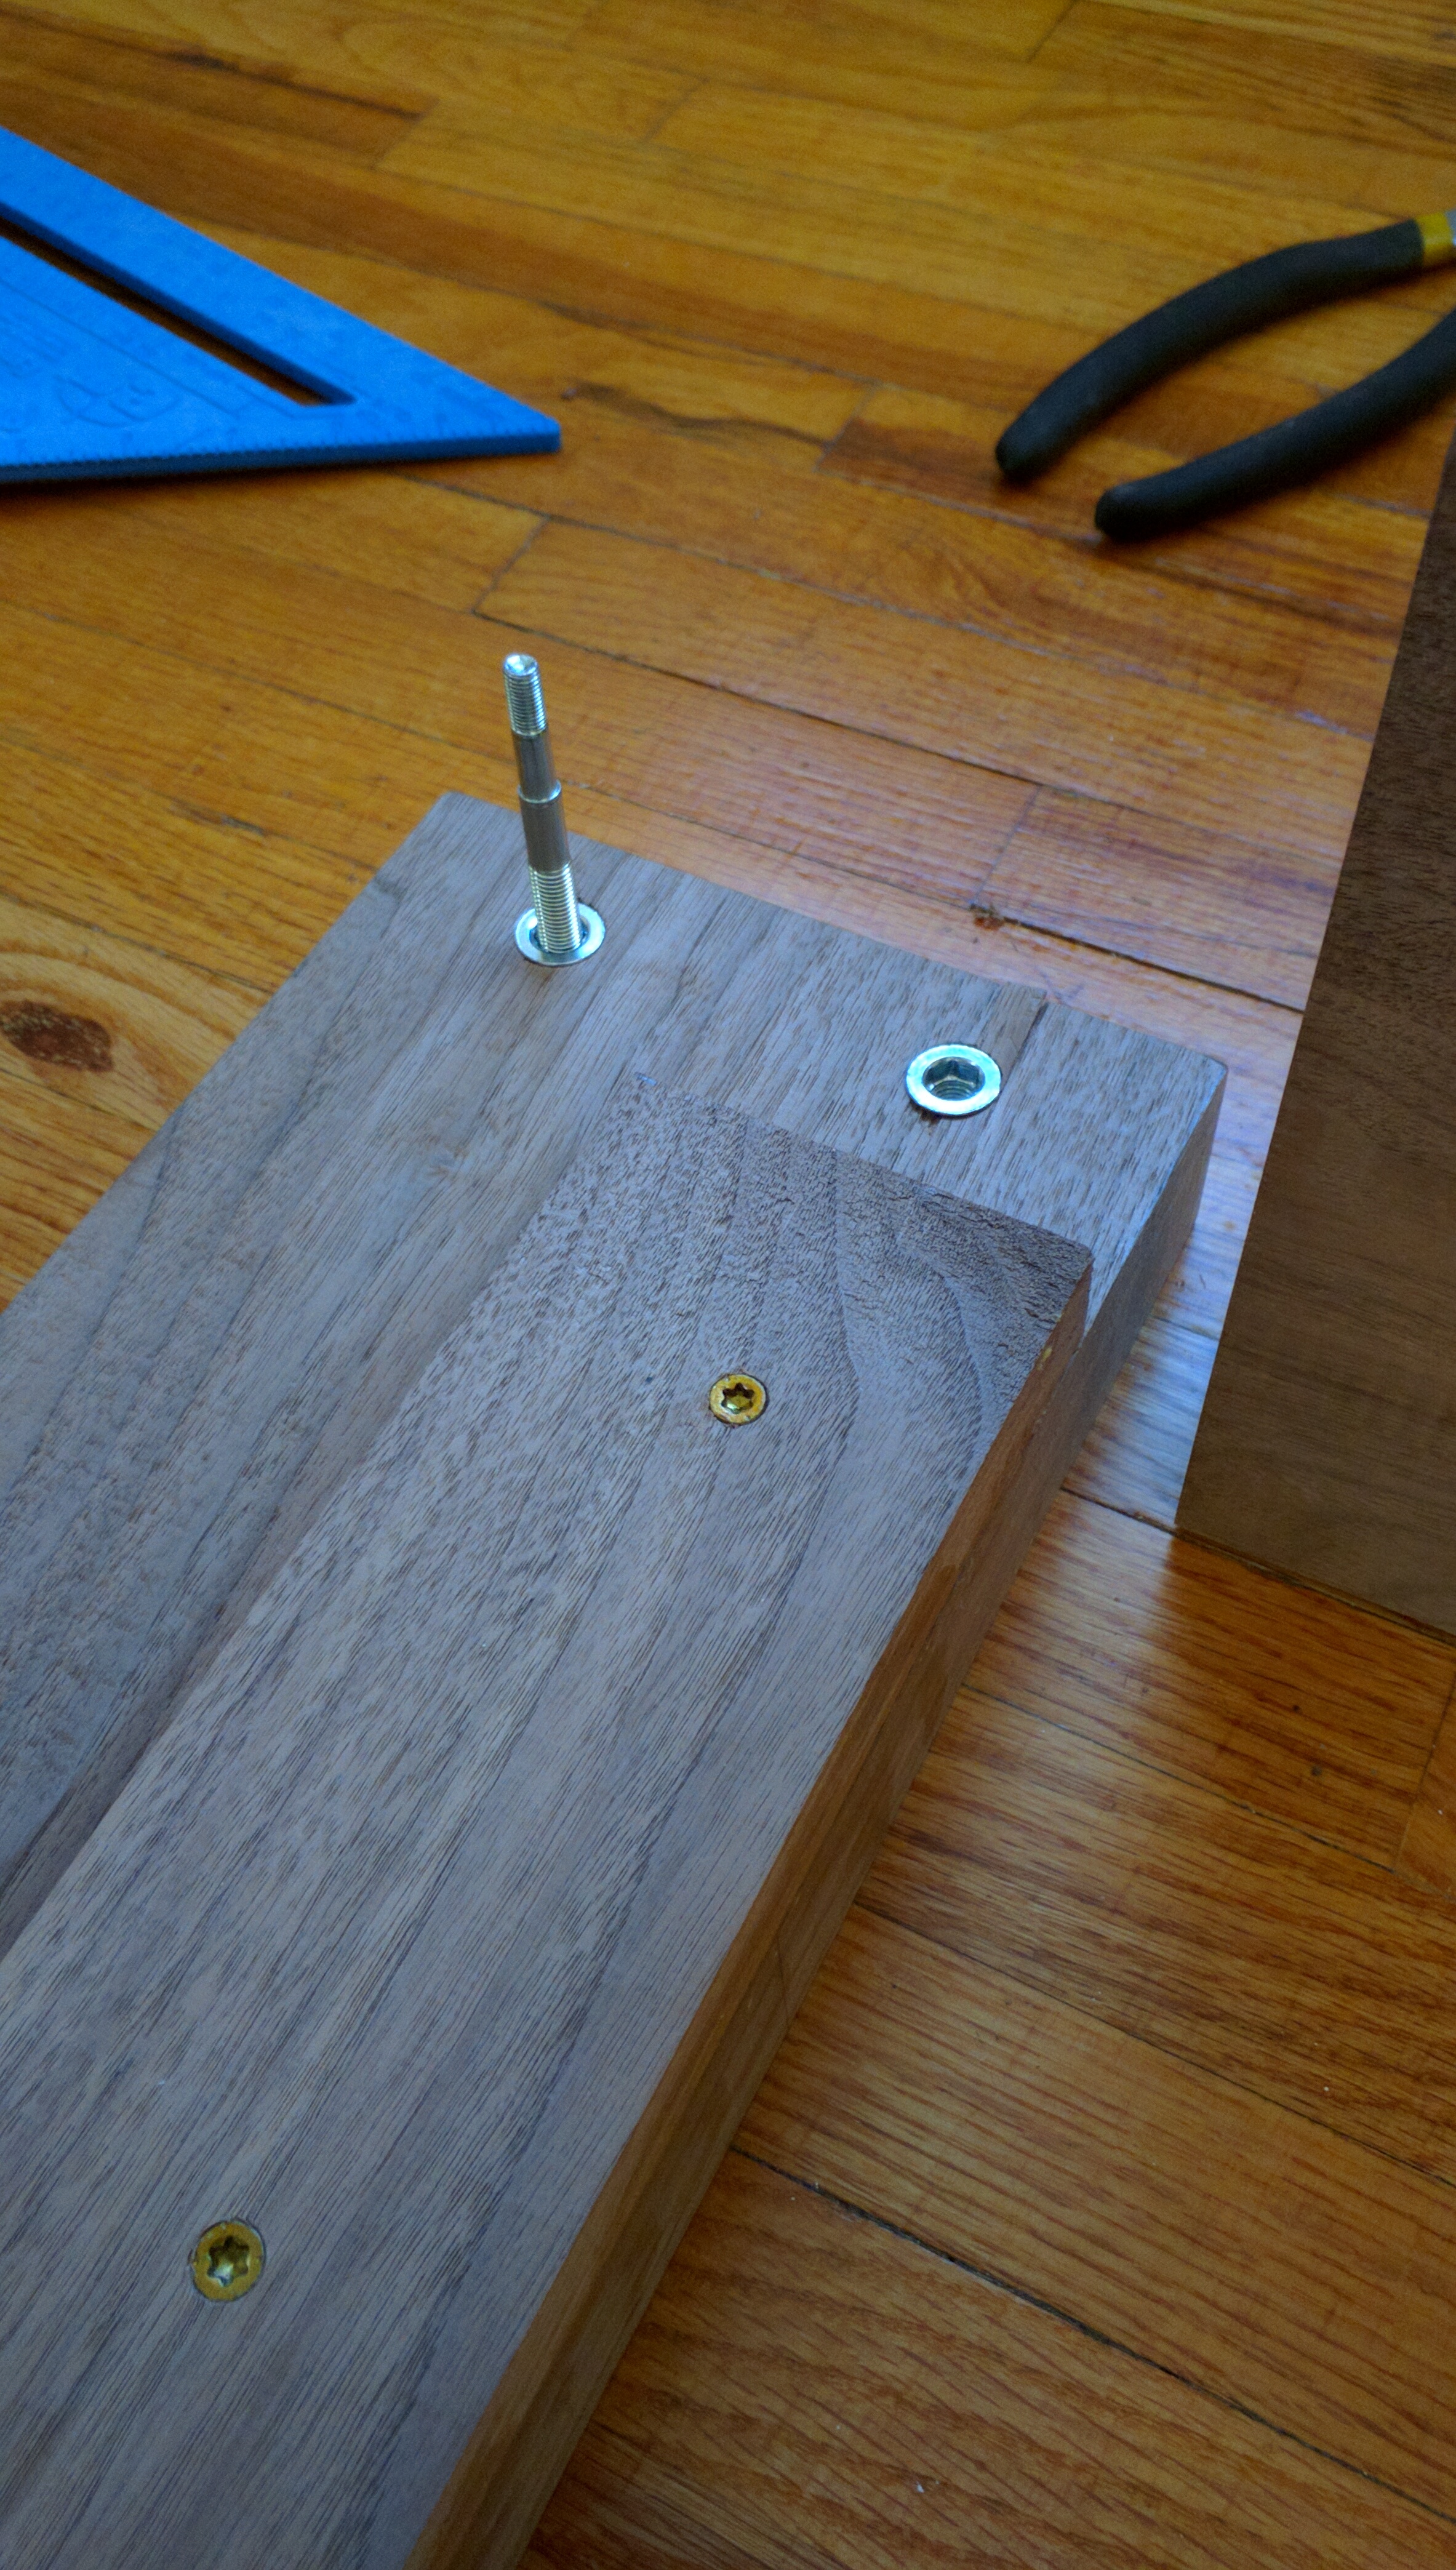
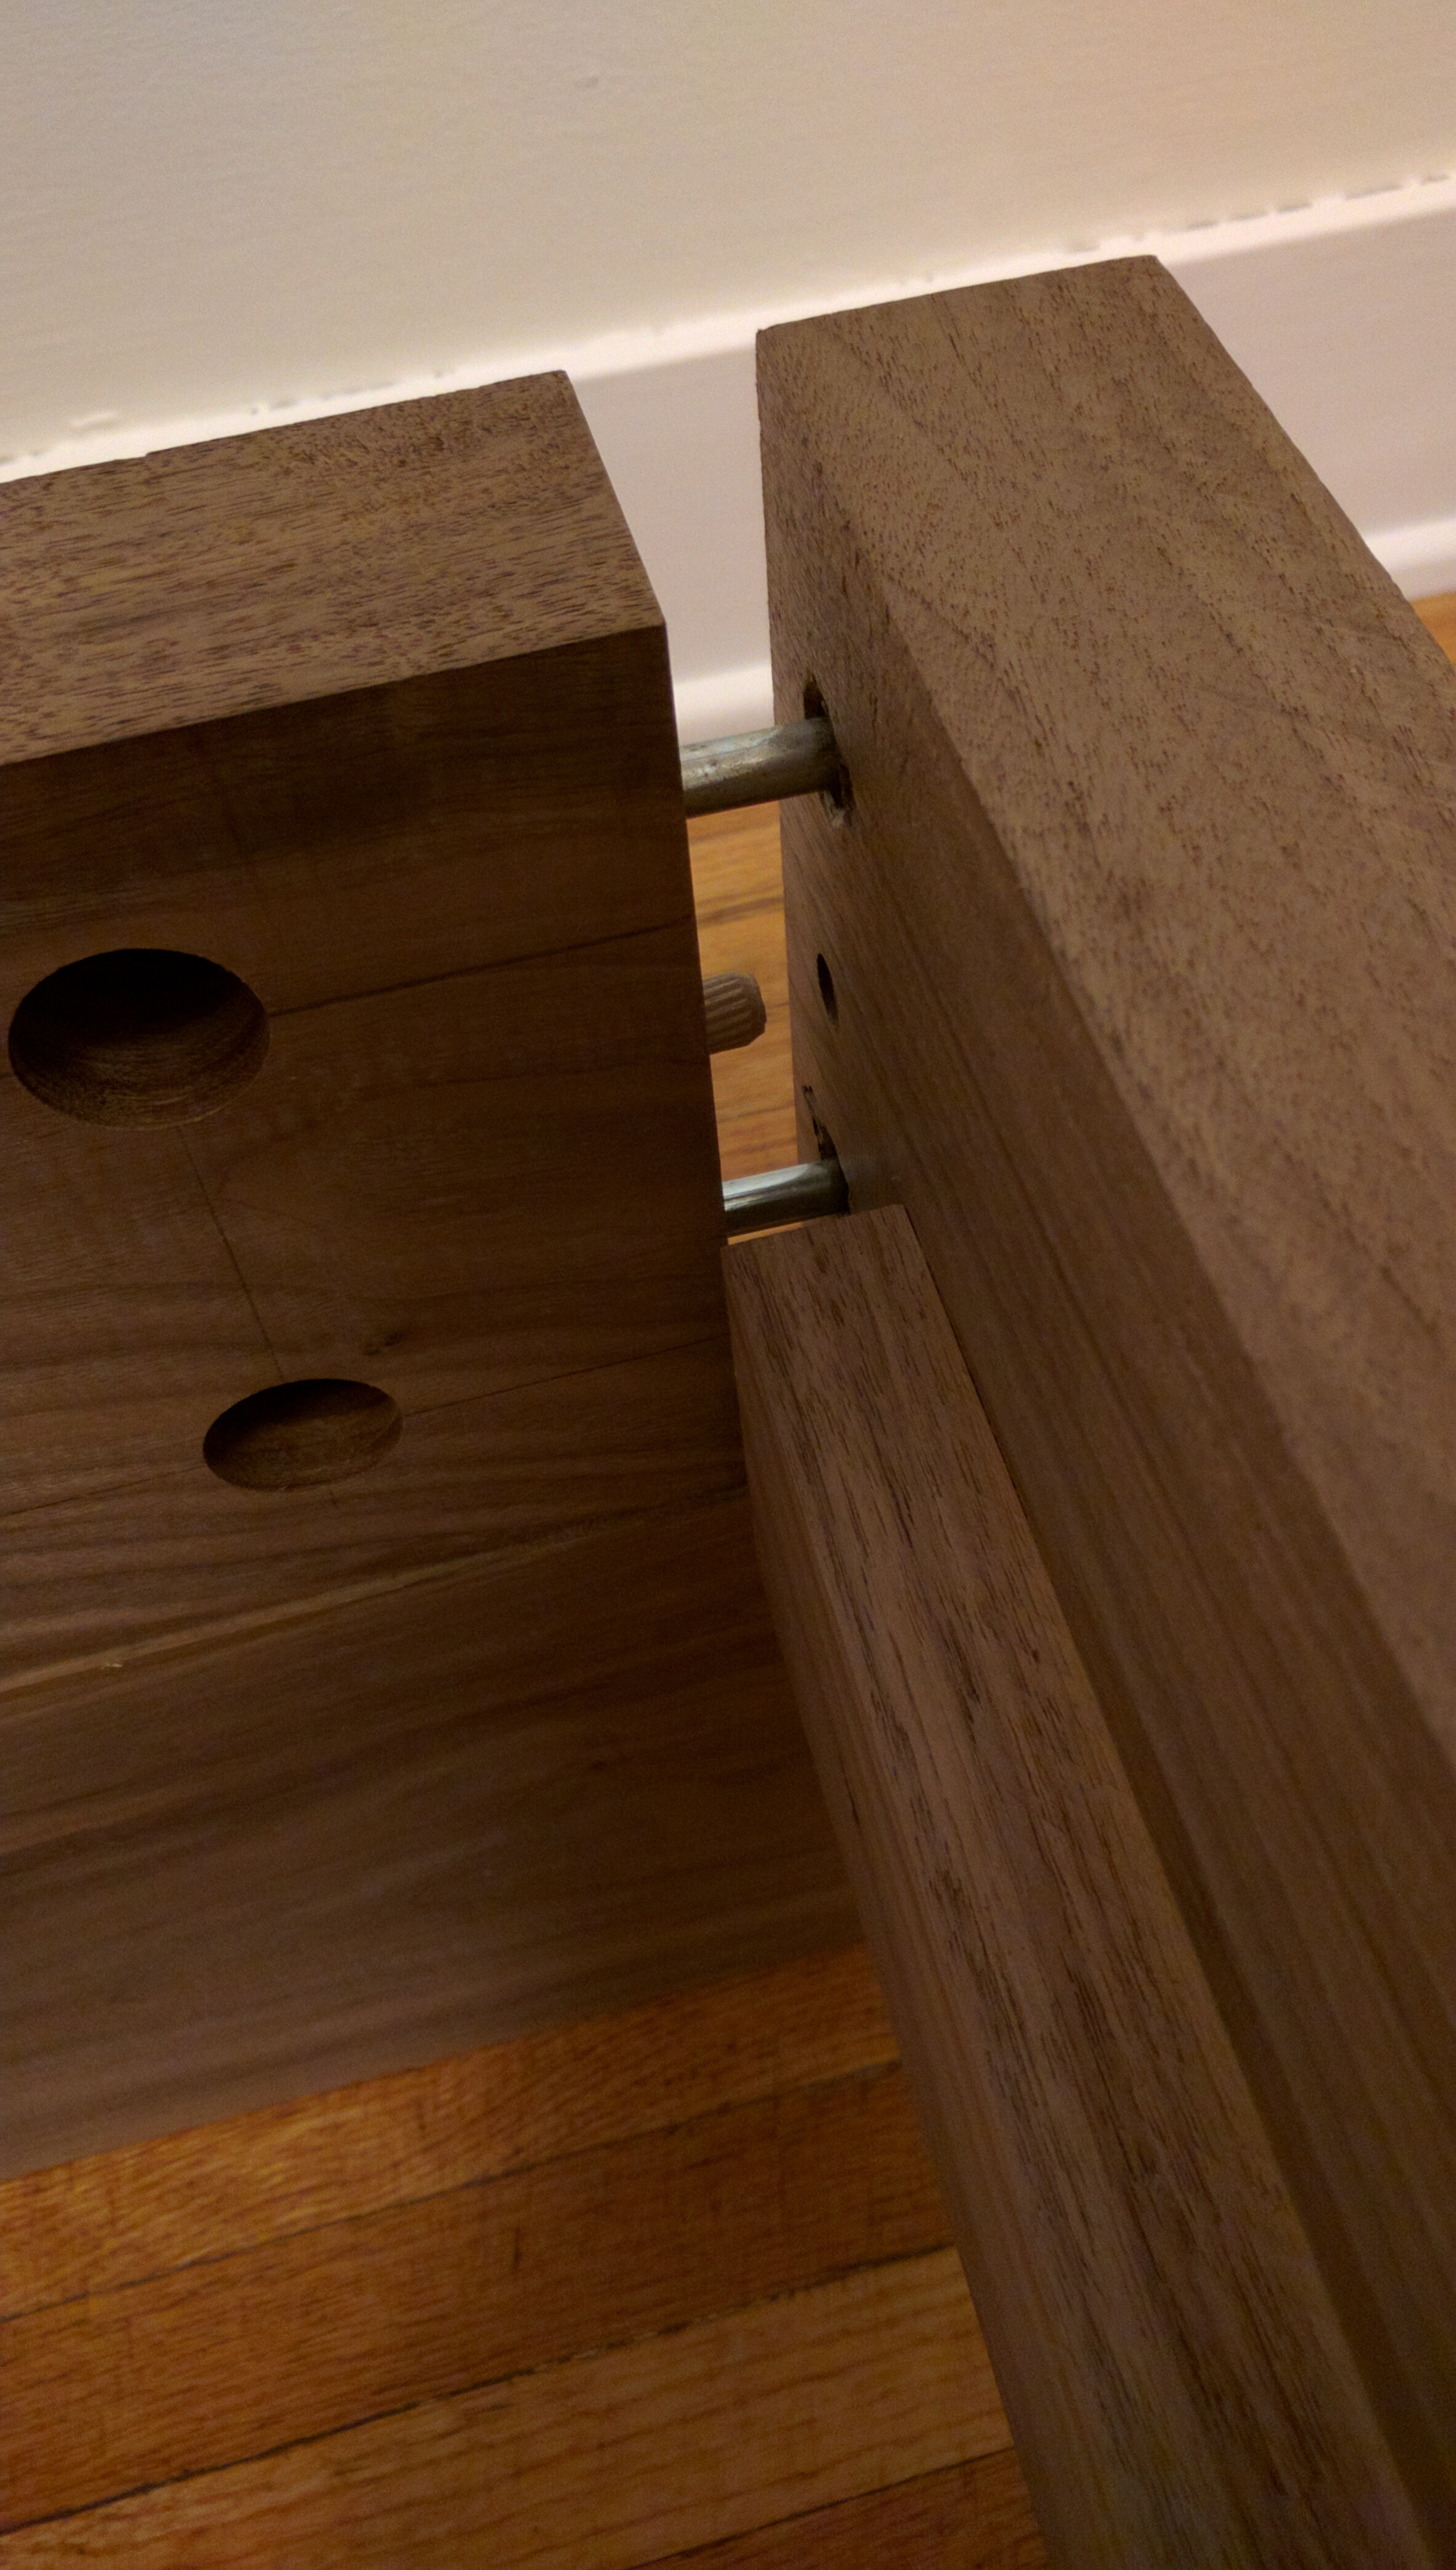
The next step was to somehow attach the rails to the head / foot boards. I opted to use a zip bolt. The bigger screw part would be screwed into the head / foot boards and the longer bolt piece would be tapped into the rails.
So off I went measuring and drilling. I used the dowel jig again here to align the holes and to make sure I was drilling straight.
To drill the holes I used a 1″ Forster bit. The taps were going to be exactly in the middle of the rail, so I needed to drill down just a bit further than 1″. I marked the 1″ point on the drill bit and used some tape to make sure I didn’t go too deep.
Once the holes were drilled I lined up the jig again and drilled the tunnels. I drilled the holes before the tunnels so that I didn’t need to worry about how deep to drill the tunnels. Just drill them until they meet the holes. Easy.
Now, move the jig to the rail and drill out the hole for the screw. The big screw that goes into the rail is 31mm long so I needed a to drill a 31mm deep hole. I used a collar on the drill bit to make sure I drilled to the exact depth.
With everything drilled it was time to install the screws. These monsters come with a 5mm hex key to screw them into the hole.
At the end of this step I ran into my first problem. It turns out the screws are 12mm (15/32) in diameter, and so my pilot hole needed to also be 12mm (15/32). My jig was only big enough for a 3/8 hole so I had to free hand it. I installed the bigger drill bit into my drill and began to enlarge the holes so the screw would fit.
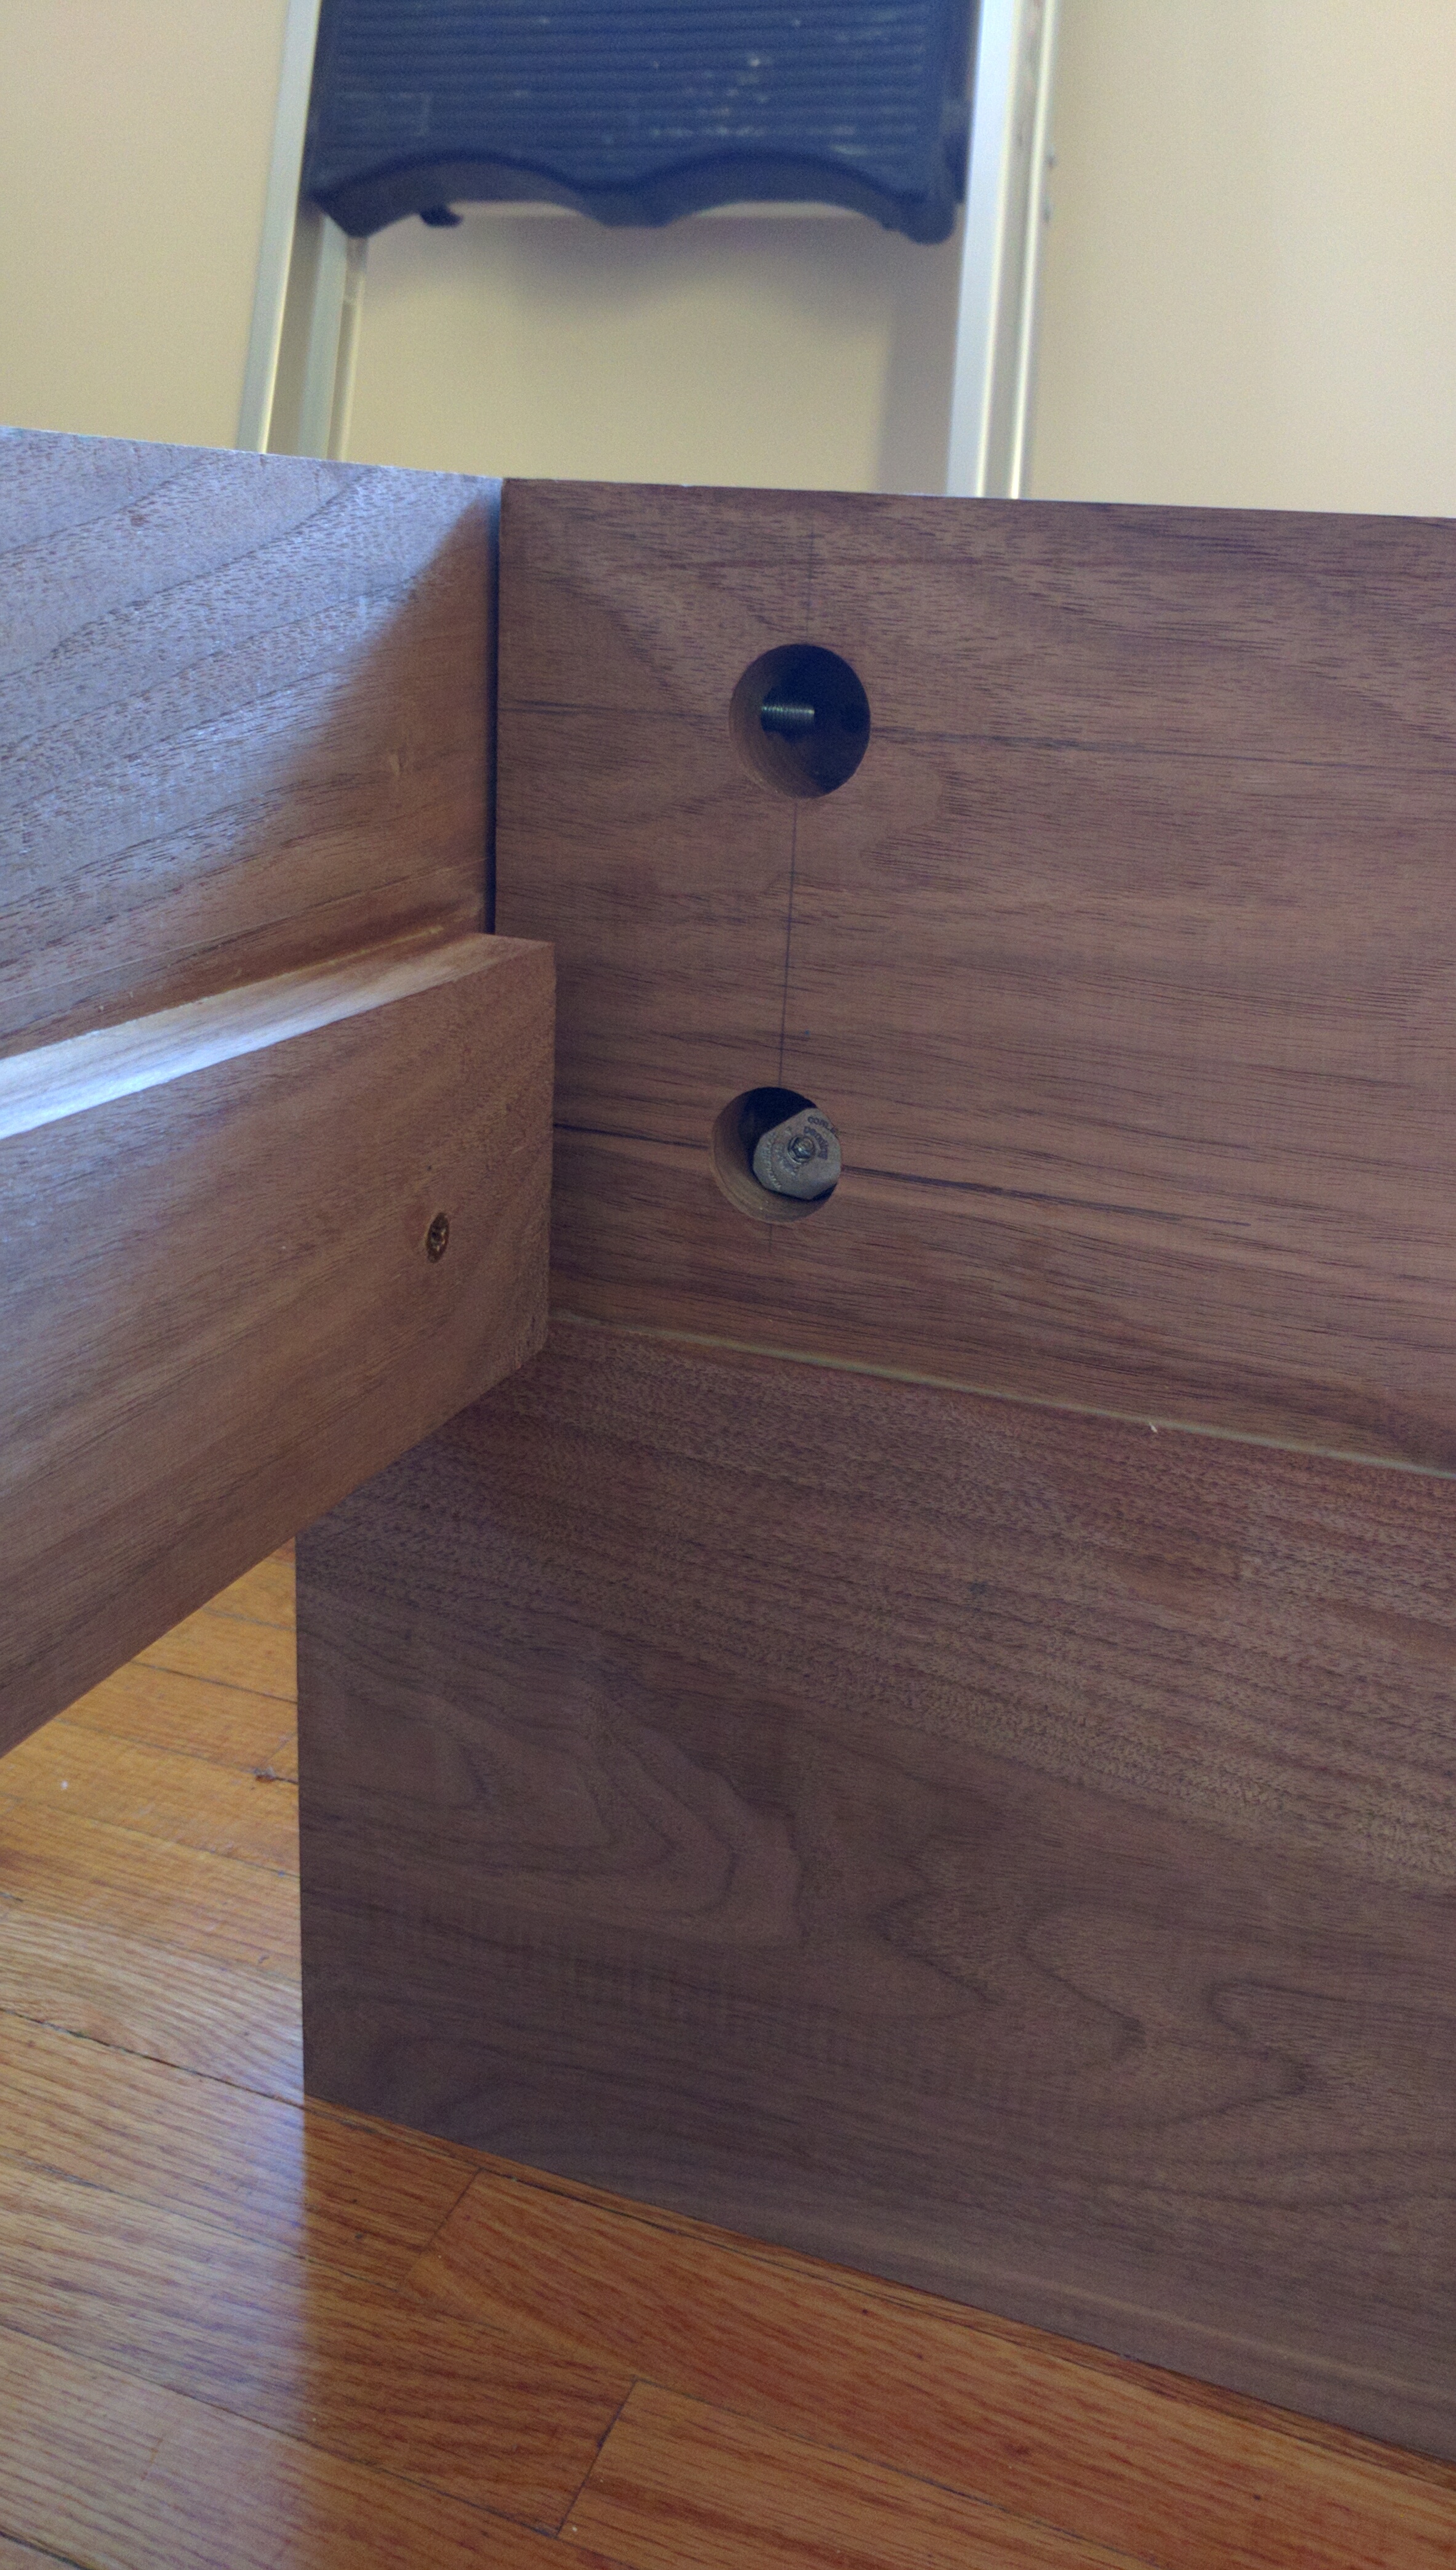
It’s hard to see from this photo but the studs were not perfectly straight. I think the free hand 15/32 enlargement I did caused the pilot hole to move out of alignment and thus the when the studs screwed into the screw, they went in at an angle. Something these zip bolts did not like. All the fidgeting in the world could not line up the stud with the nut. I couldn’t get it 🙁 It’s not like it was a huge F up. But even 1mm out of alignment was enough to ruin everything great about zip bolts. I was neither impressed nor happy. And finally I said screw it – see what I did there 😉 – and decided to drill out the pilot holes to accept bolts.
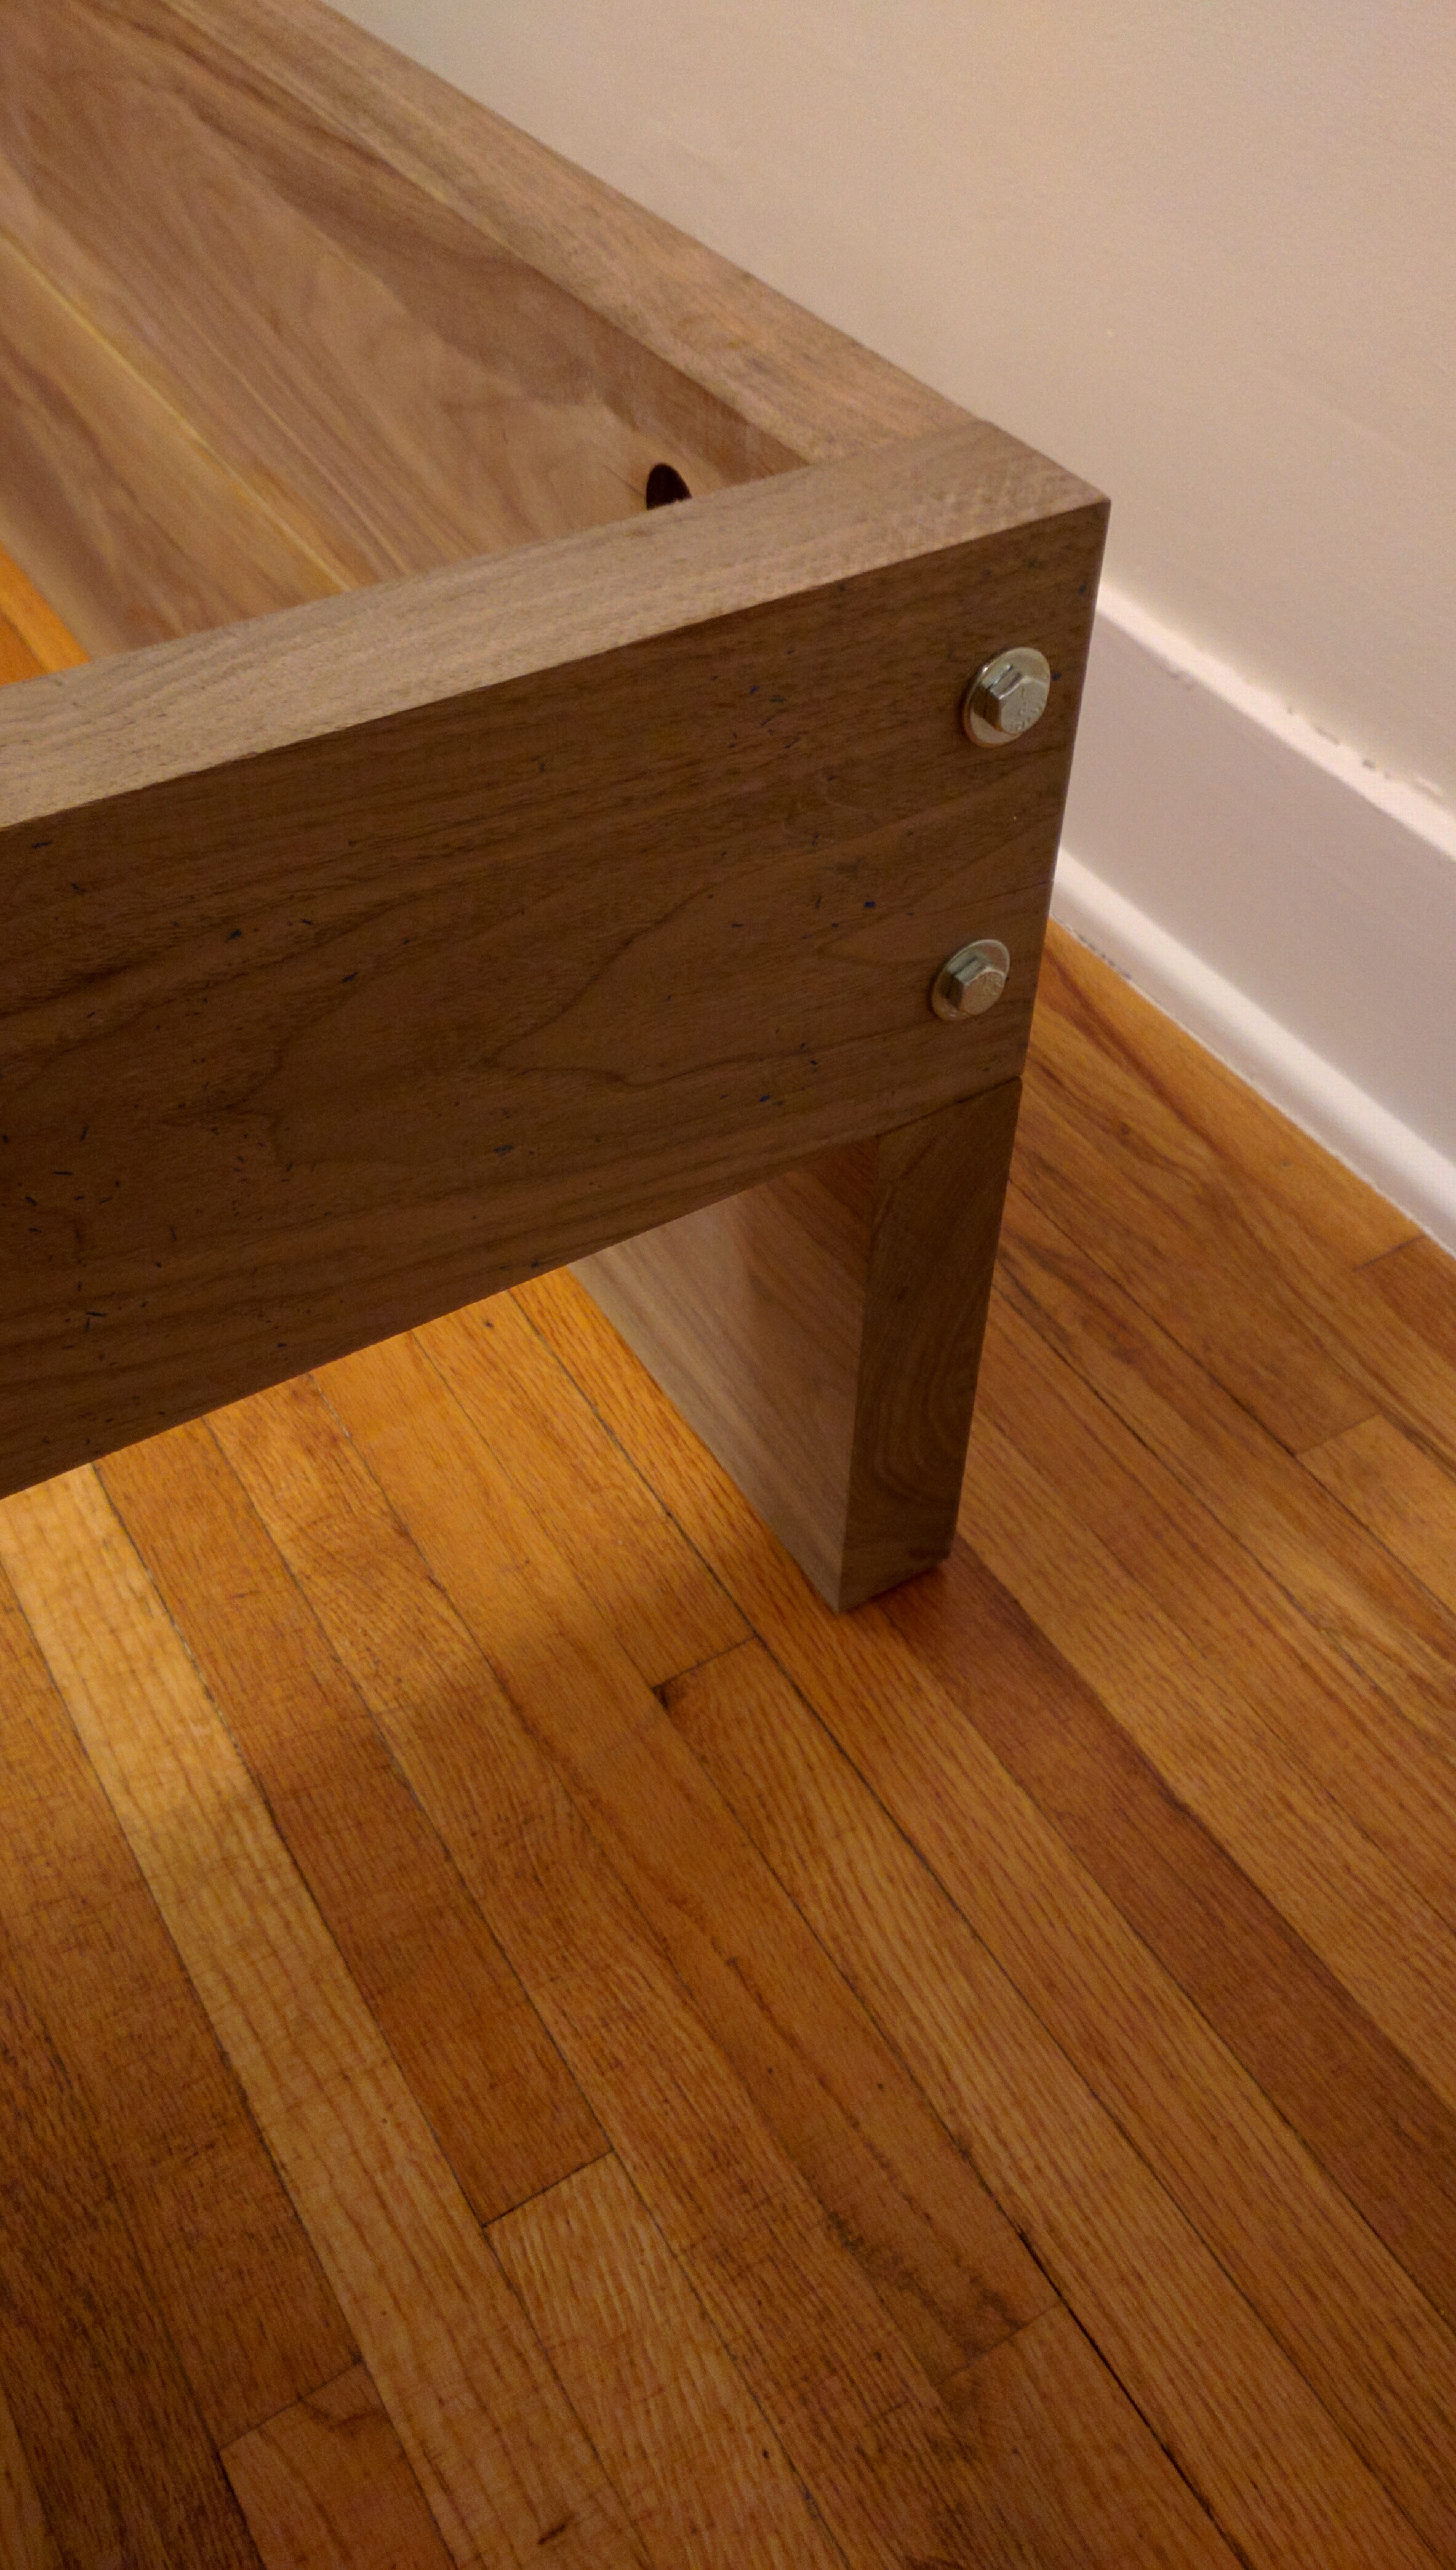
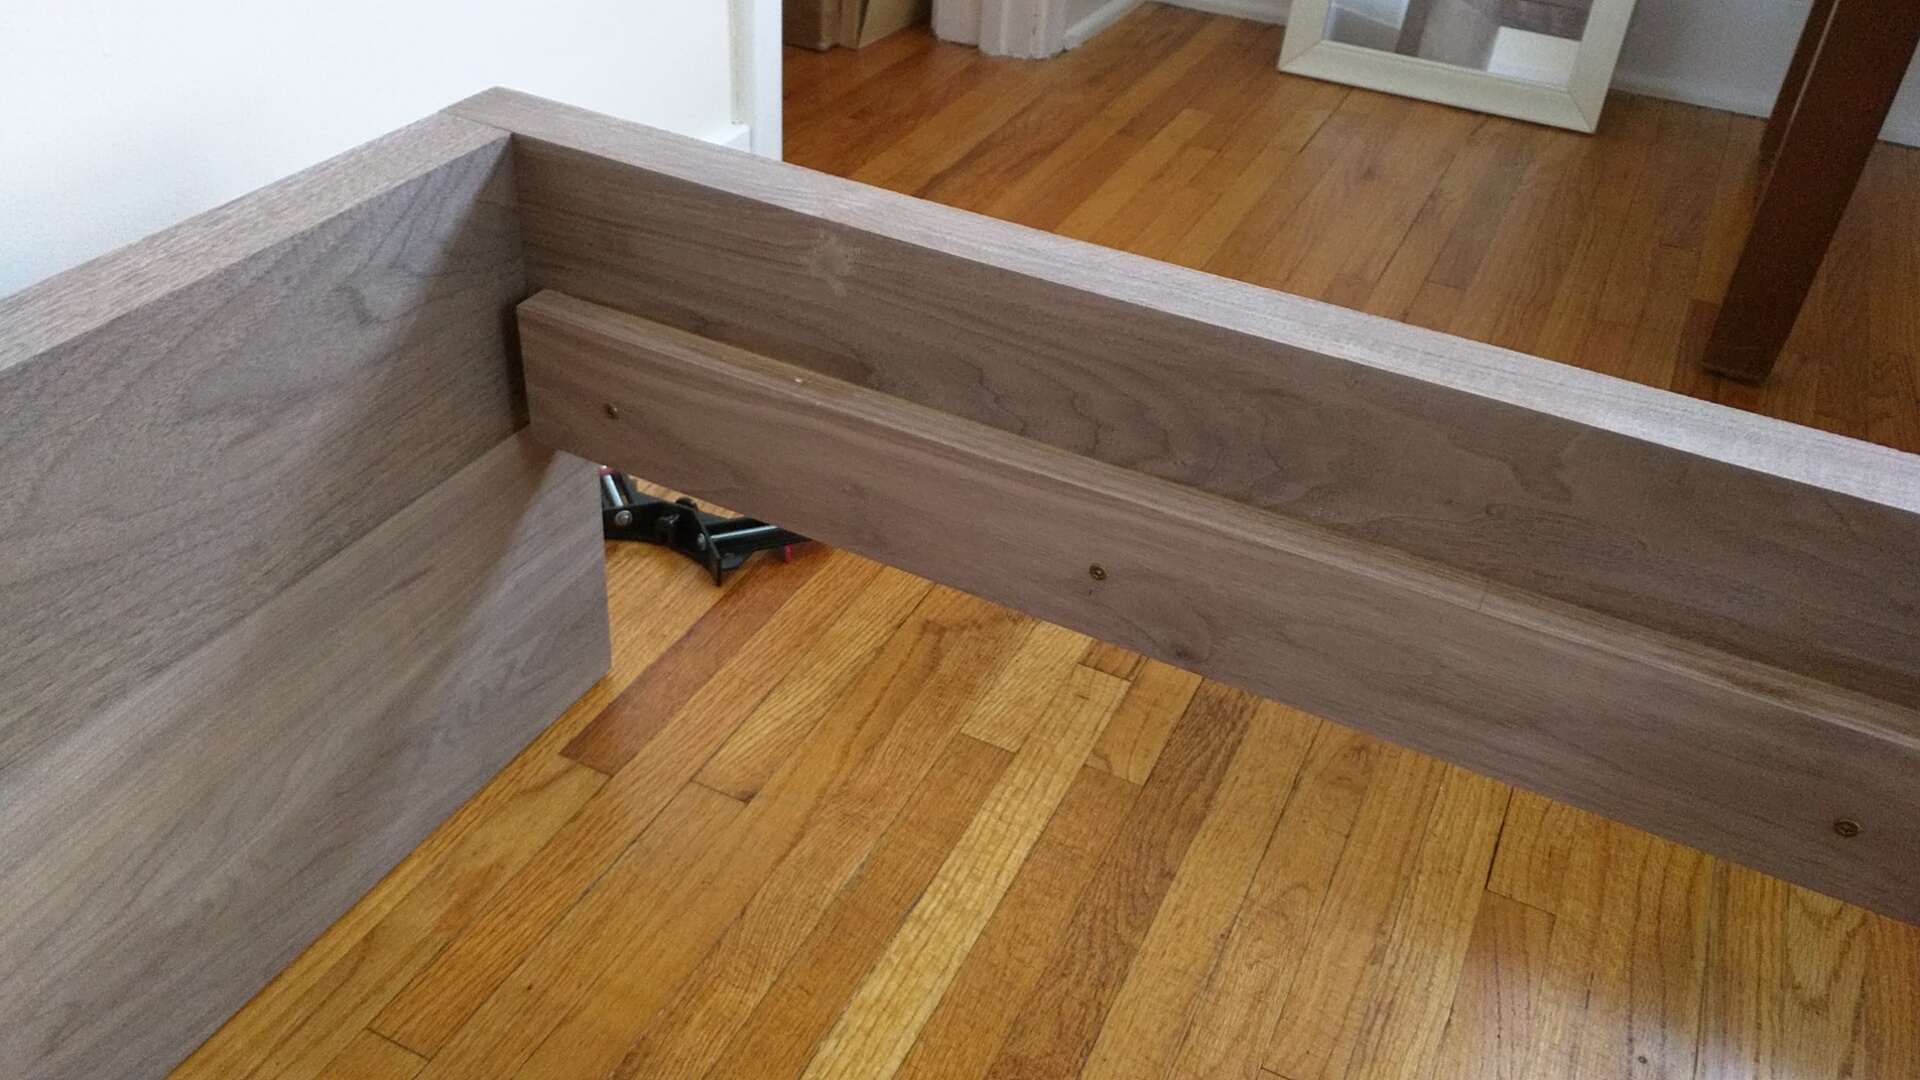
This actually turned out to be a blessing in disguise for the structural stability of the bed. With the zip bolt option, the studs had to be pre-installed into the side rails, preventing a dowel from being placed underneath the rail. But with bolts, as they can be installed after the rail is resting on the head board, it can be placed on a dowel to further help alignment (forgot to take this photo, but imagine it’s there).
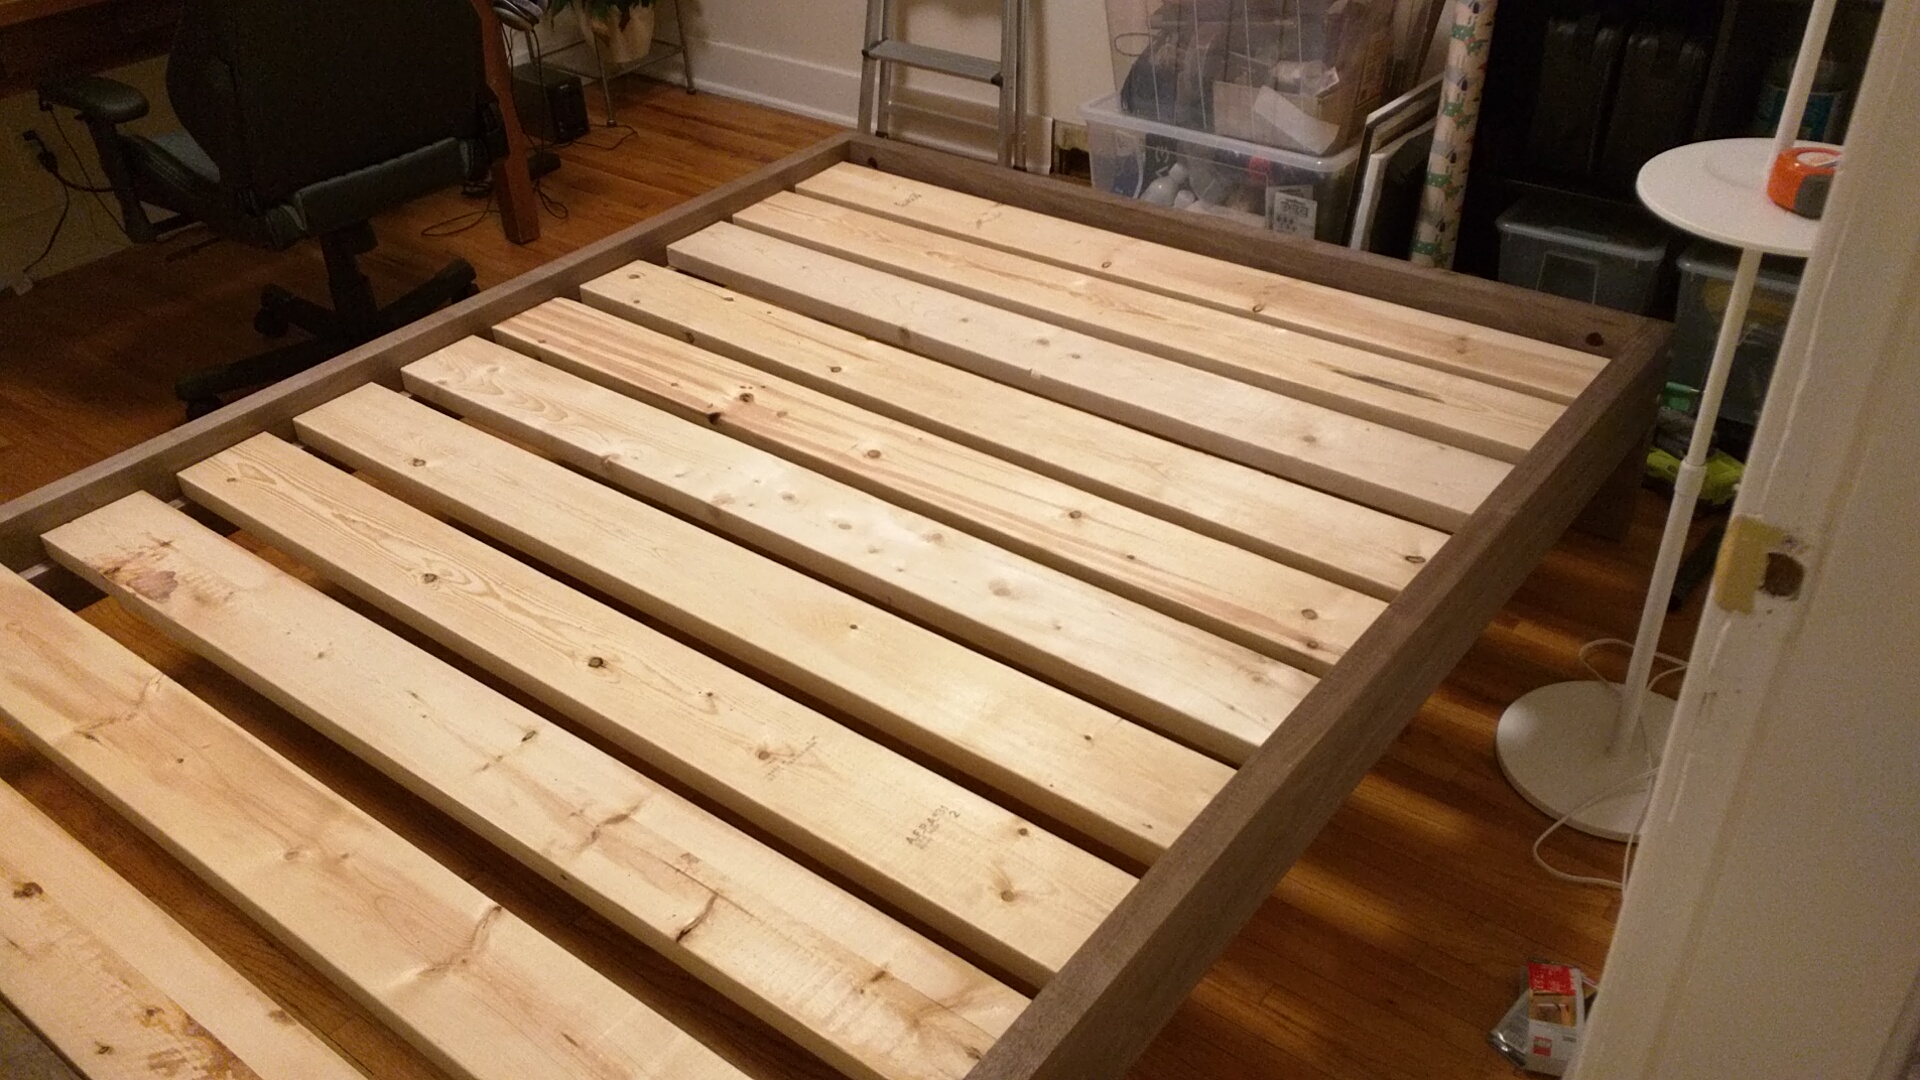
So, with the bolts installed I proceeded to install the bed slats. These slats were cut from 1×6 pieces of Pine. Pine is fairly cheap relative to Walnut, and thus I was able to find it at my local Home Depot.
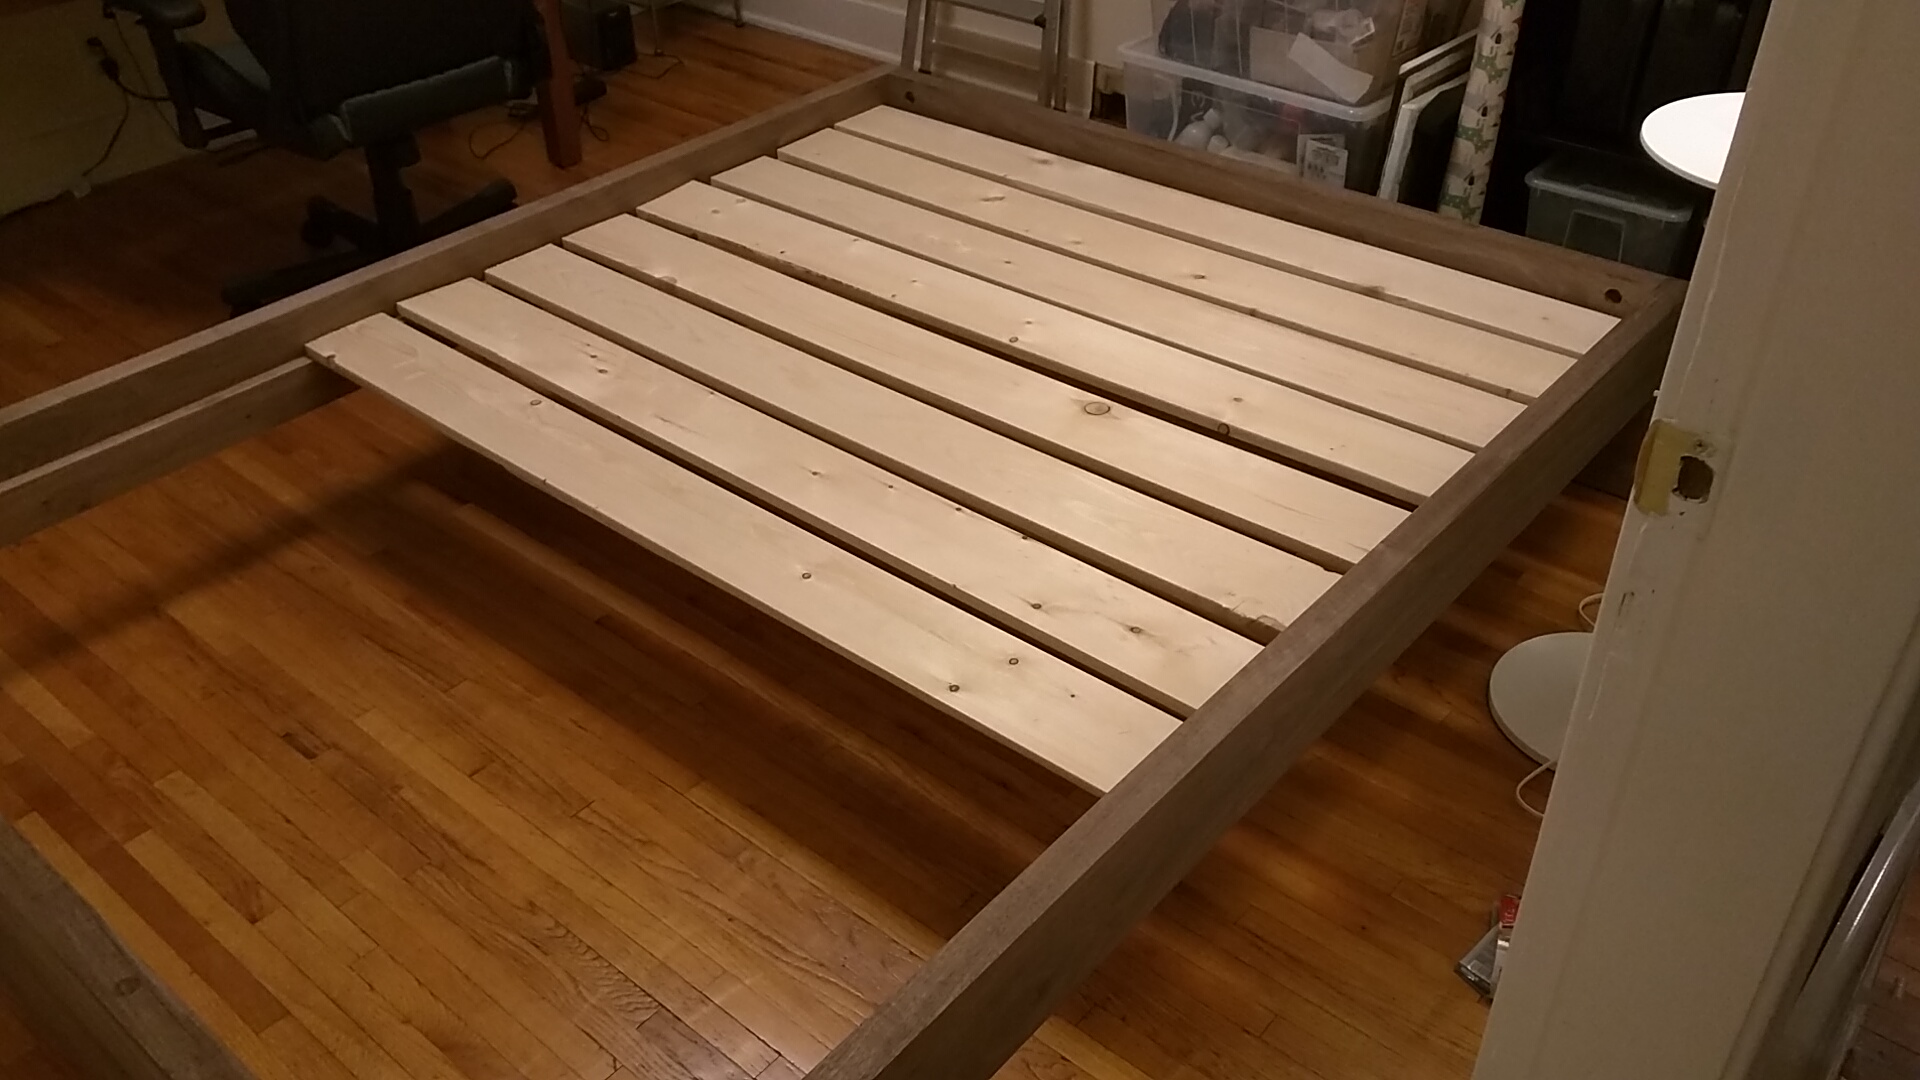
Maybe hard to see from this photo, but the slats were really flimsy. They had a good amount of flex to them and just looked fragile. So, just like the zip bolts, they were replaced by something more substantial. The new slats were cut from 2×6 of SPF. These things are monsters. I was debating installing a center support, but I don’t think I will need one anymore.
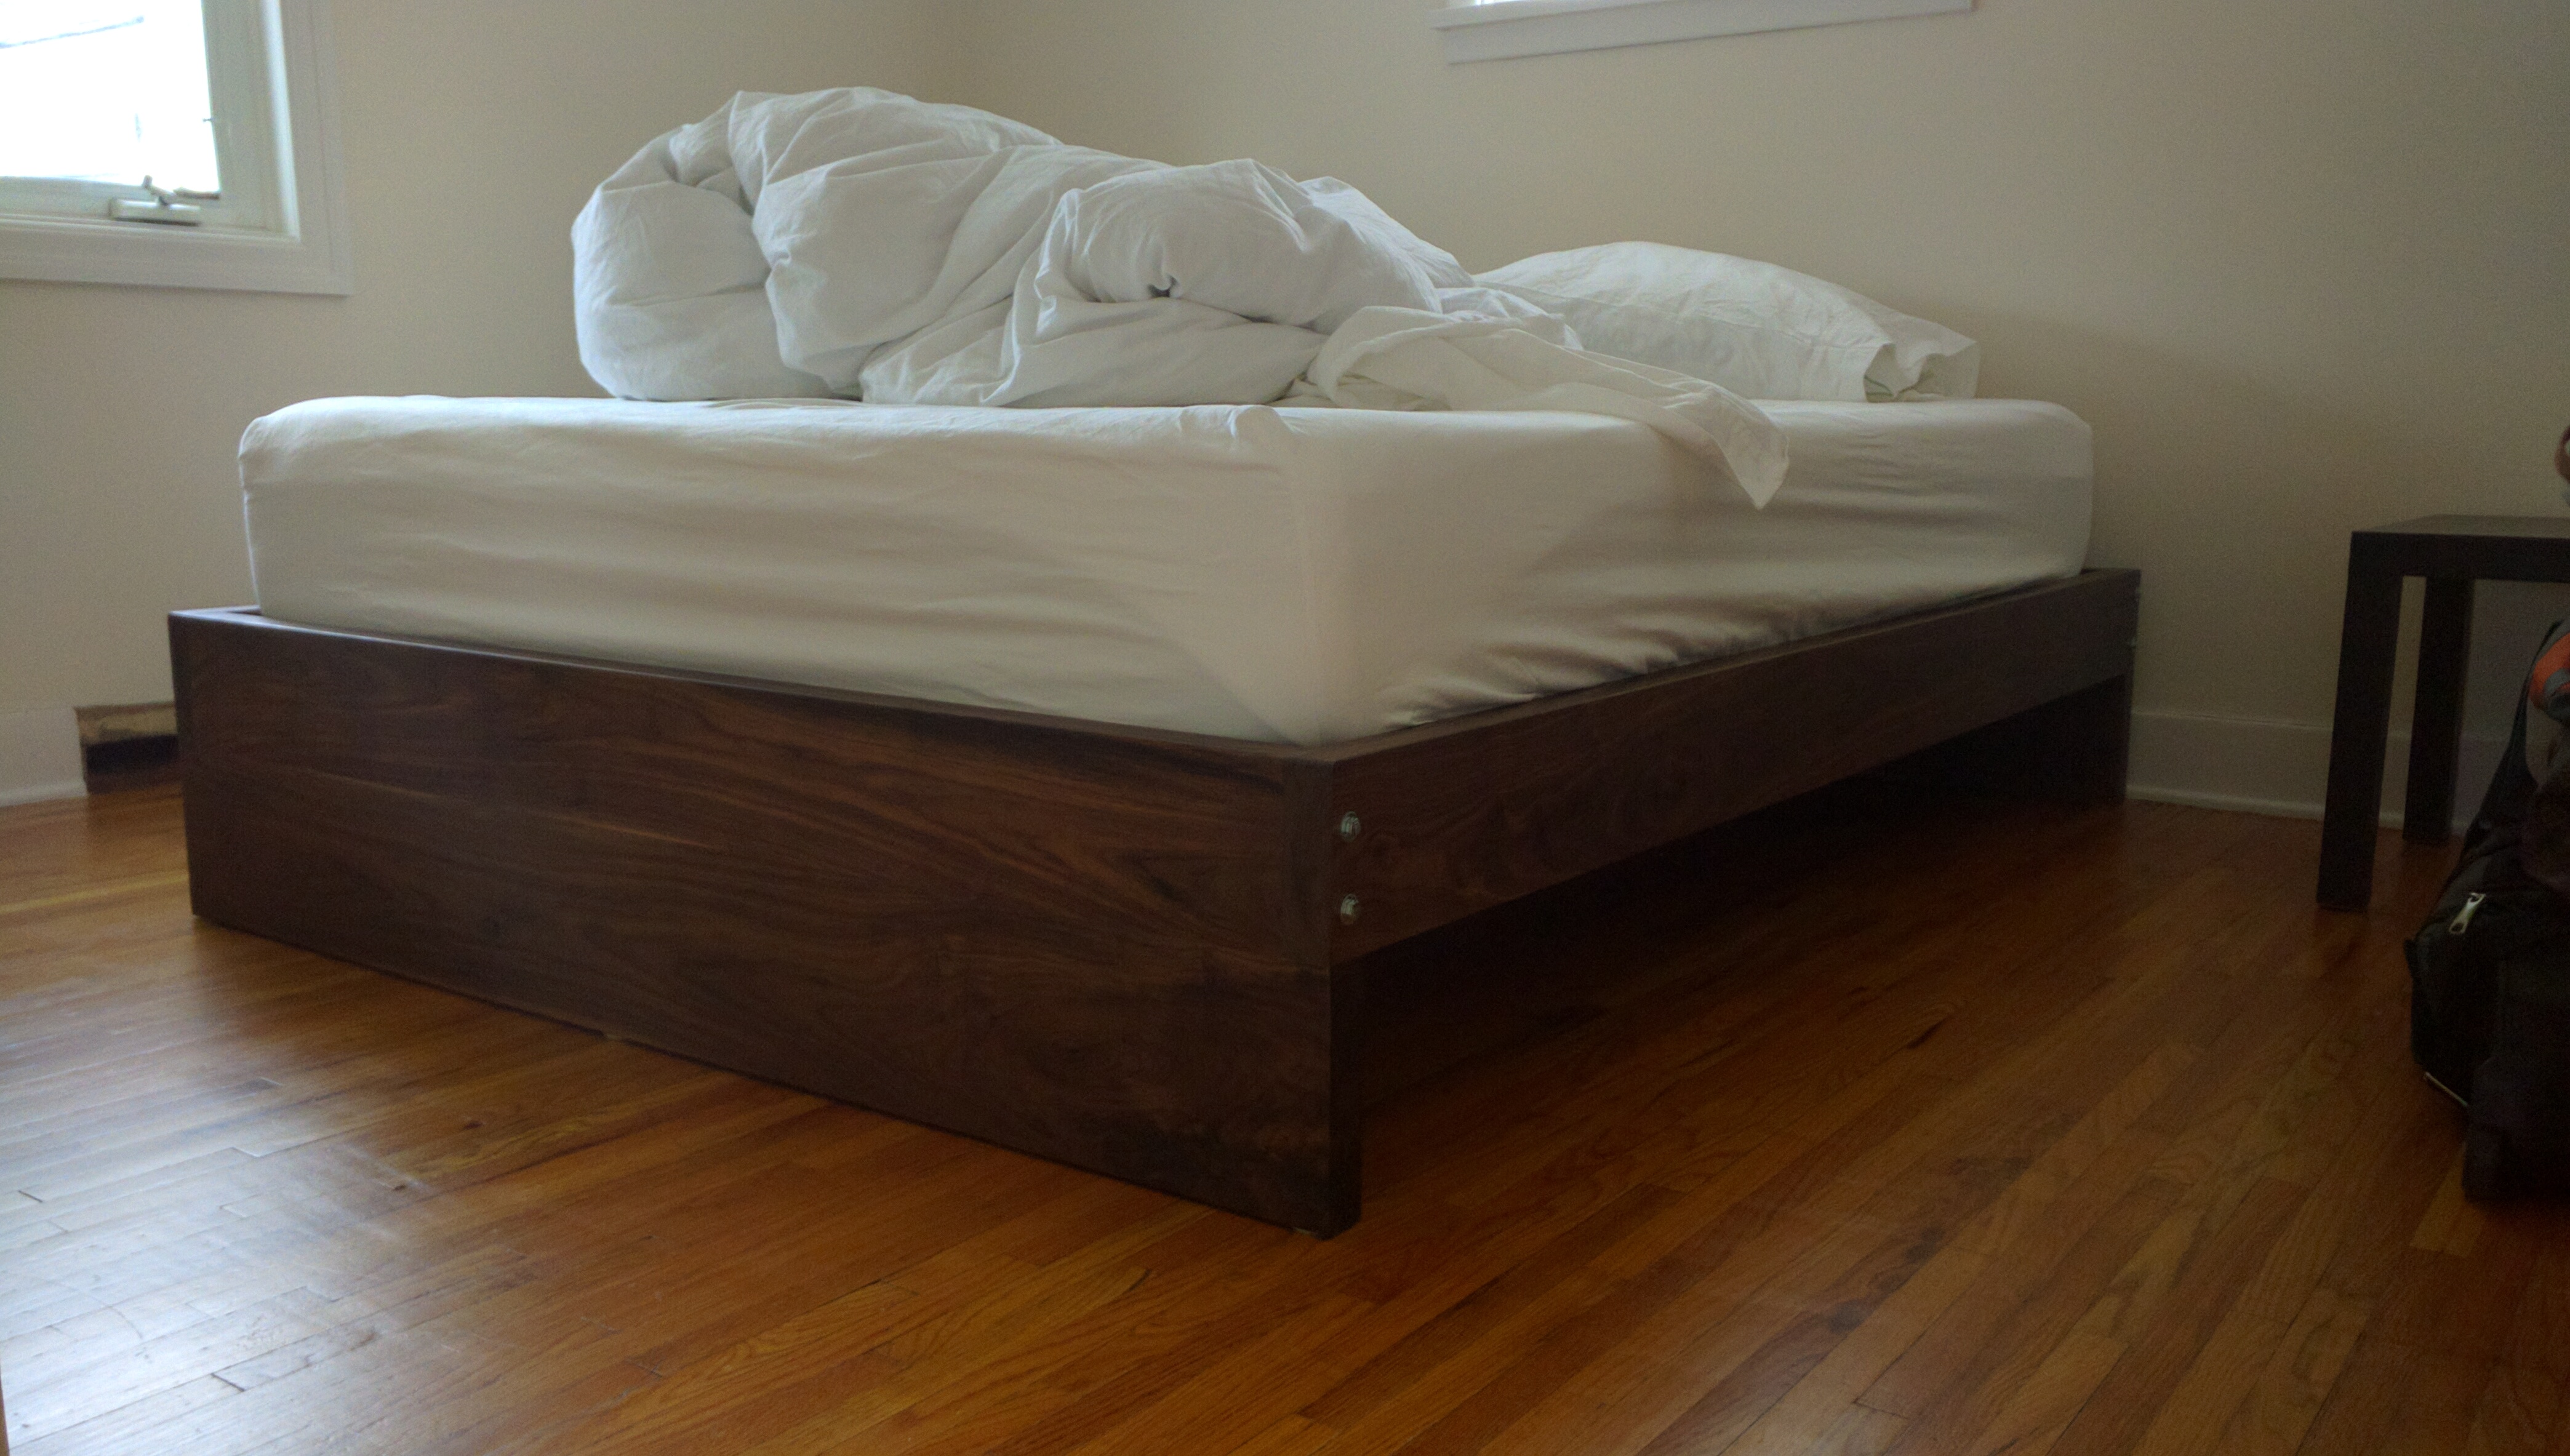
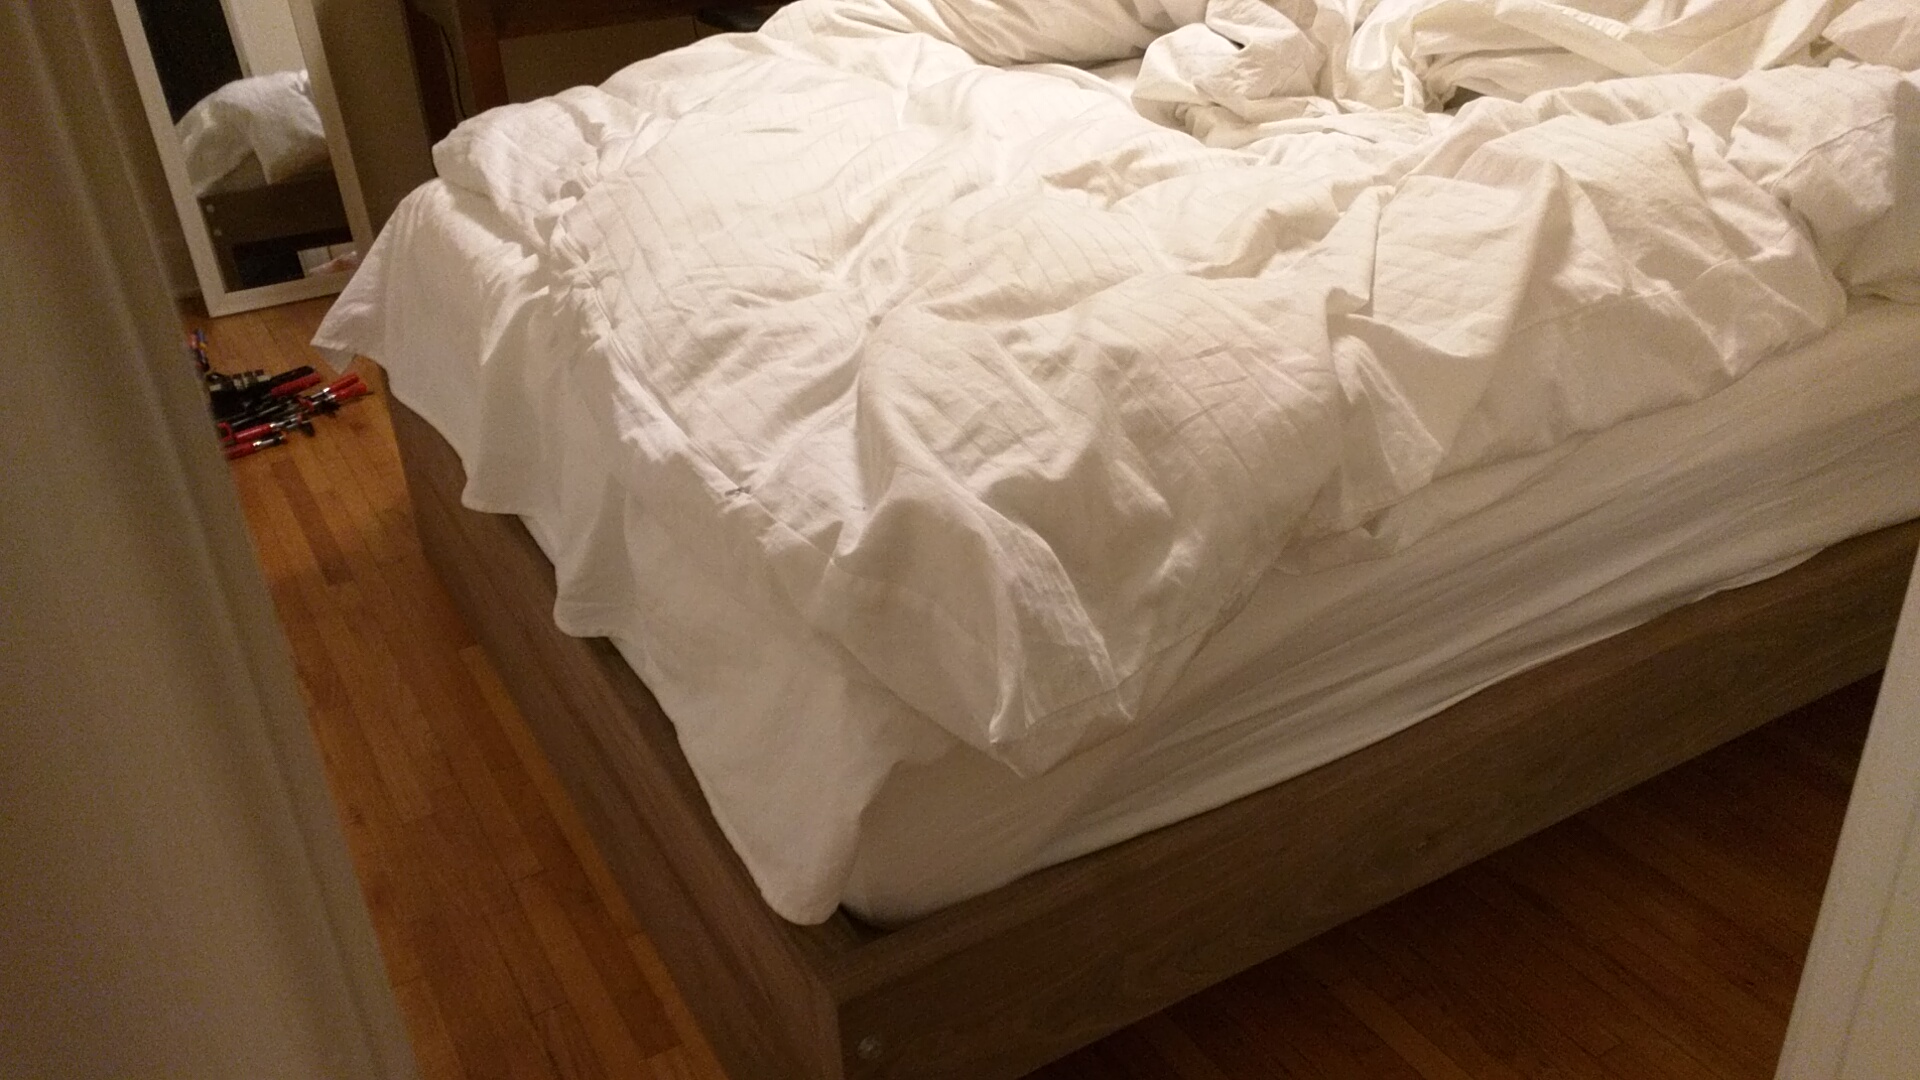
Next step was to install the mattress and test the stability.
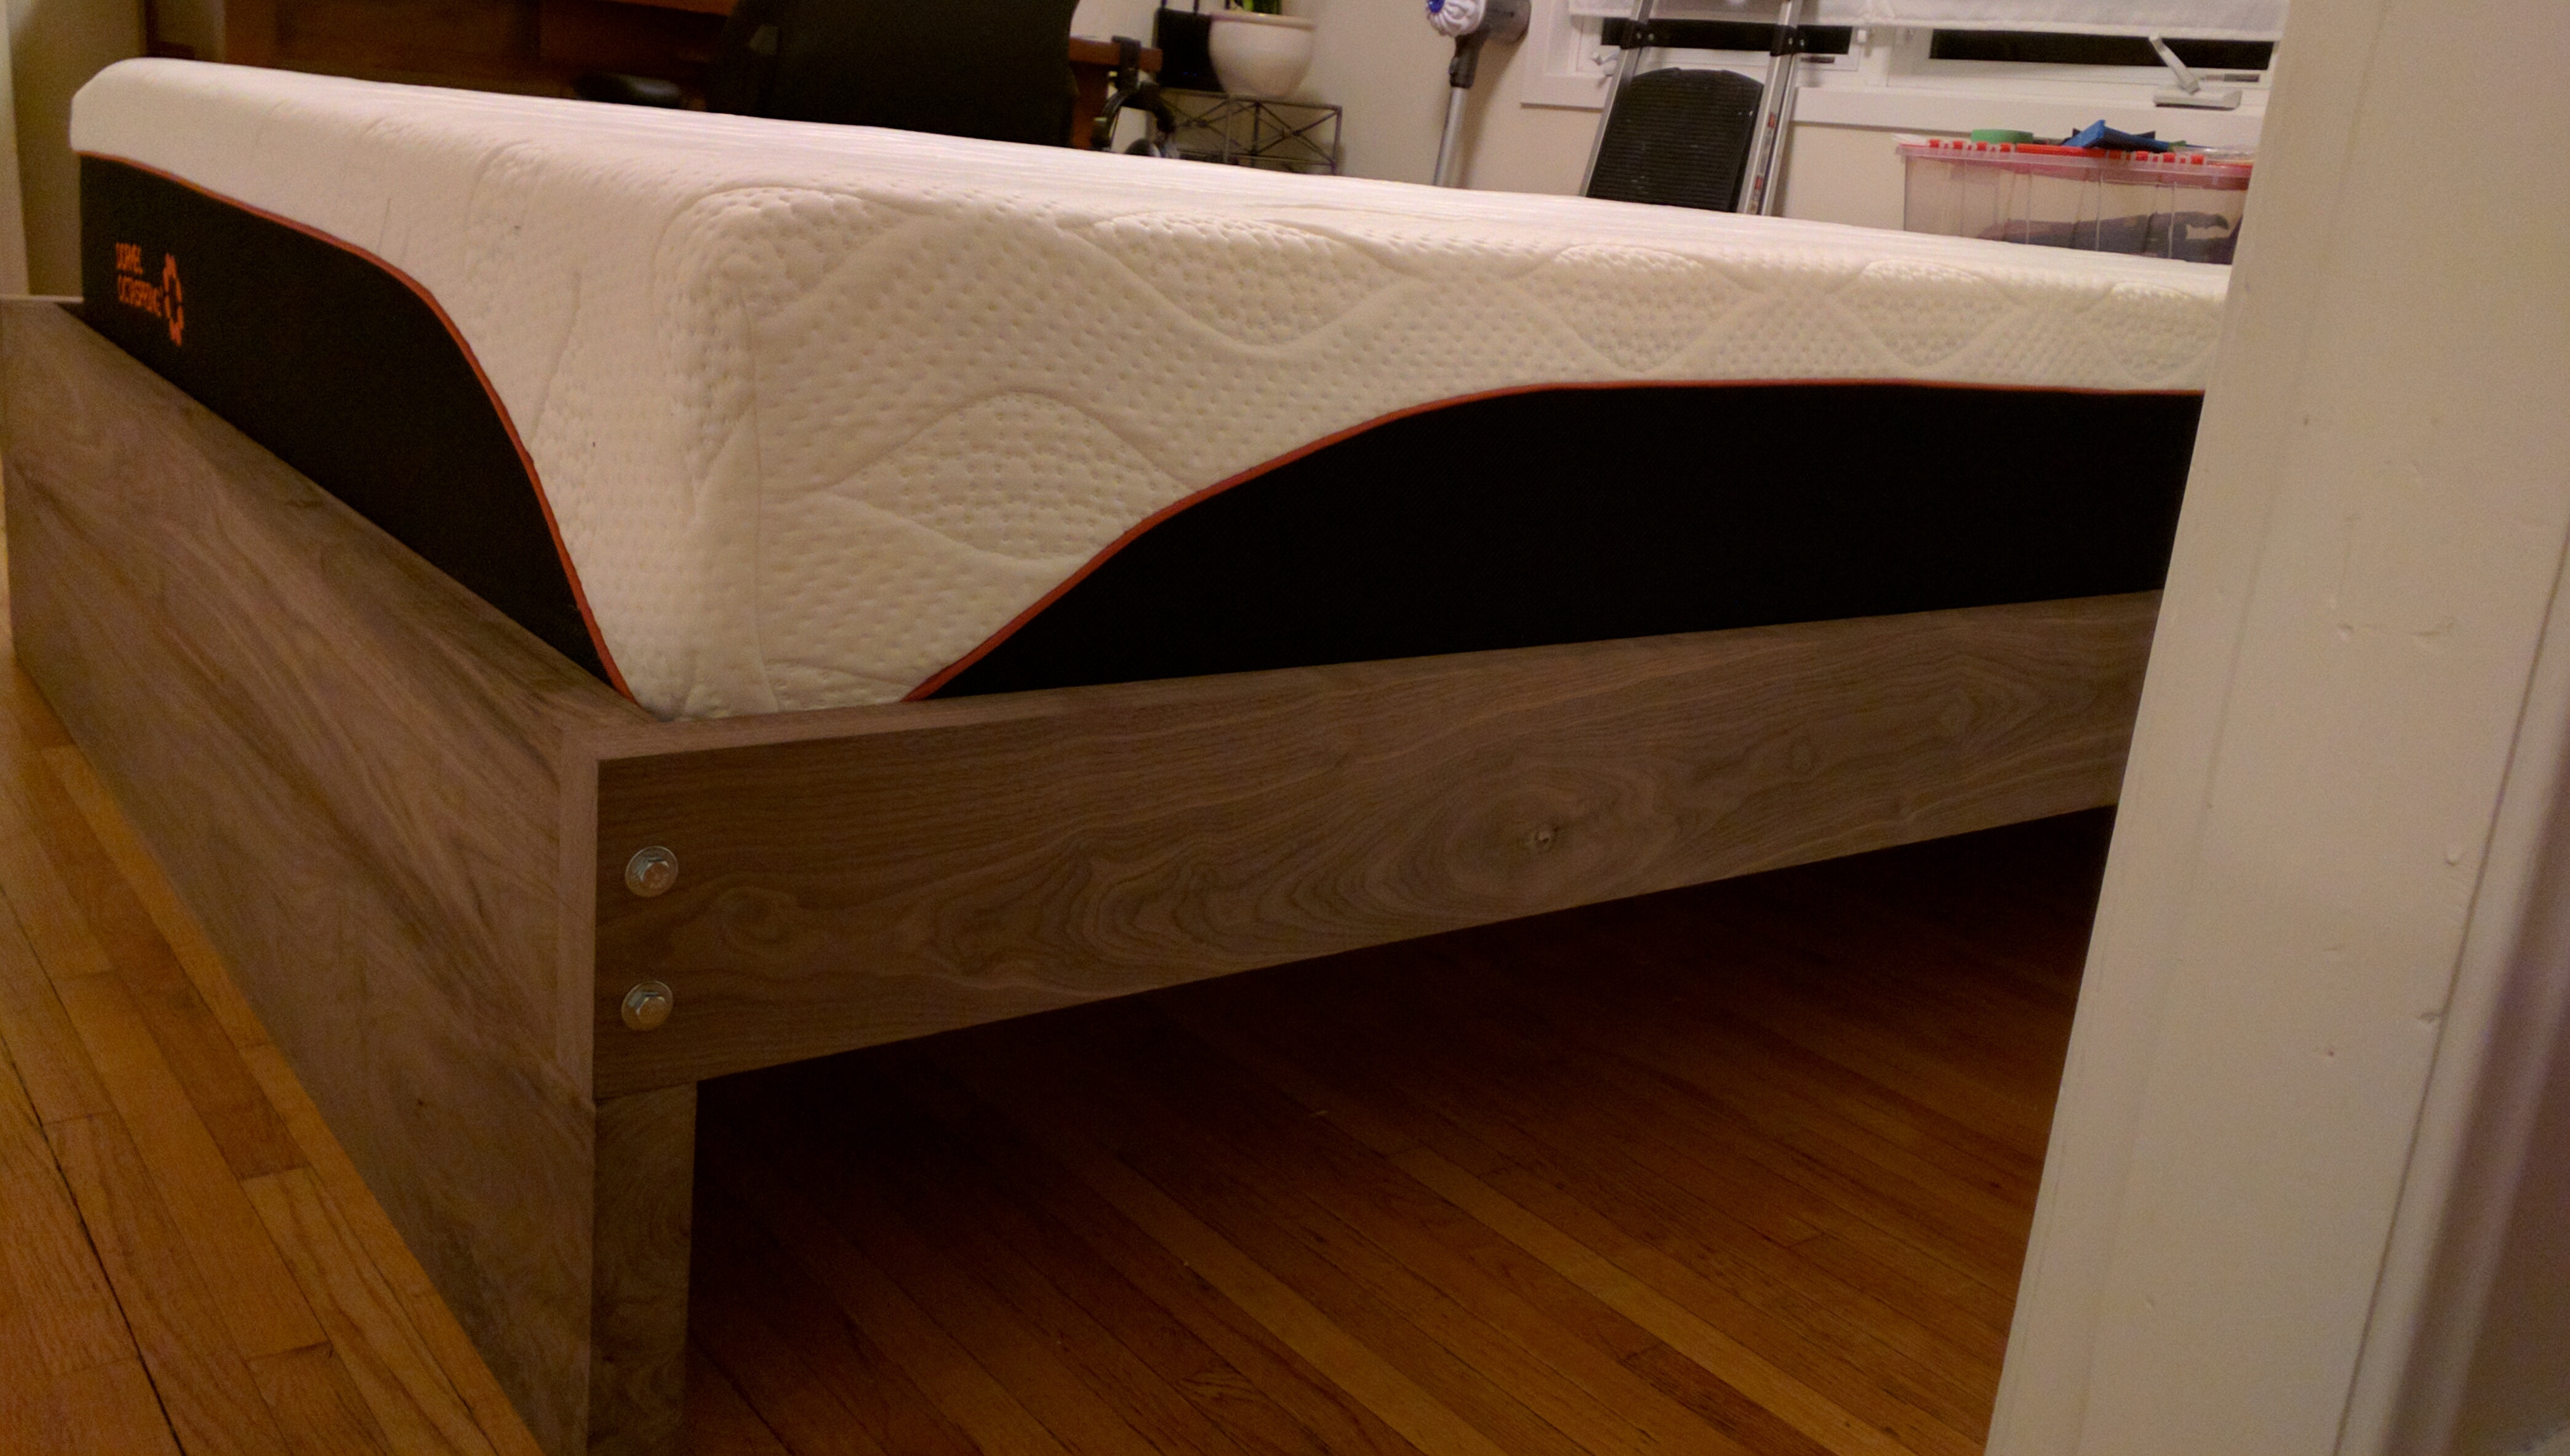
Fits great. Now I’m excited. Let’s install some sheets and try it for the evening!

I will end the post here. The project is not done though. Next steps are to take everything apart, sand, and stain.
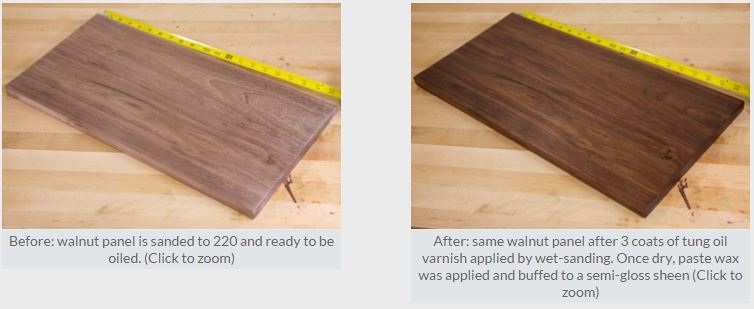
Staining will be another task in itself. I am in the process of researching stains, below is an example of what it might look like:
I think I will also replace the silver colored bolts with something more rustic. I’m thinking something like these:

These should blend into the final stain color and be less intrusive.
Any who, back to the garage. Happy wood working!
** UPDATE **
Back at it this week. Working on some improvements and the finishing. Following the test sleep, it was apparent that I was going to have to do something about the bed slats. Initially I thought the weight of mattress was going to be enough to keep them in place. This was not the case. As I rolled around I could hear them moving and banging against each other. The solution here was to install spacers between the slats. I calculated that blocks cut to 1.625 inches wide would allow 11 of my 2×6 bed slats to sit evenly spaced along the bed frame. I had some scrap walnut, and used it to cut the blocks. The blocks were then glued to the frame, and like always, stayed in the clamps for 24 hours. This really sucked because I had to clamp about 26 blocks and I only had 8 clamps. So this simple process took 3 days to finish ;(
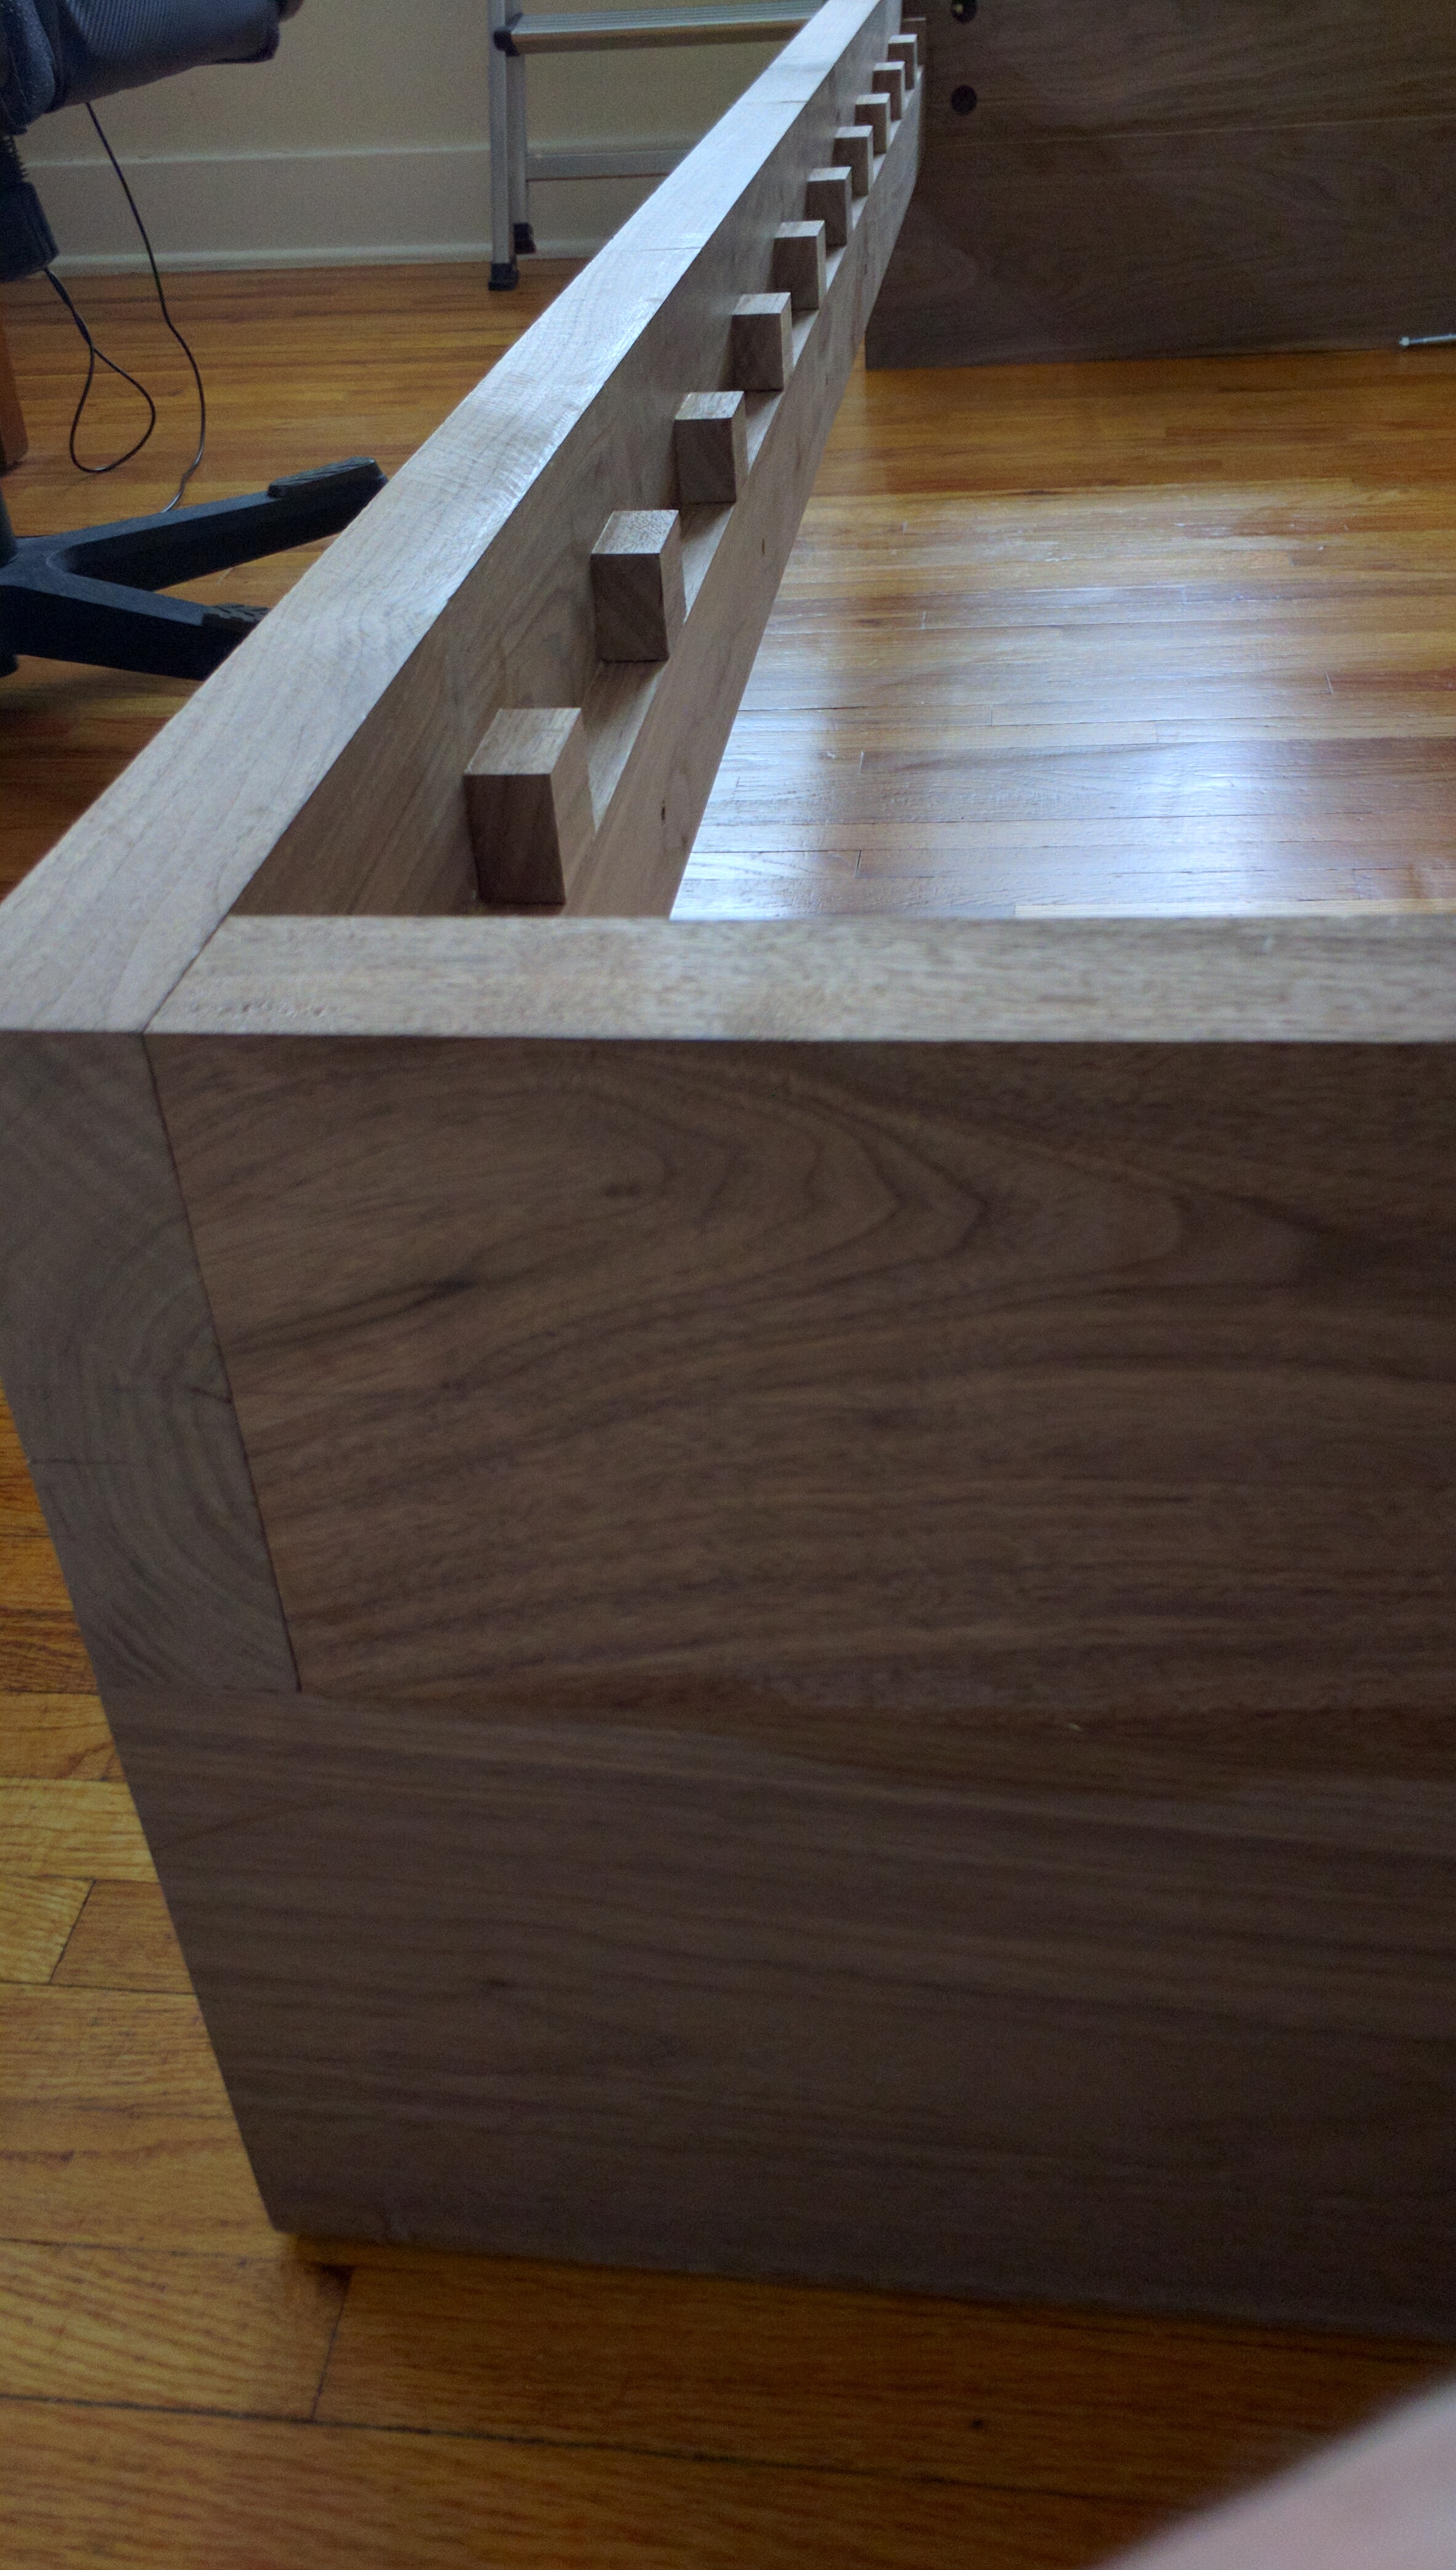
Once the blocks were glued I made one further improvement to help with the assembly. A dowel was installed between the blots. This would help align the rails when placing them on the head / foot boards. I went this rout vs placing the dowel under the rail as it would easier to install and server mostly the same purpose. Using the same jig as above, I placed it onto the boards as if I was going to be drilling the bolt holes, but used a different hole for the dowel. If I were ever to build this bed again placing the dowel here would save a bit of time vs placing it under the rail.
Finally, it was time to sand the wood and round the edges. To sand I used a random orbital sander, and a series of 120 & 150 grit sand paper. The pieces were sanded to 120, cleaned, sanded to 150, and cleaned again.
Near the end of my sanding adventure I discovered that the sander had a vacuum attachment, which is the best thing ever. By attaching the vacuum to the sander the garage did not fill up with saw dust and I’m sure the sanding performance improved as I was not sanding on top of a layer of dust. This is not my sander, but the same idea.

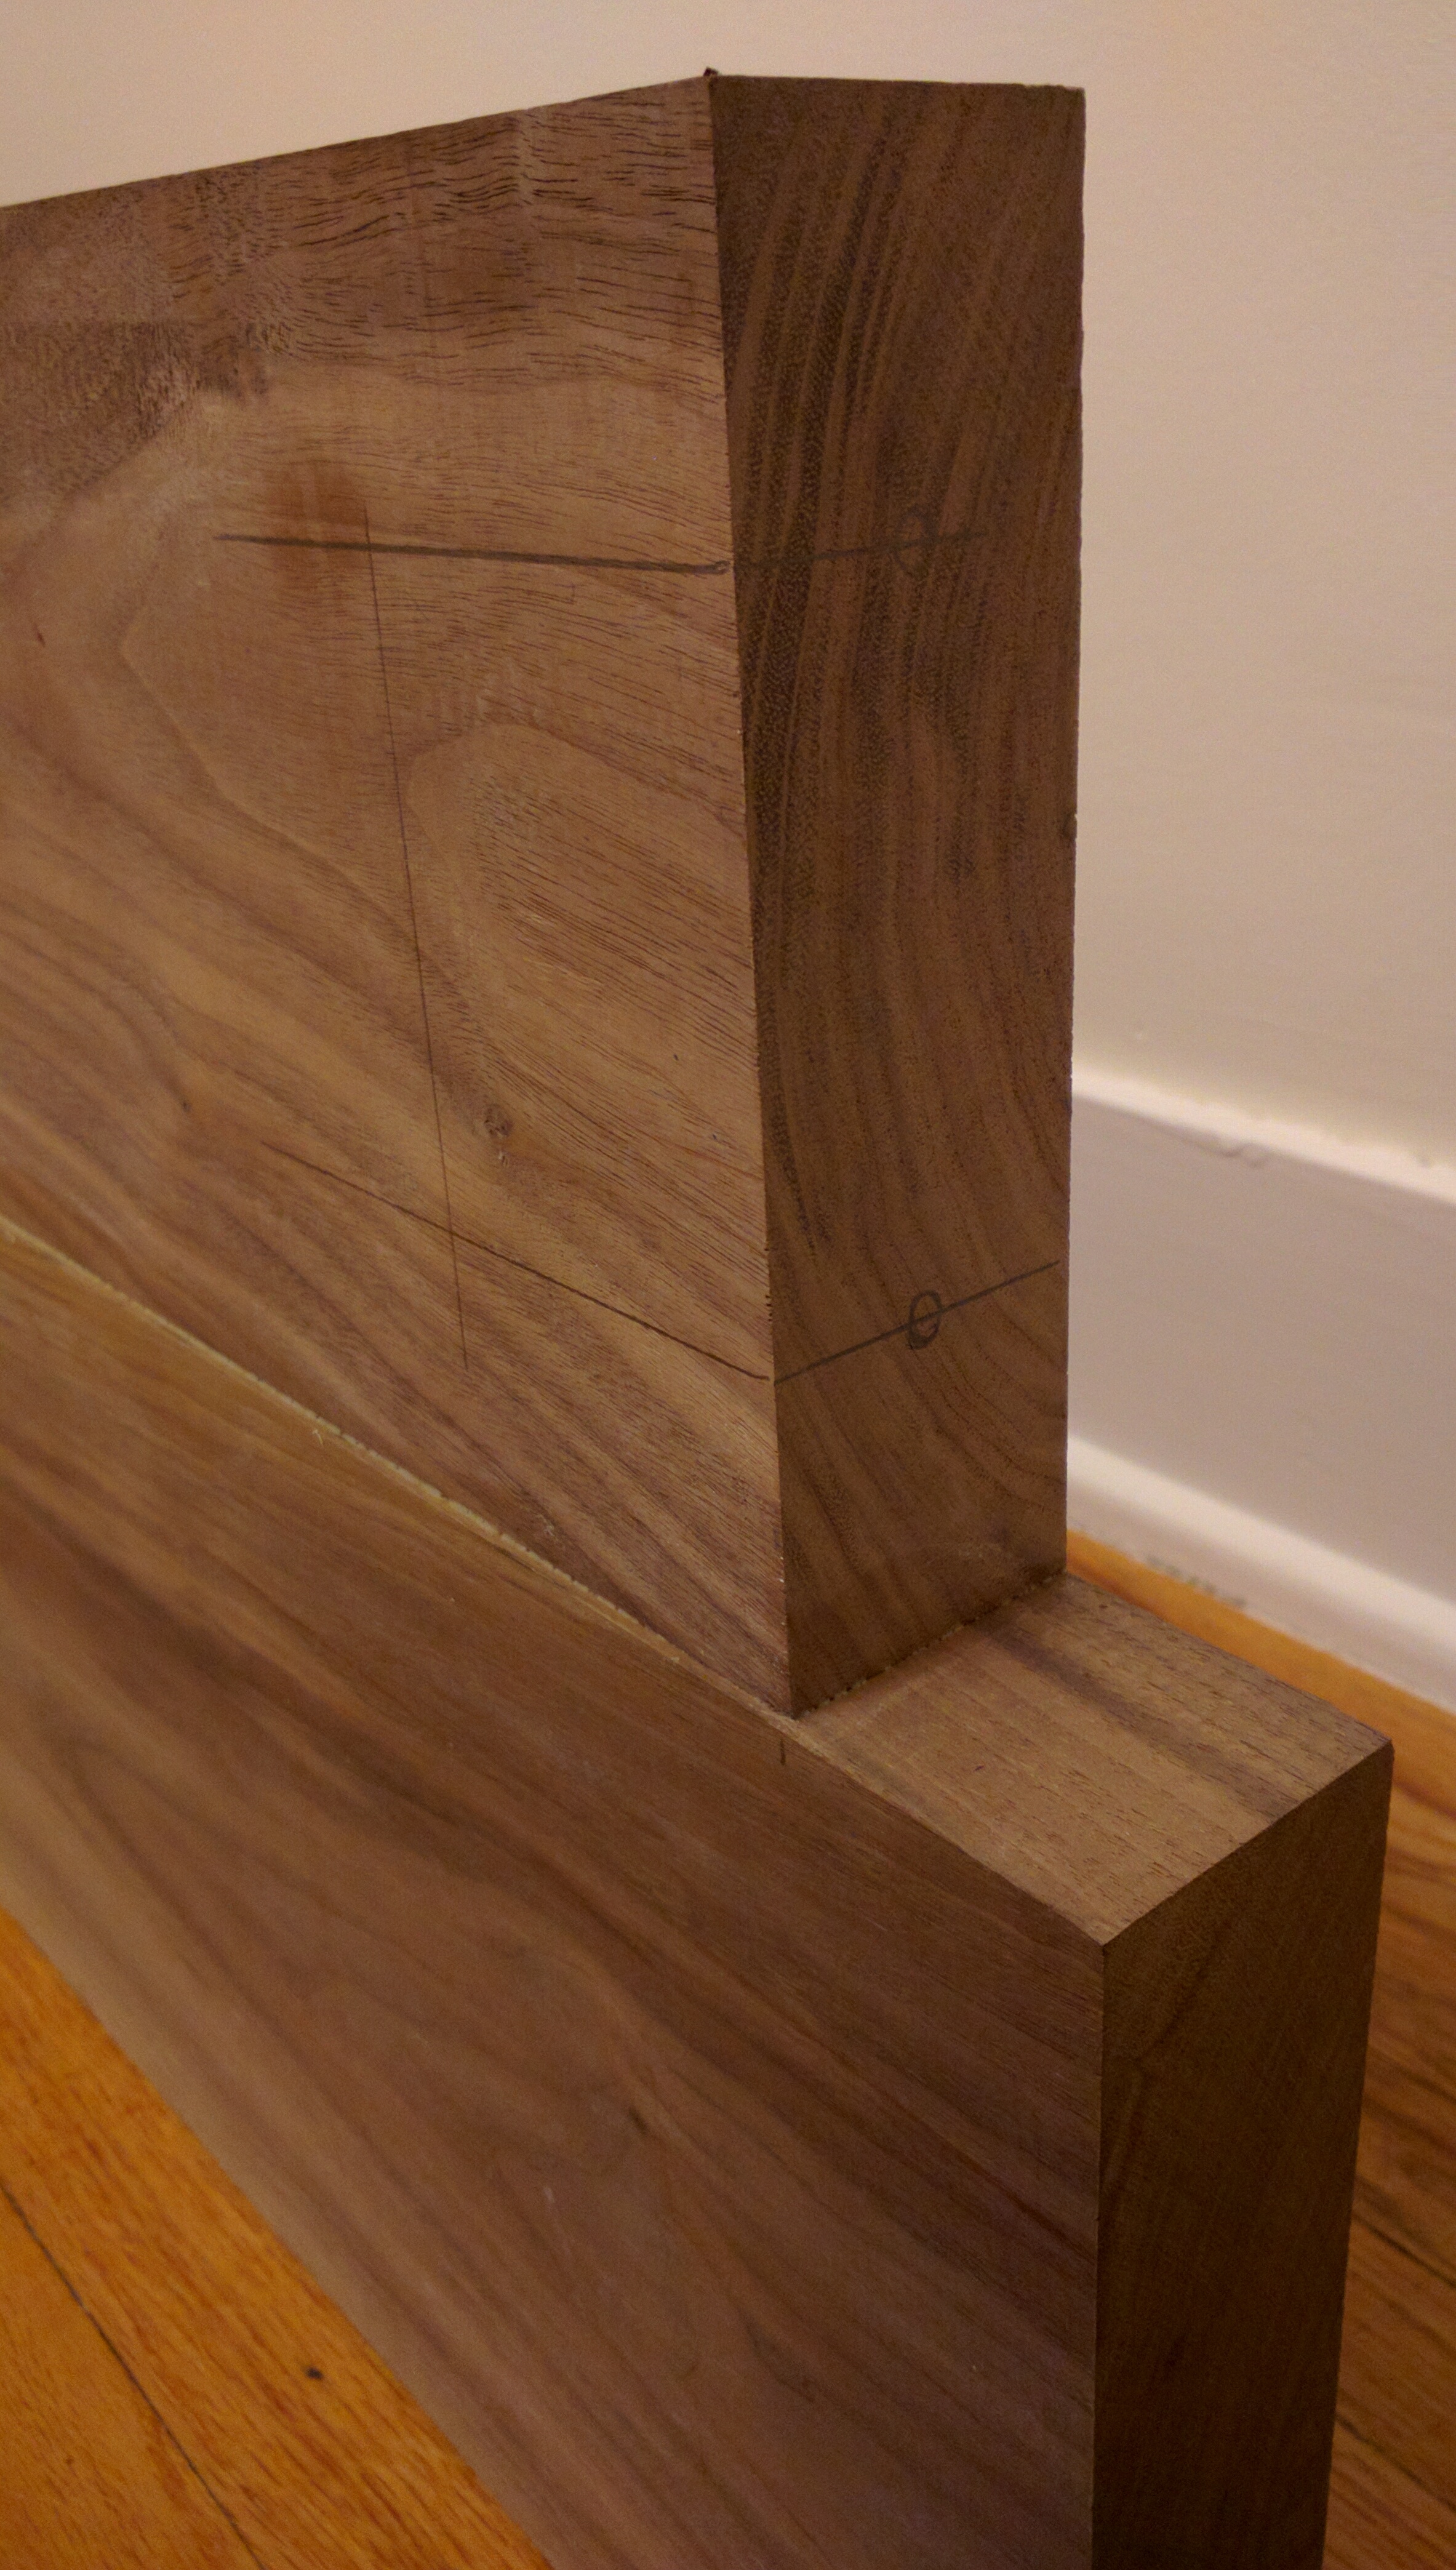
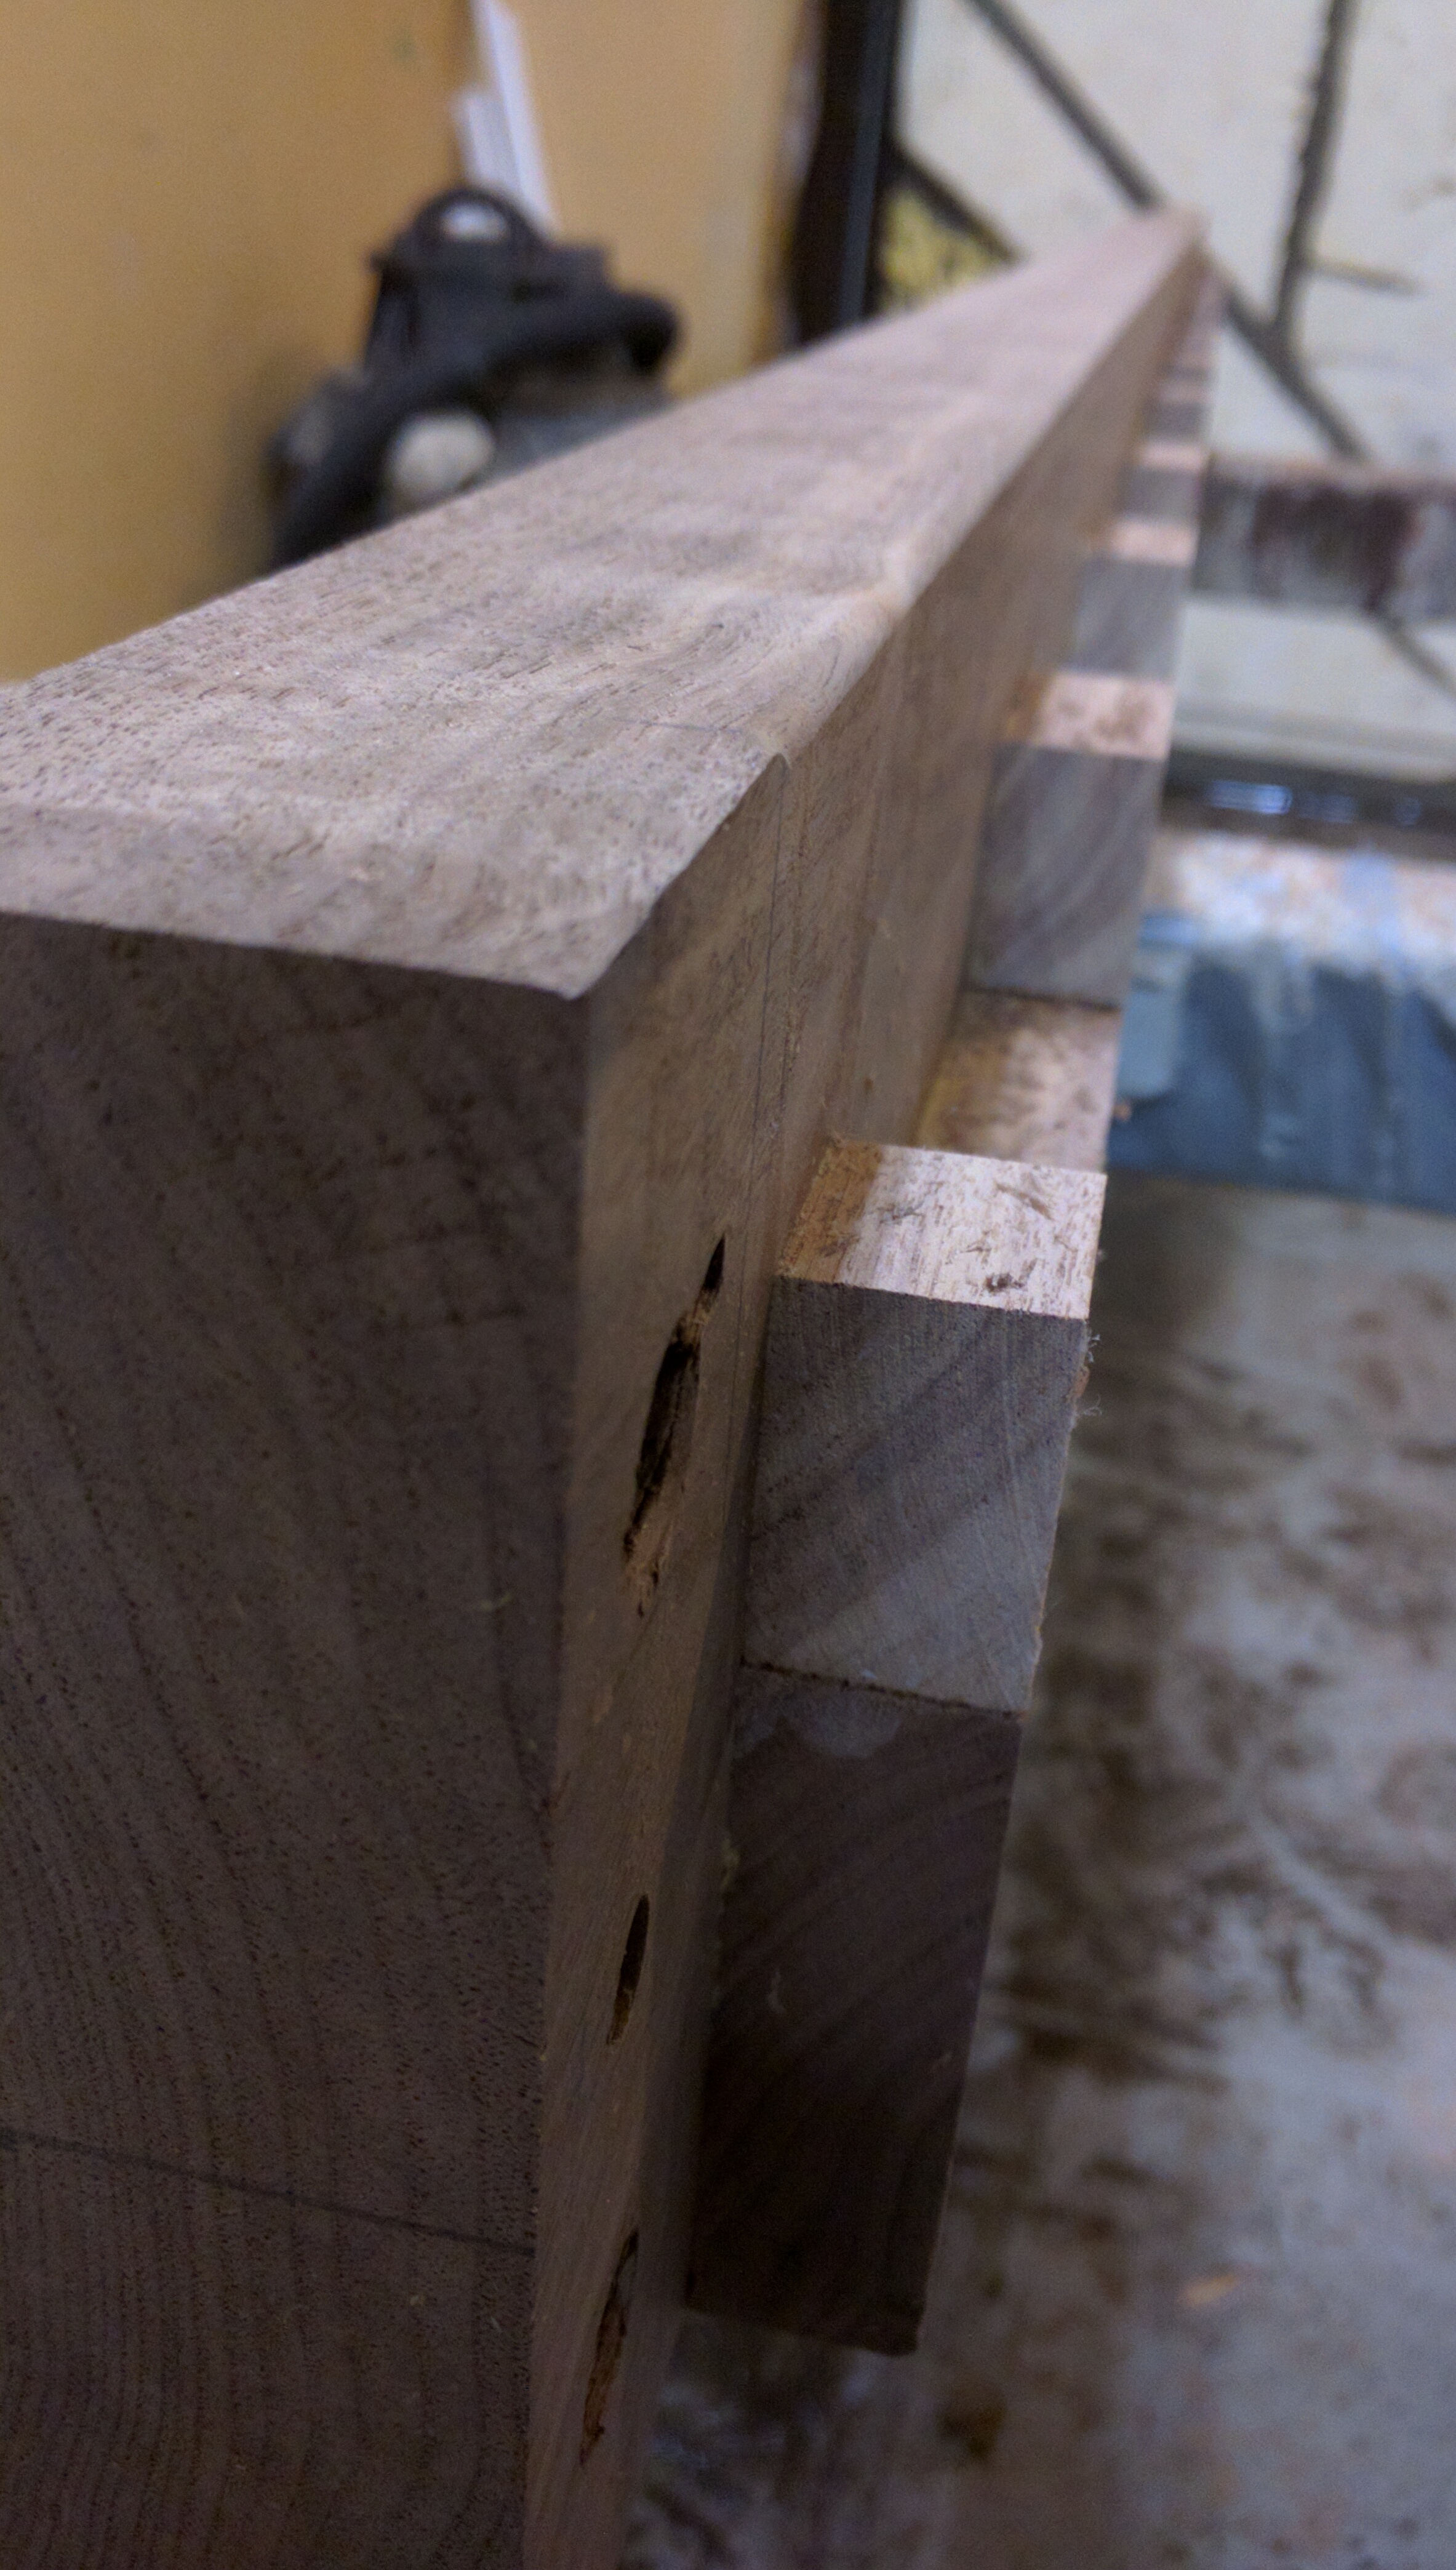
Once sanded, I used a router with a 1/8′ rounding bit to round the edges. The router came with a edge guide, and thus this process was really easy. Basically it’s just moving the router down the the corners once.

In this shot you can see the sharp corner vs the rounded edge. I opted to leave the joints sharp and only rounded the exposed corners.
Next I assembled the bed frame and bolted everything tight. This was done so that I could make a final pass with the sander, smoothing over the joints.
Once sanding was done I moved the wood back into the house (it was in the garage during sanding) to apply the oil. I chose a product called Osmo for the finish. It’s a 1/2 wax and 1/2 sesame based oil finish. Food safe, pleasant smelling, and safe for the hands. Before applying the oil it’s important to make sure the wood is clean and free of saw dust. I used lint free cloths and some water to clean the wood.
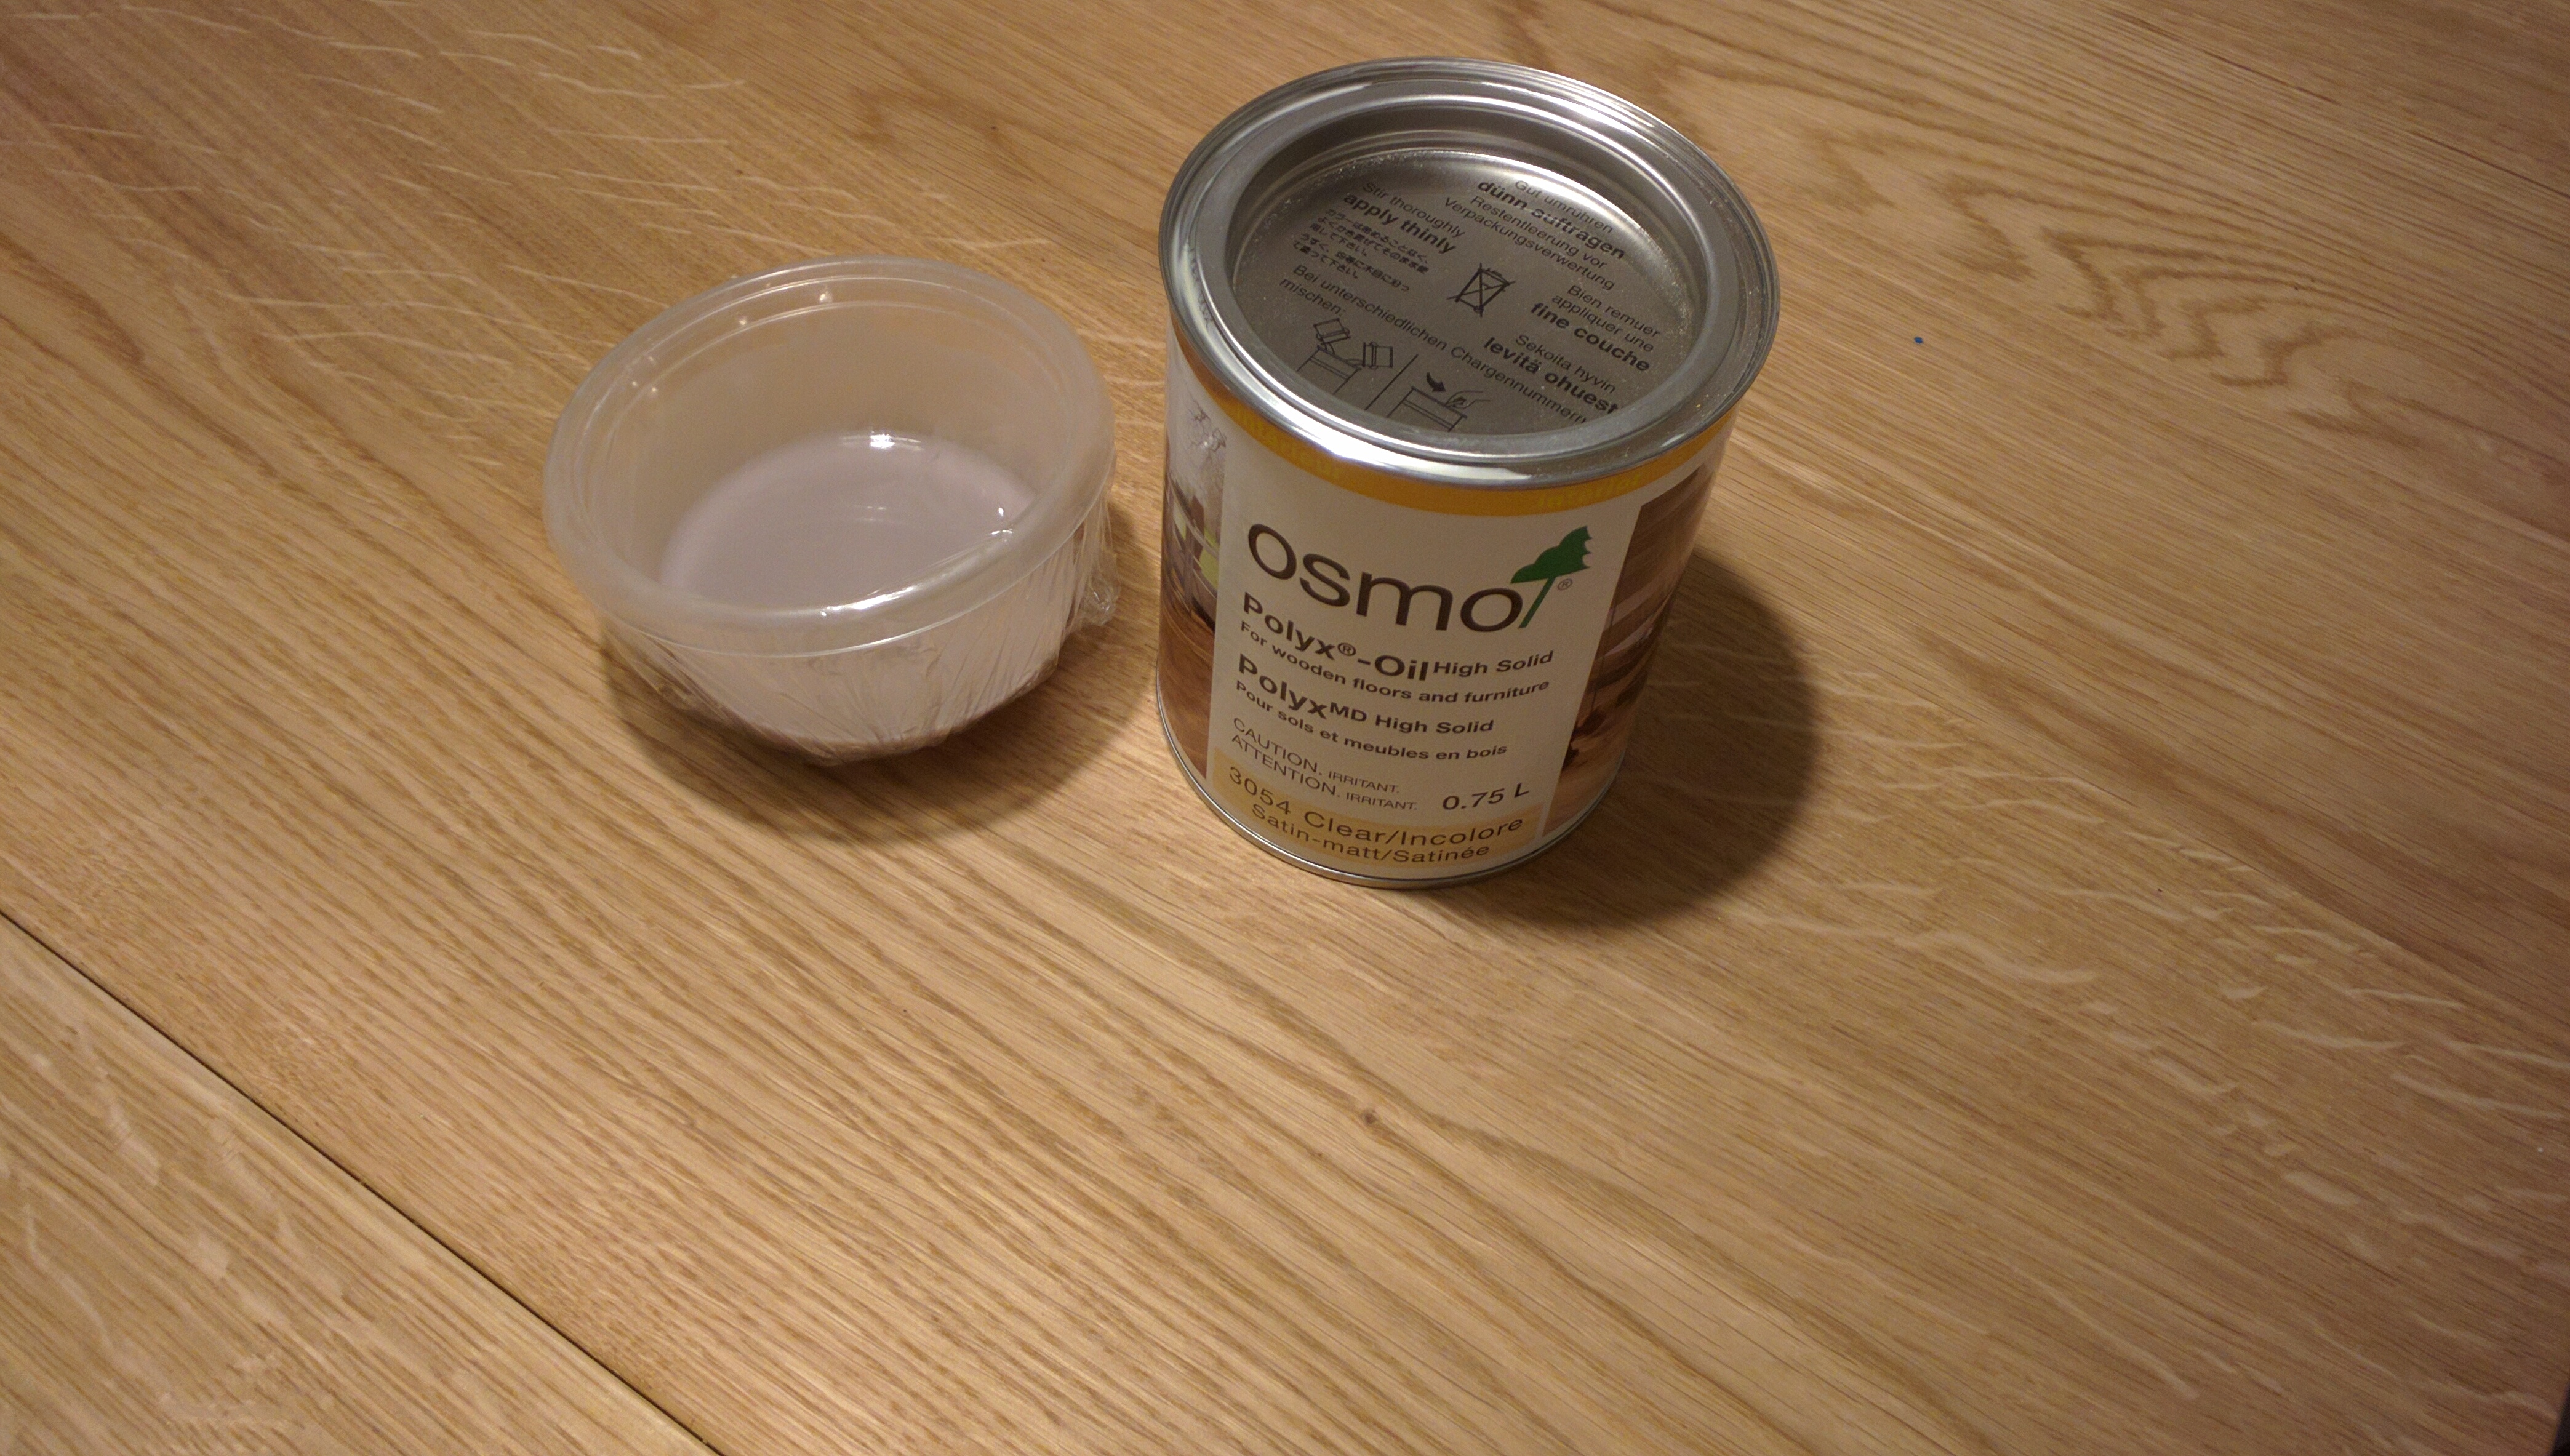
Osmo is applied with non-abrasive rubbing pads. I cut them into 1″ x 2″ pieces. Due the non-abrasive nature of the pads you can rub the oil into the wood in tight circles like you would when waxing a car. And if you try hard you don’t have to use much of the product. I used maybe 100ml to do one side of the headboard! This is actually import as using too much oil leaves a rough finish. You want a 2 very thin coats of the oil.
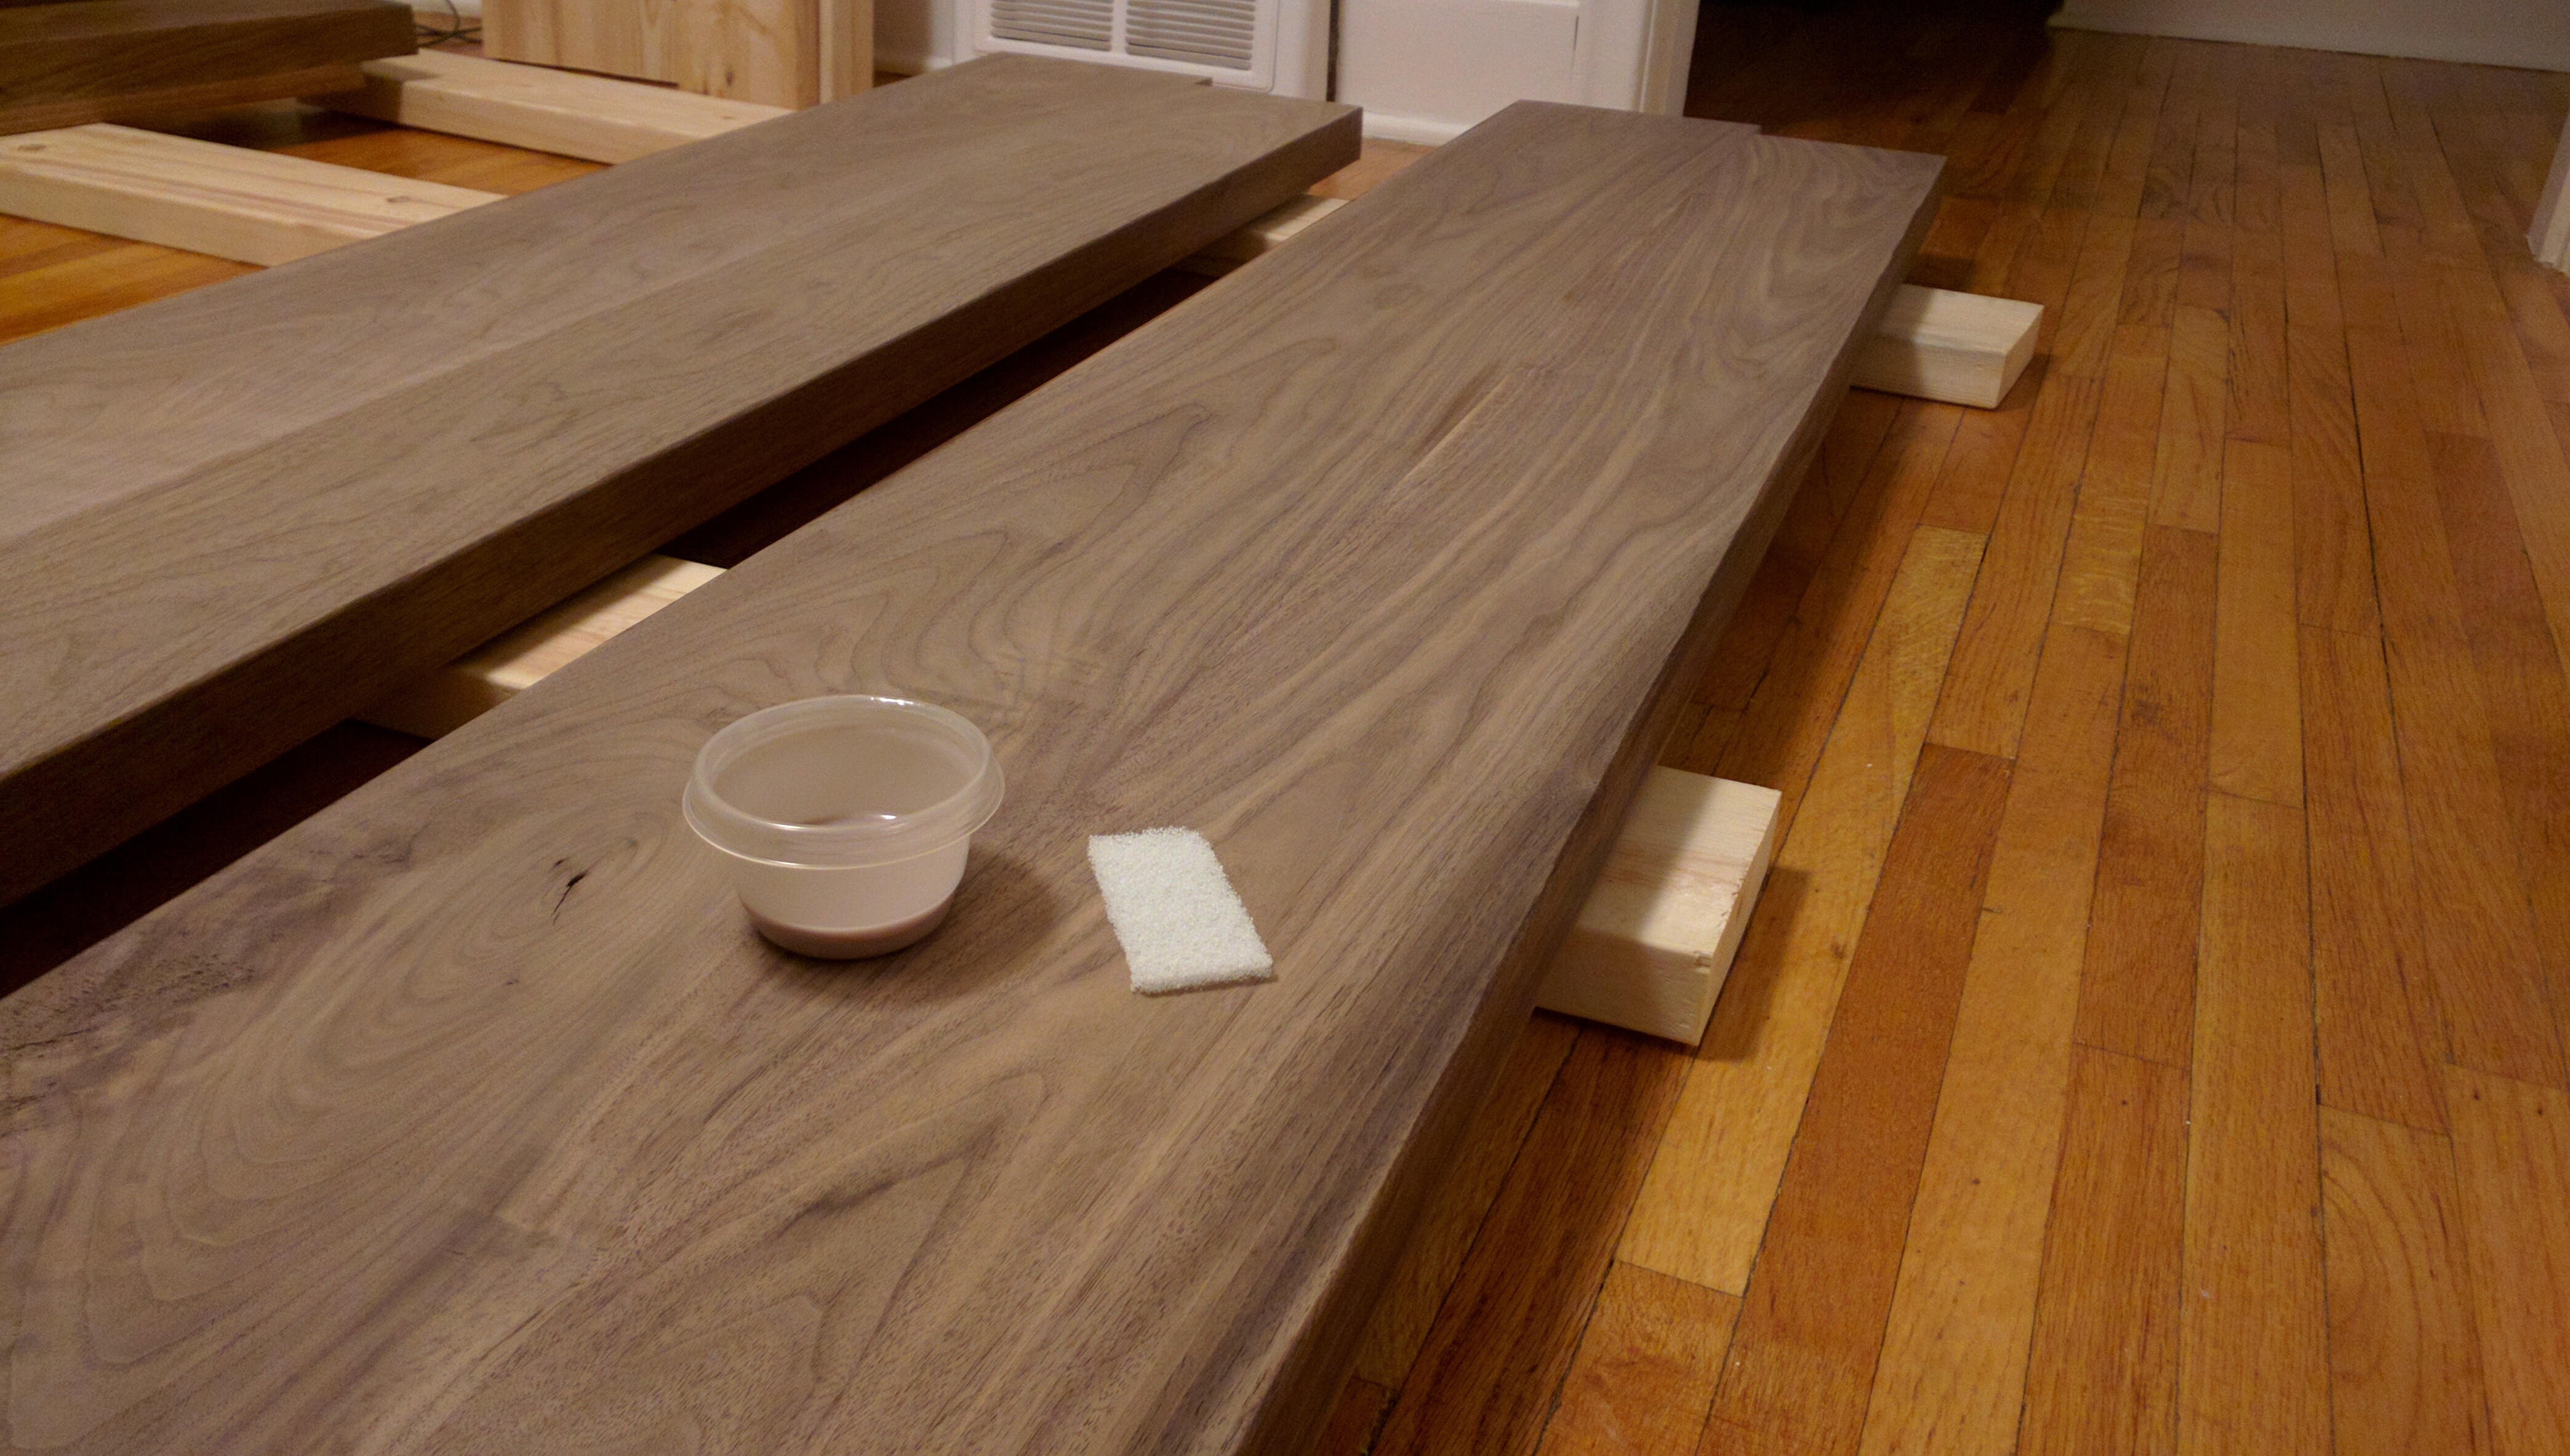
Here’s a shot after the first coat.
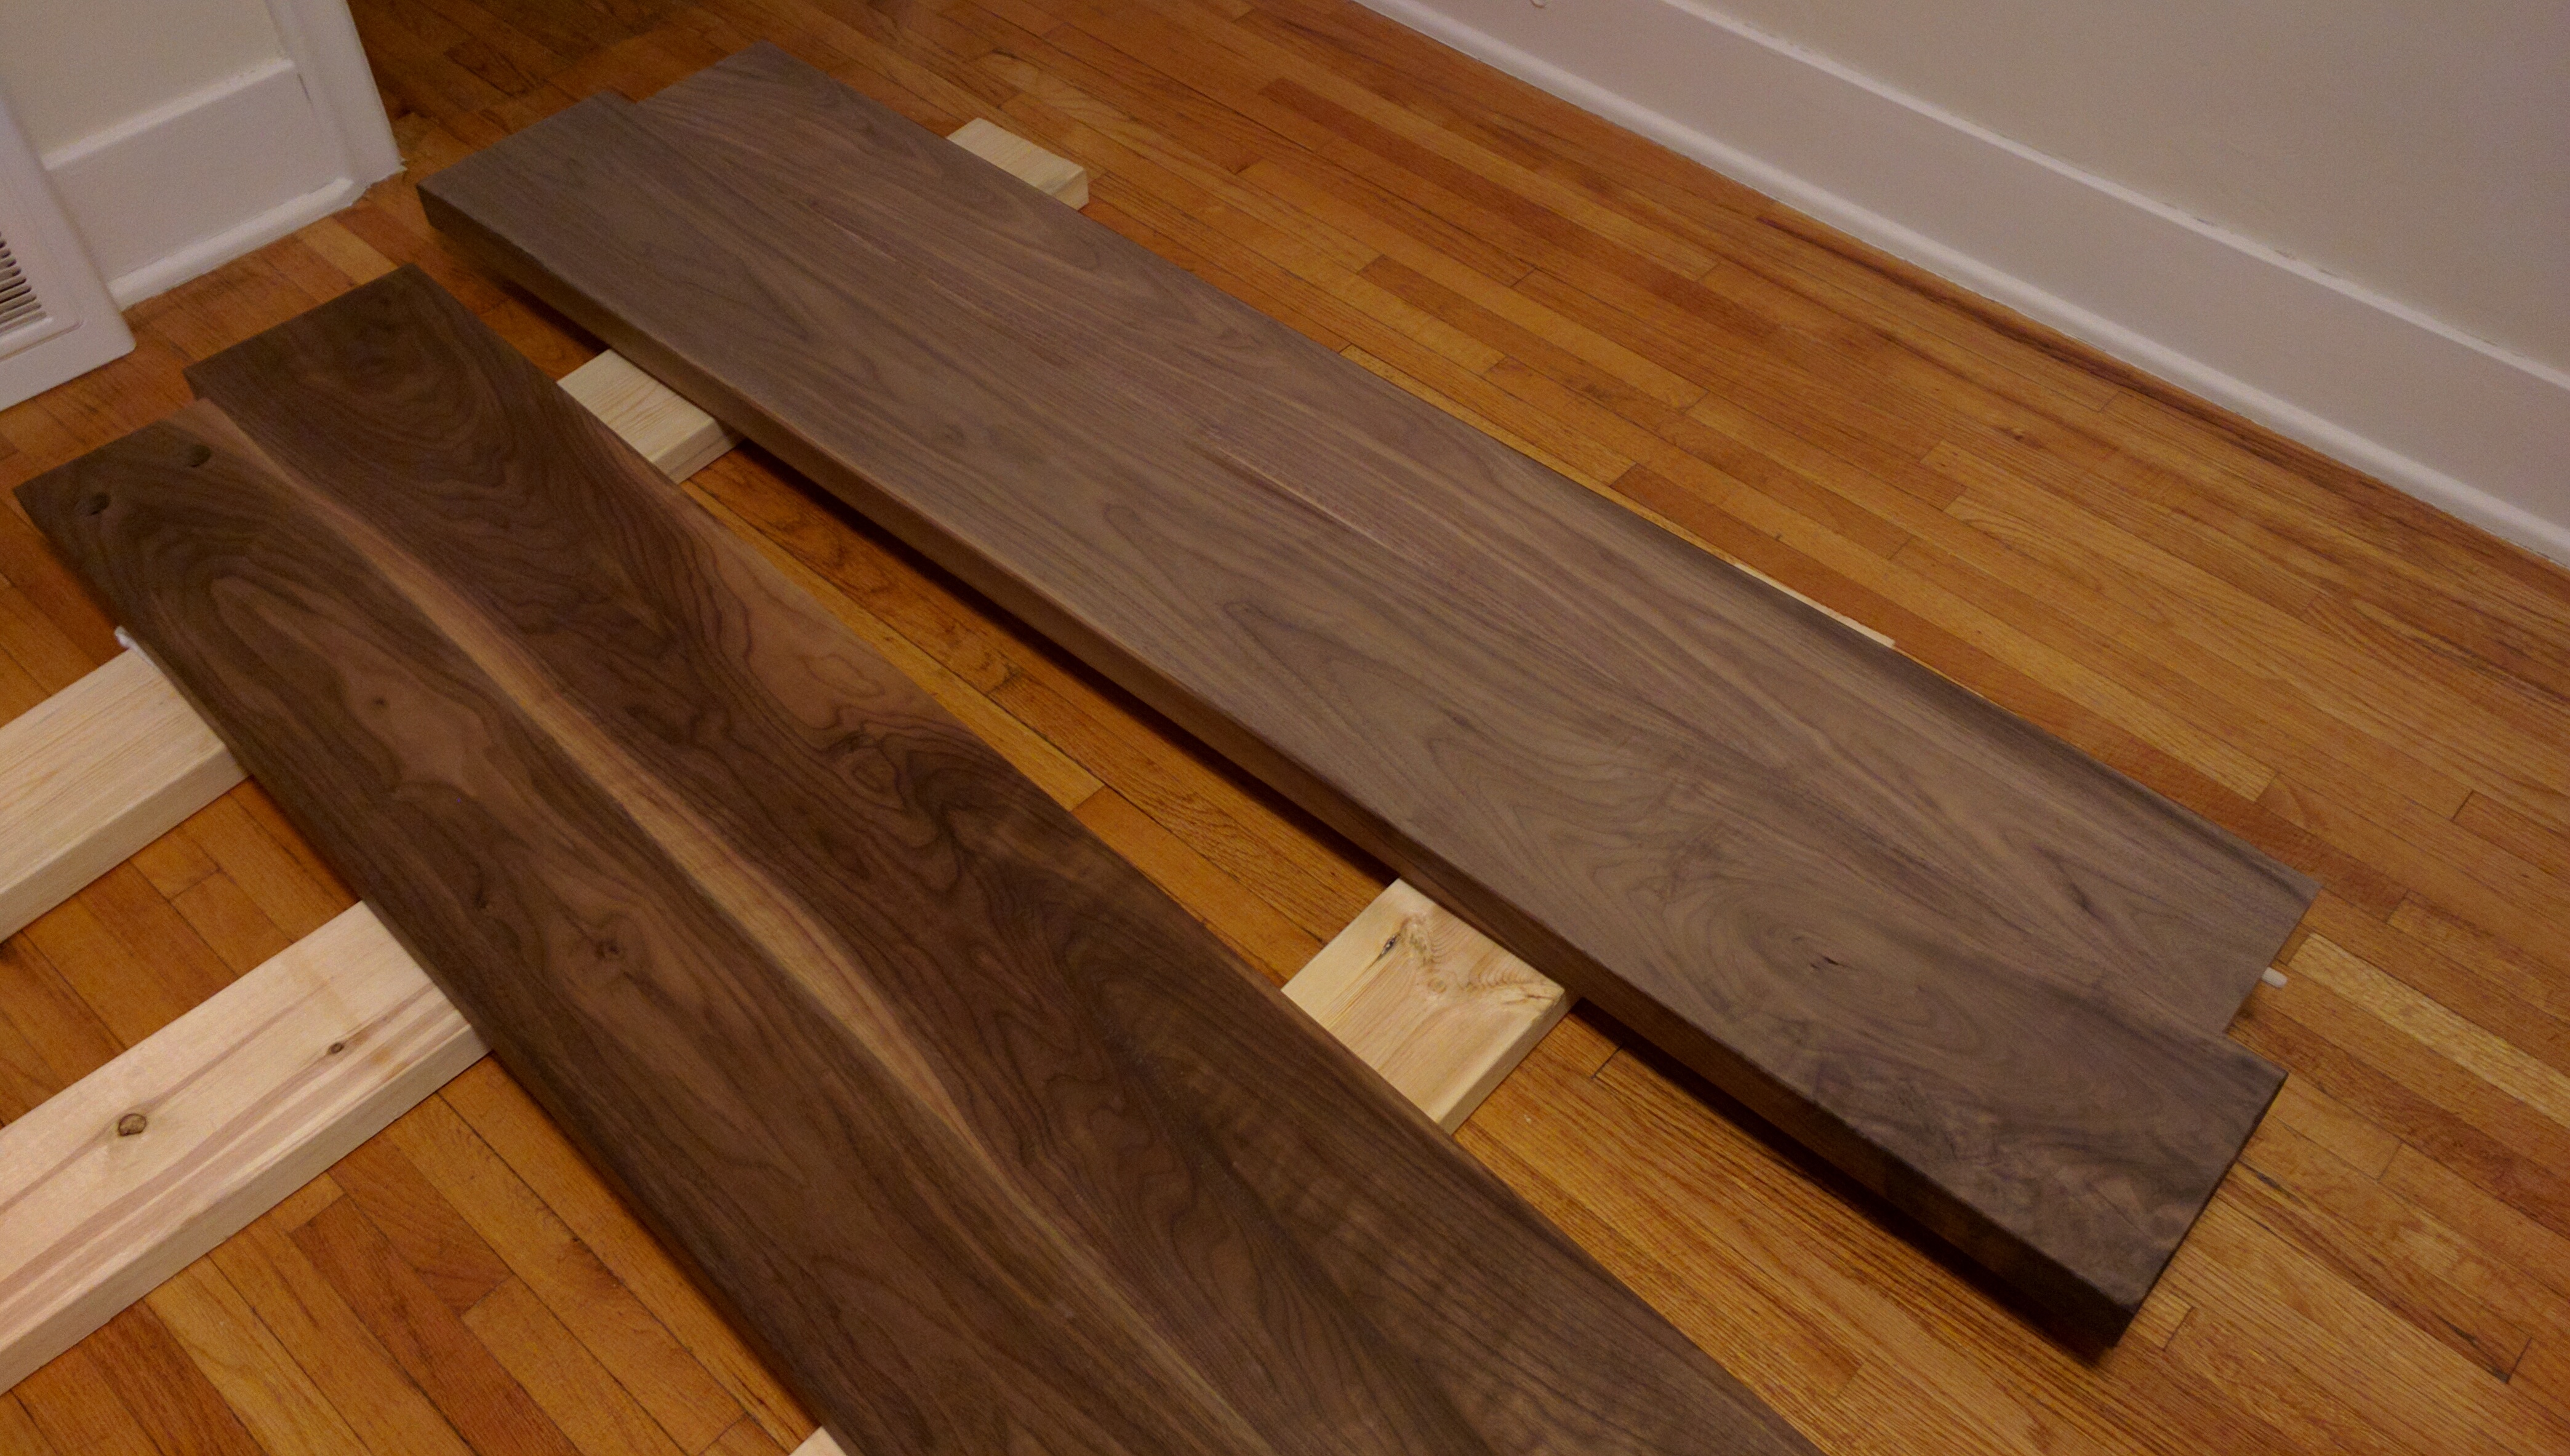
Once all pieces had received 2 coats it was time to assembled the bed.